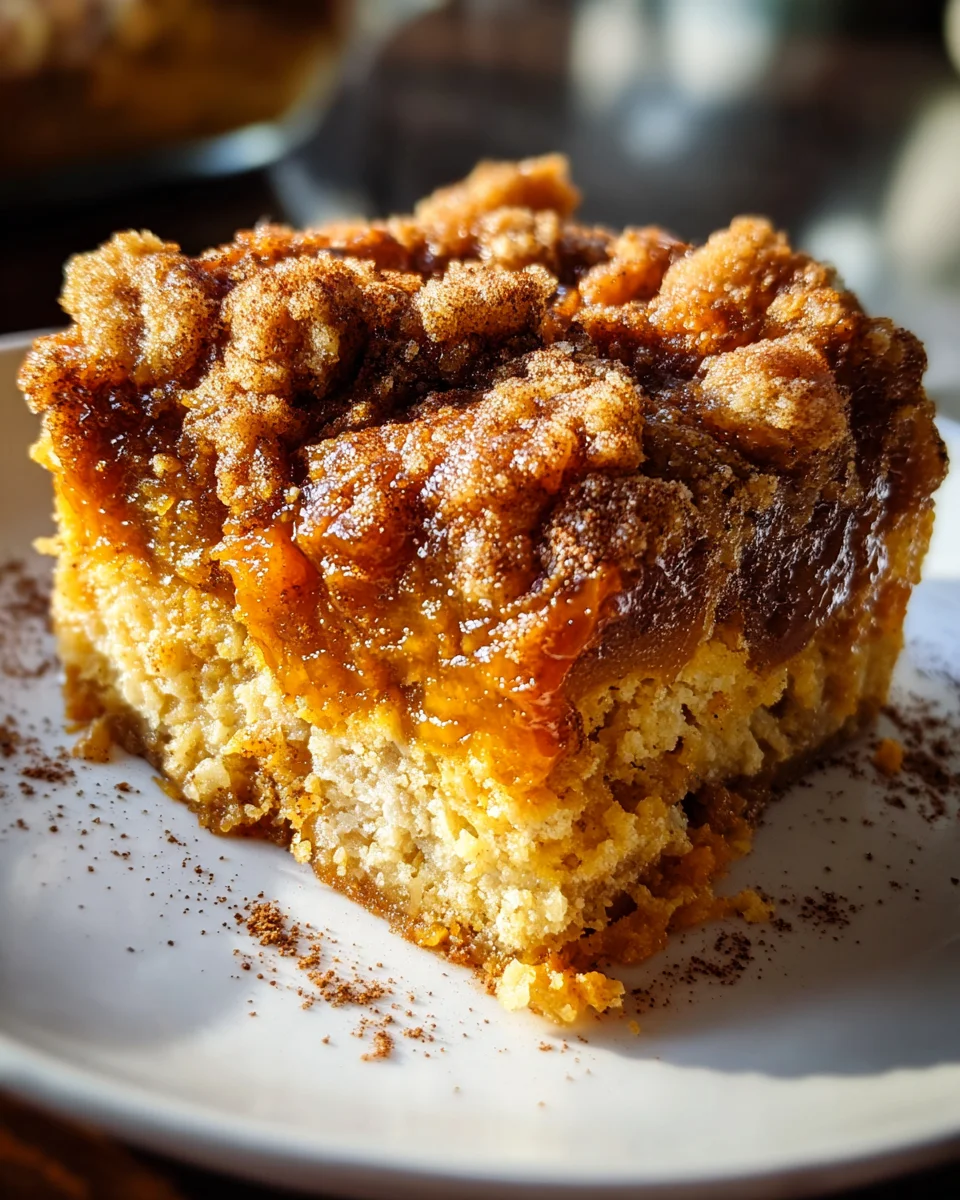
Pumpkin Dump Cake is more than just a dessert; it’s a celebration of ease and autumnal delight, all baked into one incredible dish. If you’re searching for that perfect sweet treat that requires minimal effort but delivers maximum flavor, then you’ve absolutely found your match. I personally adore how this recipe manages to combine the creamy, spiced goodness of pumpkin pie with the comforting texture of a cake, all topped with a delightful, buttery crunch that will have everyone asking for a second slice.
Why This Recipe Becomes an Instant Favorite
The beauty of a “dump cake” lies inherently in its name – you simply “dump” the ingredients into a baking dish, and the oven does the rest of the magic. This straightforward approach revolutionized home baking, offering busy cooks a genius way to create impressive desserts without the fuss. I find it particularly appealing during the bustling holiday season when time is a precious commodity. People consistently rave about the exquisite balance of flavors: the rich, velvety pumpkin layer infused with classic fall spices like cinnamon and nutmeg, perfectly complemented by a golden, crumbly topping that emerges from the cake mix and melted butter. It’s a symphony of textures and tastes in every single bite. This Pumpkin Dump Cake recipe isn’t just easy; it’s an unforgettable experience that brings warmth and joy to any gathering.

Ingredients:
- For the Pumpkin Layer:
- One (1) 29-ounce can pure pumpkin puree (be absolutely sure it’s pure pumpkin puree and not pumpkin pie filling; the latter already contains sugar and spices, which would throw off our flavor balance significantly. We want pure, unadulterated pumpkin for this recipe!)
- One (1) 12-ounce can evaporated milk (this adds an incredible richness and creamy texture to our pumpkin base, making it truly luxurious. Don’t substitute with regular milk unless absolutely necessary, as the fat content and consistency are quite different.)
- One (1) cup granulated sugar (for sweetness that perfectly complements the earthy pumpkin and warm spices.)
- One (1) teaspoon ground cinnamon (the foundational spice that screams autumn.)
- One (1) teaspoon pumpkin pie spice (this blend typically includes cinnamon, nutmeg, ginger, and cloves, adding a complex warmth. If you don’t have pumpkin pie spice, you can substitute with ½ teaspoon ground nutmeg, ¼ teaspoon ground ginger, and a pinch of ground cloves.)
- ½ teaspoon salt (a crucial ingredient often overlooked, salt balances the sweetness and enhances all the other flavors, making them pop.)
- Two (2) large eggs (these act as a binder, helping our pumpkin layer set beautifully into a smooth, custardy consistency.)
- For the Topping Layer:
- One (1) 15.25-ounce box yellow cake mix (a classic choice that provides a buttery, slightly sweet crumble. You could also experiment with a spice cake mix for an extra kick of flavor, but yellow cake is my go-to for its comforting familiarity.)
- One (1) cup chopped pecans (optional, but highly recommended! They add a delightful crunch and nutty flavor that contrasts wonderfully with the soft pumpkin. If you have nut allergies, simply omit them.)
- One (1) cup (two sticks) unsalted butter, melted (we’ll be drizzling this over the cake mix to create that irresistible golden, buttery crust. Using unsalted butter allows us to control the overall saltiness of the dish.)
Getting Ready: Preparing Your Workspace and Ingredients
Before we dive into the fun part of mixing and layering, let’s take a moment to set ourselves up for success. This preparation phase is often underestimated, but it truly makes the entire baking process smoother and more enjoyable. Trust me, a well-organized kitchen is a happy kitchen!
- Preheat Your Oven: First things first, go ahead and preheat your oven to 350°F (175°C). This gives it ample time to come up to the correct temperature and maintain it steadily. An accurately preheated oven is key to even baking and achieving that perfect golden crust on our “Pumpkin Dump Cake”. If your oven isn’t properly preheated, your cake might take longer to bake, or worse, bake unevenly, leading to a less-than-perfect result.
- Prepare Your Baking Dish: Grab a 9×13-inch baking dish. Any material will do – glass, ceramic, or metal – but I personally love using a glass dish for dump cakes because you can actually see the beautiful layers from the side, which is quite satisfying. Lightly grease the bottom and sides of the dish with butter, cooking spray, or even a little bit of vegetable oil. This small step is essential to prevent the cake from sticking, ensuring easy removal and clean slices later on. Nobody wants a cake that’s stuck to the pan, right?
- Melt the Butter: While the oven is preheating, let’s melt our butter for the topping. You’ll need one cup, which is equivalent to two sticks. You can melt it gently in a small saucepan over low heat, or for convenience, pop it into a microwave-safe bowl and heat it in 20-30 second intervals, stirring in between, until fully melted. Be careful not to overheat it, as we just want it liquid, not boiling. Set it aside to cool slightly while we prepare the pumpkin layer.
- Gather Your Tools: Make sure you have a large mixing bowl, a whisk, a spatula, and measuring cups and spoons readily available. Having everything within arm’s reach prevents frantic searching mid-recipe and keeps the process flowing smoothly.
- Chop the Pecans (If Using): If you’re opting for the wonderful crunch of pecans, now is a great time to chop them. A rough chop is perfect; we’re looking for texture, not uniformity. If you’re using pre-chopped pecans, just ensure they’re ready to be sprinkled.
Crafting the Velvety Pumpkin Layer
This is where the magic begins for our “Pumpkin Dump Cake”! The pumpkin layer is the heart and soul of this dessert, providing that rich, custardy, and wonderfully spiced foundation. We want it to be perfectly smooth and evenly flavored, so let’s pay close attention to the details here.
- Combine Wet Ingredients First: In your large mixing bowl, crack the two large eggs. Give them a quick whisk until they are lightly beaten and the yolks and whites are fully combined. This step helps ensure they incorporate smoothly into the pumpkin mixture without any streaks of egg white.
- Add the Pure Pumpkin Puree: Now, add the entire 29-ounce can of pure pumpkin puree to the bowl with the eggs. Remember our earlier note: it must be pure pumpkin puree, not pumpkin pie filling! The difference is crucial for the final taste and texture of your “Pumpkin Dump Cake”. Give it a good stir with the whisk or a spatula to start combining it with the eggs.
- Pour in the Evaporated Milk: Next, pour in the 12-ounce can of evaporated milk. The evaporated milk is a star ingredient here; it contributes significantly to the creamy, rich texture of our pumpkin layer, making it feel wonderfully decadent. Mix it in thoroughly until the mixture is uniform and smooth.
- Incorporate the Dry Sweetener and Spices: Now it’s time to bring in the flavor! Add the one cup of granulated sugar, the one teaspoon of ground cinnamon, the one teaspoon of pumpkin pie spice, and the ½ teaspoon of salt to the pumpkin mixture.
- A Note on Spices: If you’re substituting individual spices for the pumpkin pie spice blend, this is where you’d add your ½ teaspoon ground nutmeg, ¼ teaspoon ground ginger, and pinch of ground cloves. The combination of these spices is what gives the “Pumpkin Dump Cake” its signature warm, inviting aroma and taste.
- Why Salt is Important: Don’t skip the salt! It might seem counterintuitive to add salt to a sweet dessert, but it performs a vital role in balancing the sweetness, cutting through the richness, and truly enhancing all the other flavors. Without it, the pumpkin layer can taste a bit flat.
- Whisk Until Velvety Smooth: Now, whisk all the ingredients together vigorously until the mixture is completely smooth, well-combined, and lump-free. You want to see a consistent, creamy texture with no streaks of unmixed sugar or spices. Scrape down the sides of the bowl with your spatula to ensure everything is incorporated. This might take a minute or two of dedicated whisking. The smoother this base, the more luxurious your “Pumpkin Dump Cake” will be.
- Set Aside: Once your pumpkin mixture is perfectly smooth and aromatic, set it aside. It’s ready for assembly!
Assembling the Layers for Your Pumpkin Dump Cake
This is where our “Pumpkin Dump Cake” truly comes together! The beauty of a dump cake is its simplicity in assembly, but a few thoughtful steps can elevate it from good to truly great. We’re going for even distribution and that perfect crumble topping.
- Pour the Pumpkin Layer: Retrieve your prepared 9×13-inch baking dish. Carefully pour the entire velvety pumpkin mixture you just prepared into the greased dish. Use your spatula to ensure you get every last bit of that deliciousness out of the bowl.
- Even Spread is Key: Once poured, gently tilt the dish from side to side or use your spatula to spread the pumpkin mixture evenly across the bottom of the pan. We want a uniform layer so that every slice of “Pumpkin Dump Cake” gets an equal share of the custardy goodness.
- Consistency Check: Notice how the mixture settles into a beautiful, even layer. This is the foundation upon which our glorious crumble will rest.
- Sprinkle the Dry Cake Mix: Now for the “dump” part! Open your box of yellow cake mix. Here’s a little trick: instead of just dumping it all in one spot, which can lead to clumps, I like to gently sprinkle the dry cake mix evenly over the entire surface of the pumpkin layer. You can do this by hand, or if you prefer, you can use a fine-mesh sieve to ensure an even coating.
- Avoid Mixing: Do not stir or mix the cake mix into the pumpkin layer! This is absolutely crucial for a “Pumpkin Dump Cake”. The magic happens as the dry cake mix absorbs the moisture from the pumpkin and butter during baking, creating that wonderful, cake-like crust. If you mix it in, you’ll end up with a denser, less appealing texture. Just sprinkle it lightly and evenly.
- Full Coverage: Aim for full coverage. You shouldn’t see much of the pumpkin mixture peeking through the dry cake mix. This ensures a consistent topping across your entire “Pumpkin Dump Cake”.
- Add the Chopped Pecans (Optional but Recommended): If you’re using pecans, now is the time to sprinkle them generously over the dry cake mix layer. Distribute them as evenly as possible. They’ll toast beautifully in the oven, adding a fantastic nutty crunch that contrasts wonderfully with the soft pumpkin and tender cake topping. If you’re omitting nuts, simply skip this step.
- Drizzle with Melted Butter: This is arguably the most important step for achieving that signature “Pumpkin Dump Cake” topping! Take your melted butter (which should have cooled slightly by now, preventing any shocking of the dry cake mix) and carefully drizzle it evenly over the entire surface of the cake mix and pecans.
- Coverage is Critical: The butter is what transforms the dry cake mix into a rich, buttery, golden-brown crust. Aim to cover as much of the dry cake mix as possible with the melted butter. You might notice some spots where the butter doesn’t completely saturate the mix – that’s okay, it will spread and absorb as it bakes. However, try to get good, even coverage. Some people prefer to cut cold butter into thin slices and lay them over the cake mix, which also works, but I find drizzling melted butter offers more consistent coverage and less fuss for a “Pumpkin Dump Cake”.
- Visual Cue: You’ll see the dry cake mix start to absorb the butter, creating little golden islands. This is exactly what we want!
Baking Your Delicious Pumpkin Creation
Now that our “Pumpkin Dump Cake” is beautifully assembled, it’s time to let the oven do its work and transform these layers into a warm, bubbly, and utterly irresistible dessert. Baking is where the “dump cake” truly earns its name, as the simple layers magically meld into something far greater than the sum of its parts.
- Into the Oven It Goes: Carefully transfer your baking dish to the preheated 350°F (175°C) oven. Place it on the middle rack for even heat distribution. Avoid opening the oven door too frequently during the first half of baking, as this can cause temperature fluctuations that might affect how the “Pumpkin Dump Cake” sets.
- Bake Time: Our “Pumpkin Dump Cake” will typically bake for 50 to 60 minutes. However, baking times can vary significantly depending on your individual oven, the exact temperature, and even the material of your baking dish. Therefore, consider this a general guideline, and always rely on visual cues for doneness.
- What to Look For During Baking:
- The Topping: After about 30-40 minutes, you’ll notice the cake mix topping beginning to turn a beautiful golden brown and becoming crisp. The edges might brown a bit faster than the center, which is perfectly normal.
- The Pumpkin Layer: You’ll see the pumpkin layer beneath the cake mix bubbling up around the edges of the pan. This indicates that it’s cooking through and setting into that lovely, custardy consistency.
- Doneness Test: The best way to check for doneness is to observe the center of the cake. Gently jiggle the pan (using oven mitts, of course!). If the center of the pumpkin layer still appears very liquidy and wobbly, it needs more time. When it’s done, the center should be mostly set, with perhaps a very slight jiggle, much like a baked custard. You can also insert a thin knife or a wooden skewer into the pumpkin layer (through the cake topping) near the center. If it comes out mostly clean, with just a few moist crumbs, your “Pumpkin Dump Cake” is ready.
- Preventing Over-Browning: If you notice the top browning too quickly before the pumpkin layer is fully set, you can loosely tent the dish with aluminum foil for the last 15-20 minutes of baking. This will protect the topping from burning while allowing the pumpkin to finish cooking.
- Trust Your Senses: Rely on your eyes and nose! The aroma of warm pumpkin and spices will fill your kitchen, and the “Pumpkin Dump Cake” will look undeniably appealing with its golden, bubbly crust.
Cooling and Serving Your Irresistible Pumpkin Dump Cake
The waiting game after baking can be tough, especially when your kitchen smells incredible, but a little patience here will ensure your “Pumpkin Dump Cake” reaches its full potential in both flavor and texture.
- Cooling Period is Essential: Once your “Pumpkin Dump Cake” emerges from the oven, looking glorious and smelling divine, resist the immediate urge to dig in. Transfer the hot dish to a wire rack. It’s crucial to let the cake cool for at least 20-30 minutes before serving.
- Why Cool? During this cooling time, the pumpkin custard continues to set up, firming into that perfectly scoopable, rich texture. If you try to cut into it too soon, it will likely be too loose and messy. The flavors also meld and deepen as it cools slightly, creating a more harmonious and satisfying bite.
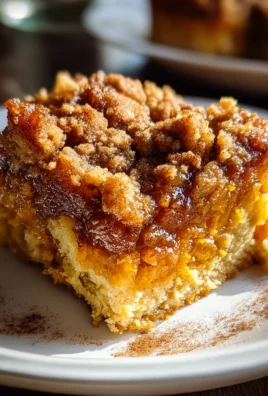
- Texture Development: The cake topping will also crisp up a bit more as it cools, giving you that delightful contrast of textures: tender, warm topping over a smooth, creamy pumpkin base.
- Serving Suggestions: While this “Pumpkin Dump Cake” is absolutely divine on its own, a few simple additions can elevate it to dessert nirvana:
- Whipped Cream: A generous dollop of freshly whipped cream is a classic pairing. Its lightness and slight sweetness perfectly complement the rich pumpkin and spiced cake. For an extra touch, you could even add a tiny pinch of cinnamon or a drop of vanilla extract to your whipped cream.
- Vanilla Ice Cream: A scoop of good quality vanilla bean ice cream melting into the warm “Pumpkin Dump Cake” is pure bliss. The cold creaminess against the warm cake creates an unforgettable experience.
- Caramel Drizzle: A light drizzle of warm caramel sauce adds another layer of sweetness and complexity, enhancing the autumnal flavors.
- A Dusting of Spices: For a simple yet elegant touch, a light dusting of extra cinnamon or pumpkin pie spice over the top just before serving adds an aromatic flourish.
- How to Store Leftovers: Should you be fortunate enough to have any “Pumpkin Dump Cake” leftovers (a rare occurrence in my house!), they store beautifully.
- Refrigeration: Cover the baking dish tightly with plastic wrap or aluminum foil and refrigerate for up to 3-4 days. Because of the eggs and dairy in the pumpkin layer, refrigeration is a must to maintain freshness and safety.
- Reheating: To enjoy warm leftovers, you can scoop out individual portions and gently reheat them in the microwave for 30-60 seconds, or cover the entire dish loosely with foil and warm it in a 300°F (150°C) oven for about 15-20 minutes, or until just heated through. Be careful not to overheat, as this can dry out the cake.
Enjoy Your Pumpkin Dump Cake! This recipe truly delivers a comforting, flavorful, and incredibly easy-to-make dessert that’s perfect for fall gatherings, holiday meals, or just a cozy evening treat. The contrast between the rich, spiced pumpkin custard and the buttery, crunchy cake topping is absolutely irresistible. I hope you and your loved ones enjoy this delightful “Pumpkin Dump Cake” as much as I do! It’s a testament to how simple ingredients, combined thoughtfully, can create something truly spectacular.
Conclusion:
So there you have it! We’ve journeyed through the incredibly simple steps to create a dessert that consistently wows with minimal effort. What truly makes this recipe a must-try isn’t just its delightful taste, but the sheer ease with which you can bring it to life in your own kitchen. I promise you, this isn’t just another dessert; it’s a revelation, especially for those busy days when you crave something homemade and comforting without spending hours laboring over a hot stove. It’s perfect for new bakers and seasoned pros alike, a testament to delicious simplicity. You’ll be amazed at how quickly you can achieve such a decadent outcome. The magic truly lies in how those humble ingredients transform into a rich, moist, and utterly satisfying treat. Imagine a warm, spiced pumpkin base, perfectly balanced with a buttery, crumbly topping that offers just the right amount of texture contrast. Every spoonful is an embrace of autumn flavors, a harmonious blend that feels both indulgent and wonderfully nostalgic. This particular version of Pumpkin Dump Cake is designed to be fool-proof, delivering consistent results that will have everyone asking for the recipe. It’s the kind of dessert that gathers loved ones around the table, sparking joy and contented sighs with every bite. The aroma alone as it bakes is enough to brighten any day, filling your home with the inviting scents of fall and instantly creating a cozy atmosphere. It truly embodies comfort in every sense of the word, making it an ideal choice for gatherings, holidays, or just a simple weeknight indulgence. Now, while this glorious creation is absolutely divine on its own, I’d be remiss not to share some of my favorite ways to elevate the experience. For the ultimate warm comfort, serve it straight from the oven with a generous scoop of vanilla bean ice cream. The cold, creamy ice cream melting into the warm cake is a match made in heaven, creating a symphony of temperatures and textures. A dollop of freshly whipped cream, perhaps infused with a hint of maple syrup or a dash of cinnamon, also works wonders, adding an ethereal lightness that complements the rich cake beautifully. Don’t forget a sprinkle of toasted pecans or walnuts over the top for an extra layer of crunch and nutty flavor – it truly makes a difference, adding depth and a delightful textural counterpoint. For a more elegant presentation, a light dusting of powdered sugar adds a simple, beautiful finish that makes it look as good as it tastes. Think about serving it with a warm cup of coffee, tea, or even a glass of cold milk; it’s perfect for any time of day, whether as a dessert after dinner, a delightful afternoon treat, or even a special breakfast on a holiday morning. The versatility is truly one of its greatest assets. Feeling adventurous? There are so many delightful variations you can explore to make this recipe uniquely yours! To deepen the spice profile even further, try adding a pinch of ground ginger, cloves, or allspice to your pumpkin mixture – adjust to your personal preference for warmth. For a truly decadent twist, you could swirl in some softened cream cheese frosting elements before baking for an extra layer of richness and tanginess, or even add a generous layer of chocolate chips for a pumpkin-chocolate fusion that’s unexpectedly delightful and utterly irresistible. If you want to experiment with the topping, swap out a portion of the yellow cake mix for a spice cake mix to intensify those autumnal notes, or sprinkle some shredded coconut for a subtle tropical twist. You could even drizzle a warm caramel sauce over the top immediately after baking, allowing it to soak into the warm cake for an extra layer of sticky sweetness. The beauty of this recipe is its flexibility; it’s a fantastic canvas for your culinary creativity, inviting you to experiment and discover new favorite combinations. Don’t be afraid to play around with different nuts, dried fruits, or even a splash of liqueur like brandy or rum for an adult twist. So, what are you waiting for? I wholeheartedly encourage you to roll up your sleeves and give this incredible recipe a try this week. It’s so simple, so rewarding, and guaranteed to become a new favorite in your repertoire for years to come. Trust me, your taste buds (and your loved ones) will thank you for making this wonderfully easy and delicious dessert! Once you’ve whipped up your own batch, please don’t keep the deliciousness to yourself. I’d absolutely love to hear about your experience! Share your photos, your family’s reactions, and any delightful variations you came up with in the comments below. Your feedback, tips, and creativity inspire us all to keep baking and sharing the joy of homemade treats. Let’s make some wonderful memories in the kitchen together!
Easy Pumpkin Dump Cake Recipe: A Delicious Fall Dessert!
An incredibly easy and delicious fall dessert, this Pumpkin Dump Cake combines the creamy, spiced goodness of pumpkin pie with the comforting texture of a cake, topped with a delightful, buttery crunch. Minimal effort, maximum flavor for any autumnal gathering.
Ingredients
Instructions
Important Information
Nutrition Facts (Per Serving)
It is important to consider this information as approximate and not to use it as definitive health advice.
Allergy Information
Please check ingredients for potential allergens and consult a health professional if in doubt.
Leave a Comment