Favorite Green Bean Casserole From Scratch Recipe has become an undisputed superstar of holiday tables and comfort food gatherings across America. Are you ready to elevate your culinary game and create a dish that will have everyone asking for seconds? This isn’t just any side; it’s a creamy, dreamy, crunchy masterpiece that evokes warmth, nostalgia, and pure satisfaction. While many associate green bean casserole with its humble origins as a quick, accessible dish popularized in the mid-20th century, typically using canned ingredients, its enduring appeal lies in its ability to bring people together around a shared love for delicious, comforting food.
What makes this dish so universally adored? It’s the delightful interplay of tender green beans, a rich, savory cream sauce, and that irresistible crispy onion topping. There’s something truly special about preparing your Favorite Green Bean Casserole From Scratch Recipe; the fresh ingredients sing, and the depth of flavor is simply unmatched. Forget the pre-made versions; we’re diving into a method that promises a fresher taste and a more vibrant texture, making it a beloved staple that tastes even better when made with care. Get ready to impress your guests and satisfy those comfort food cravings with a dish that’s both classic and elevated.

Ingredients:
-
For the Homemade Crispy Fried Onions:
- 3 large yellow onions (about 1.5 – 2 lbs), preferably Vidalia or another sweet variety for the best flavor and crispness. These will transform into the glorious, crunchy topping that defines your Favorite Green Bean Casserole From Scratch Recipe.
- 2 cups all-purpose flour, plus extra for dredging. This is your base coating, ensuring a beautiful golden crisp.
- 1/4 cup cornstarch, a secret weapon for extra crispiness and a lighter texture. Don’t skip this!
- 2 teaspoons kosher salt, divided. We’ll season the flour and then finish the onions.
- 1 teaspoon black pepper.
- 1 teaspoon paprika (optional, for color and a hint of smoky flavor).
- 1/2 teaspoon garlic powder (optional, but I find it adds a lovely depth).
- 1 tablespoon cold water, or as needed, to create a slightly clumpy texture for the dredge.
- 4-6 cups vegetable oil, canola oil, or peanut oil, for frying. You need enough to submerge the onions properly.
-
For the Creamy Mushroom Sauce (Homemade Cream of Mushroom Soup):
- 4 tablespoons unsalted butter. Butter is essential for building a rich, flavorful roux and sautéing our mushrooms.
- 1 pound fresh cremini mushrooms (baby bella), cleaned and thinly sliced. Using fresh mushrooms is key to the “from scratch” deliciousness of this casserole. You could also use a mix of button and shiitake for more complex flavor.
- 1 large shallot, finely minced (or 1/2 small yellow onion). Shallots bring a delicate sweetness and oniony depth without overpowering.
- 2 cloves garlic, minced. Garlic and mushrooms are a match made in heaven!
- 1/2 teaspoon dried thyme (or 1 teaspoon fresh, chopped). Thyme complements mushrooms beautifully.
- 1/4 cup all-purpose flour. This is for the roux, which will thicken our luscious sauce.
- 2 cups whole milk, warmed. Whole milk creates a richer, creamier sauce. Warming it helps prevent lumps when added to the roux.
- 1 cup low-sodium chicken broth (or vegetable broth for a vegetarian option), warmed. This adds another layer of savory flavor.
- 1/2 cup heavy cream (optional, but highly recommended for ultimate decadence and creaminess in your Favorite Green Bean Casserole From Scratch Recipe).
- 1 teaspoon Worcestershire sauce (optional, but it adds an incredible umami depth that truly elevates the mushroom flavor).
- 1/2 teaspoon kosher salt, or to taste.
- 1/4 teaspoon black pepper, or to taste.
- Pinch of nutmeg (optional, but I think it beautifully enhances creamy sauces).
-
For the Green Beans:
- 2 pounds fresh green beans, trimmed and snapped. Fresh green beans make all the difference here, providing a vibrant color and crisp-tender texture that canned beans simply can’t achieve.
- 1 teaspoon kosher salt, for blanching.
-
For Assembling the Casserole:
- 1/2 cup grated Parmesan cheese (optional, but adds a lovely salty, nutty kick).
- Extra black pepper, for seasoning.
- A touch more salt, if needed.
Preparing the Homemade Crispy Fried Onions
- Prepare the Onions: First, let’s get those onions ready! Carefully peel your yellow onions and then, using a sharp knife or a mandoline (be incredibly careful with a mandoline!), slice them as thinly and uniformly as possible into rings, about 1/8-inch thick. The thinner they are, the crispier they’ll get. Once sliced, separate the rings into individual strands. I find this step therapeutic, but if you’re sensitive to onion fumes, a fan or open window can be your best friend here!
- Soak for Tenderness: Place the separated onion rings into a large bowl and cover them completely with cold water. Let them soak for at least 30 minutes, or even up to an hour. This step is crucial because it helps to mellow out the sharp onion flavor and makes them more tender, ensuring they cook evenly and become delightfully crisp without burning. After soaking, drain the onions very well and pat them thoroughly dry with paper towels. Excess moisture will lead to soggy onions and splattering oil.
- Create the Dredging Mixture: In a large, shallow dish or a sturdy resealable plastic bag, combine the 2 cups of all-purpose flour, cornstarch, 1 teaspoon of kosher salt, black pepper, paprika (if using), and garlic powder (if using). Whisk everything together thoroughly until it’s perfectly combined. Now, for my little trick: sprinkle about 1 tablespoon of cold water into the flour mixture and gently toss it with your fingers or a fork. You want to create tiny, pea-sized clumps in the flour. These clumps adhere to the onions and create extra nooks and crannies for ultimate crispiness!
- Dredge the Onions: Add the dried onion rings to the flour mixture in batches. Don’t overcrowd the bowl! Toss them gently but thoroughly to ensure every single piece of onion is fully coated. Really get in there and make sure that flour mixture clings to them. Once coated, transfer the dredged onions to a wire rack set over a baking sheet, shaking off any excess flour. This allows any wet spots to dry slightly and prevents clumping. Repeat with the remaining onions.
- Heat the Oil: Pour the vegetable, canola, or peanut oil into a large, heavy-bottomed pot or Dutch oven. You need at least 2-3 inches of oil, enough to submerge the onions. Heat the oil over medium-high heat until it reaches 350-360°F (175-180°C). If you don’t have a thermometer, you can test it by dropping a tiny pinch of flour into the oil; it should sizzle immediately. Be patient and don’t rush the heating process.
- Fry the Onions: Carefully add the dredged onions to the hot oil in small batches. Again, don’t overcrowd the pot! Overcrowding will lower the oil temperature and result in greasy, soggy onions instead of gloriously crispy ones. Stir them gently with a spider or slotted spoon to separate them and ensure even cooking. Fry for 3-5 minutes per batch, or until they are deeply golden brown and wonderfully crisp. Keep a close eye on them, as they can go from perfectly golden to burnt very quickly!
- Drain and Season: Once golden and crisp, use your spider or slotted spoon to transfer the fried onions to a clean wire rack set over paper towels. Immediately sprinkle them with the remaining 1 teaspoon of kosher salt while they are still hot. This helps the salt adhere and seasons them perfectly. Allow them to drain and cool completely. As they cool, they will become even crispier. These homemade crispy fried onions are truly a game-changer for your Favorite Green Bean Casserole From Scratch Recipe!
Crafting the Creamy Mushroom Sauce
- Sauté the Mushrooms: In a large, heavy-bottomed saucepan or a deep skillet, melt the 4 tablespoons of unsalted butter over medium-high heat. Once the butter is shimmering, add the thinly sliced cremini mushrooms. Spread them out in a single layer if possible to encourage browning. Cook, stirring occasionally, for 8-10 minutes, or until the mushrooms have released their liquid, that liquid has evaporated, and the mushrooms are beautifully browned and tender. Browning the mushrooms is key to developing their deep, earthy flavor, which forms the heart of our from-scratch sauce.
- Add Aromatics and Thyme: Reduce the heat to medium. Add the finely minced shallot (or onion) and the minced garlic to the pan with the mushrooms. Sauté for another 2-3 minutes, stirring frequently, until the shallot softens and becomes translucent, and the garlic is fragrant. Be careful not to burn the garlic! Stir in the dried thyme. The aromas at this stage are just incredible.
- Make the Roux: Sprinkle the 1/4 cup of all-purpose flour over the mushroom mixture. Stir continuously for 1-2 minutes, allowing the flour to cook out. This creates a roux, which is essential for thickening our sauce and removing any raw flour taste. The mixture will look a bit pasty at this point.
- Gradually Add Liquids: Slowly, and I mean slowly, pour in the warmed whole milk, whisking constantly to prevent lumps. Continue whisking until the mixture is smooth. Then, gradually whisk in the warmed chicken or vegetable broth. Keep whisking as the sauce begins to thicken. It might seem a bit thin at first, but it will continue to thicken as it simmers.
- Simmer and Season: Bring the sauce to a gentle simmer over medium-low heat, stirring frequently. Let it simmer for 5-7 minutes, allowing it to thicken to your desired consistency – I aim for a thick, creamy soup-like texture that can coat the back of a spoon. If you’re using it, whisk in the heavy cream and Worcestershire sauce now. Season with 1/2 teaspoon of kosher salt, 1/4 teaspoon of black pepper, and a pinch of nutmeg (if using). Taste and adjust seasonings as needed. This rich, homemade mushroom sauce is the foundation for your truly authentic and Favorite Green Bean Casserole From Scratch Recipe. Remove from heat and set aside.
Prepping the Green Beans
- Trim the Green Beans: If you’re using fresh green beans, which I highly recommend for this from-scratch recipe, start by washing them thoroughly. Then, trim off the tough stem ends. You can snap them by hand, or use a knife for a cleaner cut. I usually leave the skinny tail end on, but you can trim that too if you prefer a neater look.
- Blanch the Green Beans: Bring a large pot of generously salted water to a rolling boil. Add the trimmed green beans to the boiling water and cook for 4-6 minutes, or until they are bright green and crisp-tender. You want them cooked through but still with a slight bite – not mushy! This blanching step helps to set their vibrant color and ensures they’re perfectly cooked by the time the casserole is done.
- Shock (Optional, but Recommended): Immediately drain the green beans and plunge them into a large bowl of ice water. This “shocks” them, stopping the cooking process and preserving their beautiful color and crisp texture. Let them sit in the ice bath for 2-3 minutes, then drain thoroughly. Pat them dry with paper towels to remove any excess moisture. If you’re short on time, you can skip the ice bath, but just make sure to drain them very well.
Assembling and Baking Your Favorite Green Bean Casserole
- Preheat Oven and Prepare Dish: Preheat your oven to 375°F (190°C). Lightly grease a 9×13-inch baking dish (or an equivalent 2.5-3 quart casserole dish) with butter or cooking spray.
- Combine Green Beans and Sauce: In a large mixing bowl, combine the blanched and dried green beans with the creamy mushroom sauce. Gently toss everything together until the green beans are thoroughly coated with that luscious, savory sauce. This is where the magic really starts to happen for your Favorite Green Bean Casserole From Scratch Recipe. Taste a small bit of the mixture and adjust salt and pepper if necessary. Remember, you want well-seasoned layers!
- Transfer to Baking Dish: Pour the green bean and sauce mixture evenly into your prepared baking dish. If you’re using Parmesan cheese, sprinkle half of it over the top now.
- Initial Bake: Bake the casserole, uncovered, for 20-25 minutes, or until the sauce is bubbly around the edges and the casserole is heated through. The flavors are melding beautifully in the oven at this point.
- Add Crispy Onions for the Finale: Remove the casserole from the oven. Sprinkle the generous amount of homemade crispy fried onions evenly over the top. If you have any remaining Parmesan cheese, you can add it now on top of the onions for an extra layer of flavor and golden crispness.
- Final Bake: Return the casserole to the oven and bake for another 10-15 minutes, or until the crispy onions are golden brown and toasted, and the casserole is bubbling invitingly. Keep a close eye on the onions during this final stage, as they can burn quickly.
- Rest and Serve: Once out of the oven, let your magnificent Favorite Green Bean Casserole From Scratch Recipe rest for 5-10 minutes before serving. This allows the sauce to set slightly and prevents it from being too runny. Serve hot and watch it disappear! The effort of making it from scratch truly pays off with every creamy, crunchy, savory bite.
Serving Suggestions and Tips for Success
- Make Ahead Magic: You can prepare the homemade crispy fried onions up to 3 days in advance. Store them in an airtight container at room temperature to maintain their crispness. The mushroom sauce can also be made 2-3 days ahead and stored in the refrigerator; just gently reheat it on the stovetop before combining with the green beans. The green beans can be blanched and shocked a day in advance. Combine the green beans and sauce, place them in the baking dish, and cover and refrigerate for up to 24 hours. When ready to bake, add about 10-15 minutes to the initial baking time to ensure it heats through.
- Variations to Explore: Feel free to experiment with different types of mushrooms like shiitake or oyster mushrooms for a more gourmet twist. A splash of dry sherry or white wine can also be added to the mushroom sauce for an extra layer of sophistication during the deglazing step after sautéing the shallots. For a smoky flavor, a few strips of crispy, crumbled bacon can be added to the casserole mixture or sprinkled on top with the onions.
- Serving with Pride: This Favorite Green Bean Casserole From Scratch Recipe is a quintessential side dish for holiday meals, particularly Thanksgiving and Christmas, but it’s also wonderful as a comforting side for a weeknight roast chicken or pork tenderloin. Its creamy texture and crunchy topping make it a crowd-pleaser every time. I often find myself making a double batch because it disappears so quickly!
- Leftovers (if any!): Store any leftover casserole in an airtight container in the refrigerator for up to 3-4 days. Reheat gently in the oven or microwave. While the onions might lose a little of their crispness, the flavor will still be fantastic. You can always revive them by adding a fresh sprinkle of crispy onions when reheating, if you happen to have any extra on hand!
Conclusion:
And there you have it, my friends! We’ve journeyed through the simple yet profound steps to create a dish that truly stands apart. This isn’t just any side; it’s an experience, a memory in the making, and a testament to the unparalleled joy of cooking from the heart. What makes this particular rendition so incredibly special, a true must-try in my culinary playbook, is the commitment to flavor at every stage. We’ve moved beyond the canned goods and processed ingredients, opting instead for the vibrant freshness of crisp green beans, the earthy depth of real mushrooms simmered in a rich, velvety sauce, and the irresistible crunch of truly homemade crispy onions. It’s the difference between merely eating and truly savoring. This version elevates a classic to new heights, delivering a depth of flavor and a luxurious texture that simply cannot be replicated by store-bought shortcuts. It’s comforting, it’s sophisticated, and it absolutely demands a prime spot on your table, whether it’s a festive holiday feast or a cozy Sunday dinner.
Elevate Your Meal: Serving Suggestions and Creative Twists
Now that you’ve mastered the art of creating this incredible casserole, let’s talk about how to present it and even put your own signature spin on it. While it shines brightly on its own, this casserole is an ideal companion to a myriad of main courses. Imagine it alongside a perfectly roasted turkey or chicken, the creamy texture and savory notes complementing the poultry beautifully. It’s also fantastic paired with a tender prime rib, a glazed ham, or even a hearty meatloaf. Don’t forget the classic combination with fluffy mashed potatoes and a vibrant cranberry sauce for a truly traditional spread. For a lighter, yet equally satisfying meal, serve it with a crisp green salad tossed in a simple vinaigrette.
But the magic doesn’t stop there. One of the greatest joys of cooking from scratch is the freedom to customize and experiment. Feel free to explore variations that cater to your taste buds and what you have on hand.
- Cheese Lovers Rejoice: For an extra layer of decadence, consider stirring in a handful of freshly grated Gruyère, sharp white cheddar, or even smoked Gouda into the mushroom sauce just before baking. A sprinkle of Parmesan on top during the last 10 minutes of baking will create a beautiful, golden crust.
- Herbaceous Heights: Fresh herbs can transform the flavor profile. A tablespoon of finely chopped fresh thyme or rosemary added to the mushroom sauce will infuse it with an aromatic warmth. Chives or parsley sprinkled just before serving add a burst of freshness and color.
- Unexpected Crunch: While our homemade crispy onions are undeniably superior, don’t shy away from other crunchy toppings. Toasted slivered almonds, panko breadcrumbs mixed with a bit of melted butter, or even crushed potato chips can offer a delightful textural contrast. If you’re feeling adventurous, crispy bacon bits crumbled over the top provide a smoky, savory kick.
- Mushroom Mania: Experiment with different types of mushrooms beyond the cremini. Sautéed shiitake, oyster, or wild mushrooms can bring an even deeper umami richness to your sauce.
- Spice It Up: A tiny pinch of freshly grated nutmeg in the sauce can subtly enhance the savory flavors without being overpowering. A dash of white pepper instead of black will keep the sauce visually pristine while adding a gentle warmth.
Your Turn: Embrace the “From Scratch” Difference!
There’s truly nothing quite like the satisfaction of presenting a dish you’ve lovingly prepared from its most basic components. This Favorite Green Bean Casserole From Scratch Recipe is more than just a recipe; it’s an invitation to rediscover the richness and reward of homemade cooking. I wholeheartedly encourage you to roll up your sleeves, gather your ingredients, and give this recipe a try. You’ll not only taste the difference, but you’ll also feel the pride of creating something truly spectacular from the ground up.
Once you’ve experienced the magic, I would absolutely love to hear about it! Please don’t hesitate to share your culinary triumphs in the comments below. Did you try a fun variation? Did it become an instant hit at your dinner table? Your feedback and experiences are incredibly valuable, and they inspire me and our entire community of home cooks. Take a photo, tell us your story, and let’s celebrate the joy of delicious, homemade food together. Happy cooking!
Favorite Green Bean Casserole From Scratch Recipe
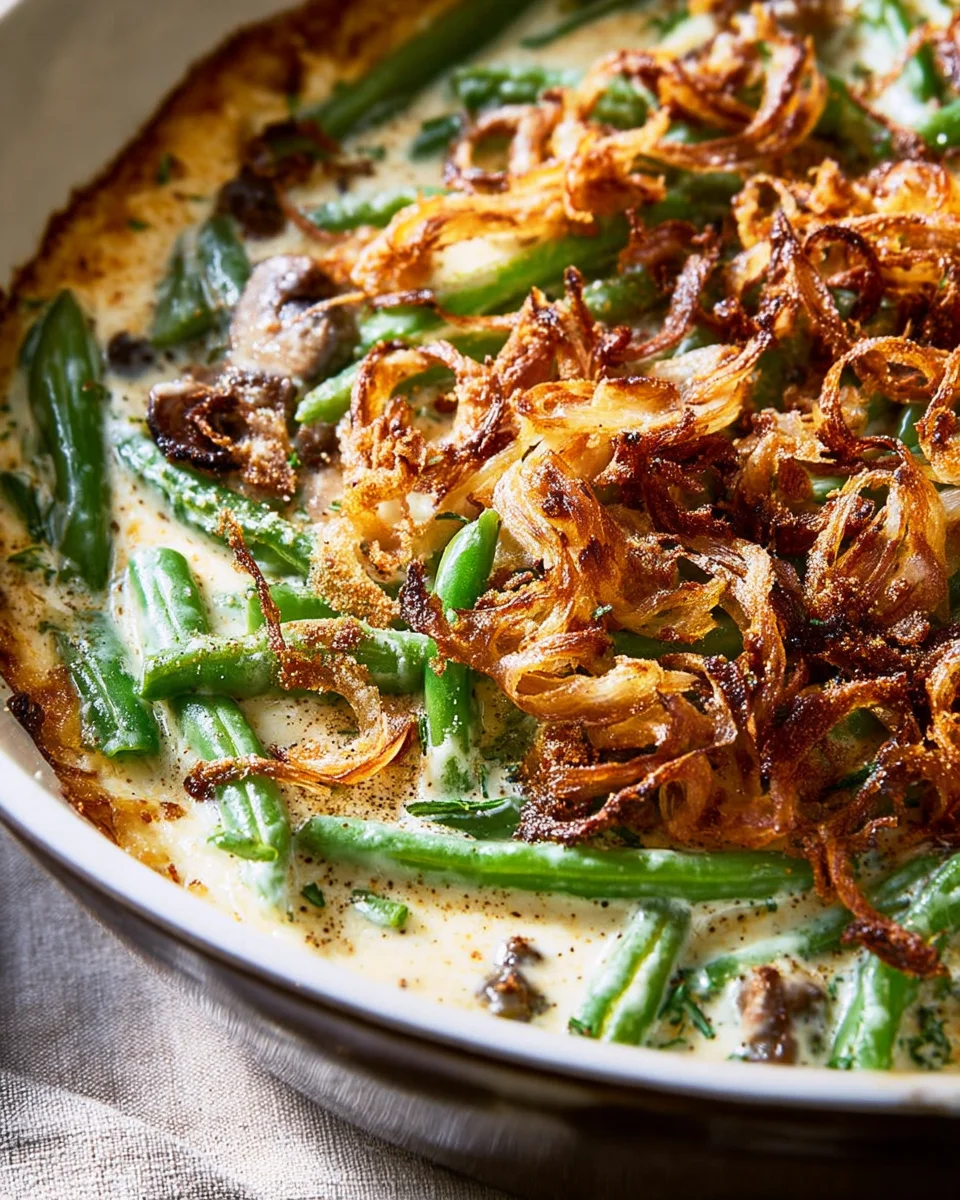
This Favorite Green Bean Casserole From Scratch Recipe elevates the classic holiday dish with tender green beans, a rich, savory homemade mushroom sauce, and irresistible crispy fried shallots, promising a fresher taste and vibrant texture that will have everyone asking for seconds.
Ingredients
Instructions
Important Information
Nutrition Facts (Per Serving)
It is important to consider this information as approximate and not to use it as definitive health advice.
Allergy Information
Please check ingredients for potential allergens and consult a health professional if in doubt.


Leave a Comment