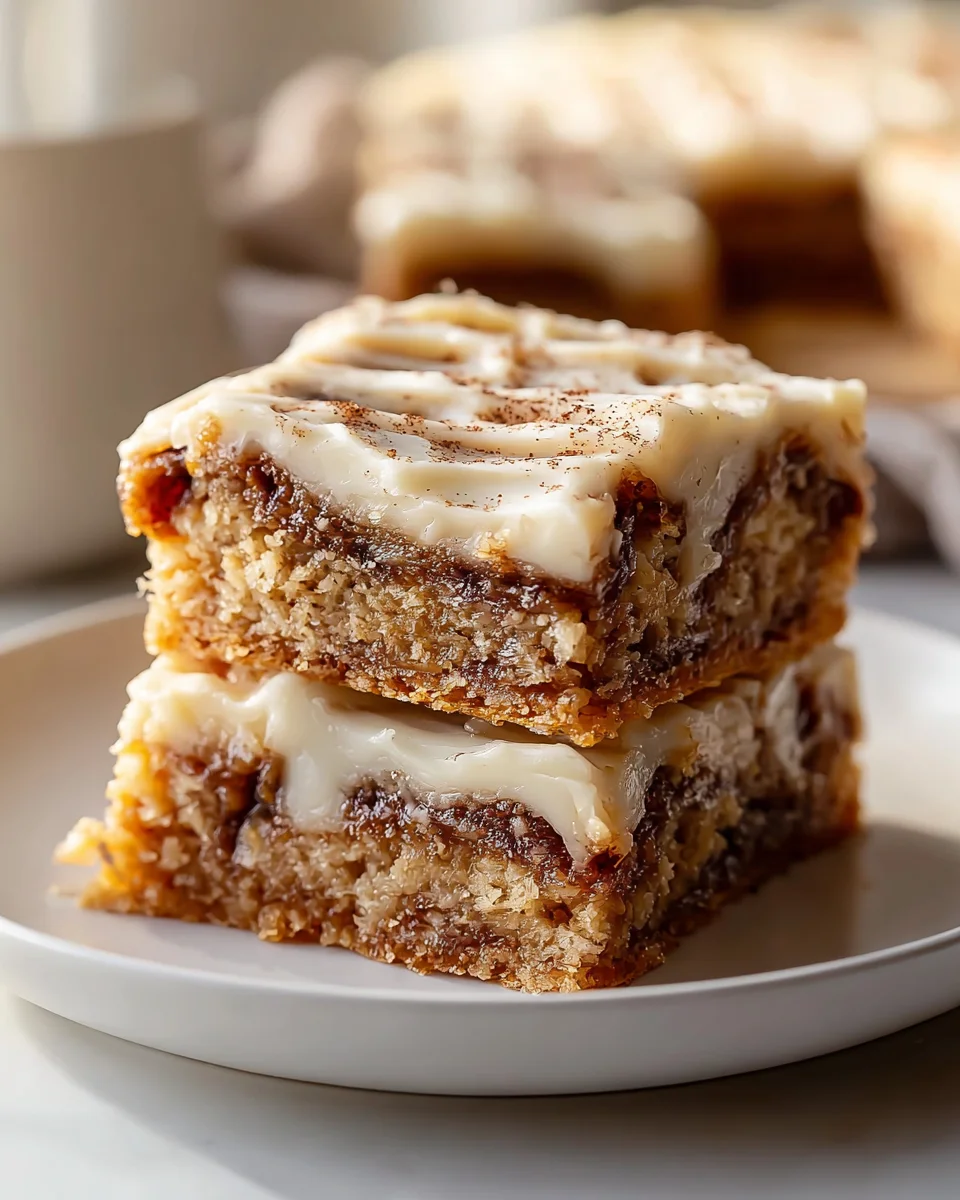
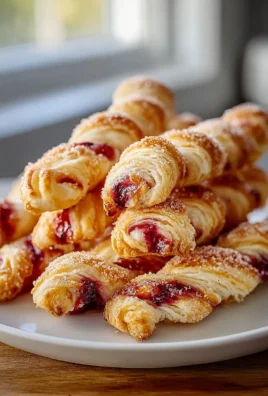
Cinnamon Roll Bliss Bars
Oh my goodness, friends, prepare yourselves for a truly magical treat! When I set out to create Cinnamon Roll Bliss Bars, I wanted to capture everything we adore about those warm, gooey, frosting-topped classic cinnamon rolls, but with a twist that makes life a little easier and a lot more shareable. And let me tell you, I think I nailed it!
What makes these bars so special, you ask? Well, it’s the sheer genius of taking that beloved bakery classic and transforming it into a convenient, sliceable bar. No individual rolling, no elaborate shaping – just pure cinnamon roll deliciousness baked in a pan. You’ll absolutely adore how effortlessly these come together, delivering that irresistible swirl of cinnamon sugar, tender dough, and a generous slathering of tangy cream cheese frosting in every single bite. They’re perfect for breakfast, dessert, or just a sweet pick-me-up, and trust me, everyone who tries them will be asking for the recipe. Get ready to experience true bliss!

<h2>Ingredient Notes</h2>
<p>Crafting the perfect batch of Cinnamon Roll Bliss Bars starts with understanding the role each ingredient plays. While the recipe itself is straightforward, a little insight into the ingredients can elevate your baking experience from good to absolutely blissful!</p>
<ul>
<li><strong>Unsalted Butter:</strong> I always opt for unsalted butter in both the bar base and the frosting. This gives me complete control over the salt content, ensuring my bars aren’t too salty. For the base, make sure your butter is at room temperature – not melted, not cold – so it creams beautifully with the sugar, creating a light and airy foundation. If you’re looking for a dairy-free alternative, a good quality plant-based butter stick (not margarine spreads) works wonderfully here, especially those formulated for baking. Just ensure it’s also at room temperature.</li>
<li><strong>Granulated Sugar & Brown Sugar:</strong> The granulated sugar provides sweetness and tenderness to our bar base. For the cinnamon swirl, I prefer light brown sugar for its molasses notes, which truly capture that classic cinnamon roll flavor. If you want an even deeper, richer molasses flavor, you can absolutely use dark brown sugar in the swirl.</li>
<li><strong>Eggs:</strong> Large eggs at room temperature are key for emulsifying properly with the butter and sugar, adding moisture, binding the ingredients, and contributing to the bar’s structure. If you’re baking egg-free, flax eggs (1 tbsp ground flaxseed meal + 3 tbsp water per egg, let sit for 5 minutes) can be a suitable substitute, though the texture might be slightly denser.</li>
<li><strong>All-Purpose Flour:</strong> This forms the main structure of our bars. Make sure to measure it correctly, either by weight (my preferred method for accuracy) or by spooning it into your measuring cup and leveling it off, rather than scooping directly, which can compact the flour and lead to dry bars. For a gluten-free version, a 1:1 gluten-free baking flour blend (one that contains xanthan gum) can be used successfully. Just be mindful that GF flours can sometimes absorb more liquid, so the batter might be slightly thicker.</li>
<li><strong>Baking Powder & Salt:</strong> Baking powder gives our bars a lovely lift and tender crumb. Salt balances the sweetness and enhances all the other flavors. Don’t skip it!</li>
<li><strong>Vanilla Extract:</strong> Use a good quality pure vanilla extract. It’s a superstar flavor enhancer in both the bars and the frosting. Avoid imitation vanilla if possible; the difference in taste is noticeable. For a twist, you could even add a tiny splash of almond extract to the frosting for a different layer of flavor.</li>
<li><strong>Ground Cinnamon:</strong> This is the star of our cinnamon swirl! Make sure your cinnamon is fresh for the most potent and aromatic flavor. Old spices lose their vibrancy. A fresh jar makes all the difference.</li>
<li><strong>Cream Cheese:</strong> Full-fat block cream cheese, softened to room temperature, is absolutely essential for that iconic tangy and rich cream cheese frosting. Low-fat or whipped cream cheese often contains too much water and won’t give you the desired thick, creamy consistency. If you need a dairy-free option, there are some excellent plant-based cream cheeses available now that work quite well in frosting, just ensure they are of the “block” variety.</li>
<li><strong>Powdered Sugar (Confectioners’ Sugar):</strong> This provides the sweetness and structure for our frosting, dissolving easily to create a smooth texture. Always sift it if it looks lumpy to avoid a grainy frosting.</li>
<li><strong>Milk or Cream:</strong> Just a tablespoon or two helps achieve the perfect spreadable consistency for the frosting. Whole milk or heavy cream will yield the richest result, but any milk (dairy or non-dairy) will work to thin it out if needed. You can also use a non-alcohol vanilla alternative.</li>
</ul>
<h2>Step-by-Step Instructions</h2>
<p>Let’s get baking! These Cinnamon Roll Bliss Bars are designed to be straightforward and incredibly rewarding. Follow these steps, and you’ll be enjoying these delightful treats in no time.</p>
<ol>
<li><strong>Prepare for Bliss:</strong> First things first, preheat your oven to 350°F (175°C). Line a 9×13-inch baking pan with parchment paper, leaving an overhang on the sides. This handy trick will make lifting the cooled bars out of the pan incredibly easy, ensuring pristine slices. Lightly grease the parchment paper for good measure.</li>
<li><strong>Cream the Base:</strong> In a large mixing bowl, using an electric mixer, cream together the softened unsalted butter and granulated sugar until the mixture is light, fluffy, and pale in color. This usually takes about 2-3 minutes. This step is crucial for incorporating air and creating a tender crumb in your bars. Next, beat in the room temperature eggs one at a time, mixing well after each addition until fully incorporated. Scrape down the sides of the bowl as needed. Finally, stir in the pure vanilla extract.</li>
<li><strong>Combine Dry Ingredients:</strong> In a separate medium bowl, whisk together the all-purpose flour, baking powder, and salt. Make sure these are thoroughly combined so that the leavening agent is evenly distributed.</li>
<li><strong>Mix Wet and Dry:</strong> Gradually add the dry ingredients to the wet ingredients, mixing on low speed until just combined. Be careful not to overmix! Overmixing can develop the gluten in the flour too much, leading to tough bars. A few streaks of flour are fine; you’ll finish mixing by hand.</li>
<li><strong>Spread the Base:</strong> Press the bar dough evenly into your prepared 9×13-inch baking pan. I find that lightly greasing my fingertips or using an offset spatula helps in spreading the slightly sticky dough right to the edges of the pan.</li>
<li><strong>Craft the Cinnamon Swirl:</strong> In a small bowl, whisk together the melted unsalted butter, light brown sugar, and ground cinnamon until it forms a thick, paste-like mixture. Dollop this glorious cinnamon swirl mixture evenly over the top of the bar dough in the pan.</li>
<li><strong>Swirl to Perfection:</strong> Using a knife or a skewer, gently swirl the cinnamon mixture into the bar dough. Don’t go too deep or overmix; you want distinct swirls, not a fully blended mixture. Aim for about 6-8 swirls across the pan.</li>
<li><strong>Bake Away:</strong> Place the pan in your preheated oven and bake for 25-30 minutes, or until the edges are lightly golden brown and a toothpick inserted into the center (avoiding a cinnamon swirl spot) comes out with moist crumbs, not wet batter. The center should also feel set when gently pressed.</li>
<li><strong>Cool Completely:</strong> This is a critical step for a beautiful frosting. Allow the bars to cool completely in the pan on a wire rack before you even think about frosting them. Warm bars will melt your delicious cream cheese frosting into a sad puddle. This can take 1-2 hours.</li>
<li><strong>Whip Up the Frosting:</strong> While the bars are cooling, prepare the cream cheese frosting. In a medium bowl, with an electric mixer, beat together the softened cream cheese and softened unsalted butter until smooth and creamy, with no lumps. This should take about 1-2 minutes. Then, gradually add the sifted powdered sugar, mixing on low speed until combined, then increase to medium-high and beat until light and fluffy. Stir in the vanilla extract (and a non-alcohol alternative if using). If the frosting is too thick, add milk or cream a teaspoon at a time until you reach your desired spreadable consistency. If it’s too thin, add a tablespoon more powdered sugar.</li>
<li><strong>Frost and Slice:</strong> Once the bars are completely cool, spread the cream cheese frosting generously and evenly over the top. Use the parchment paper overhangs to carefully lift the frosted slab out of the pan and onto a cutting board. Cut into 24 squares or rectangles, or any size you prefer. A warm, clean knife wiped between cuts will give you the cleanest slices. Enjoy your Cinnamon Roll Bliss Bars!</li>
</ol>
<h2>Tips & Suggestions</h2>
<p>These Cinnamon Roll Bliss Bars are already a dream, but with a few extra pointers and creative ideas, you can make them truly unforgettable. Here are some of my favorite tips to ensure your baking experience is nothing short of blissful:</p>
<ul>
<li><strong>Don’t Overbake!</strong> This is perhaps the most important tip for any bar cookie or cake. Overbaked bars will be dry and crumbly. Keep an eye on them, and remember that ovens can vary. The bars are done when the edges are lightly golden and a toothpick inserted into the center comes out with moist crumbs, not wet batter. They will continue to set up slightly as they cool.</li>
<li><strong>Room Temperature Ingredients are Your Best Friend:</strong> I can’t stress this enough! For the bar base, room temperature butter and eggs cream together beautifully, creating an emulsified, airy batter. For the frosting, softened cream cheese and butter are essential for a smooth, lump-free, and fluffy frosting. If your ingredients are cold, your batter might curdle, and your frosting will be lumpy.</li>
<li><strong>Perfecting the Swirl:</strong> When you’re swirling the cinnamon mixture into the dough, don’t overdo it. You want distinct ribbons of cinnamon, not a fully blended mixture. A few gentle passes with a knife or skewer are all you need. For a pretty pattern, try making S-shapes or figure-eights.</li>
<li><strong>The Art of Cooling:</strong> Patience is key! The bars absolutely must be completely cool before you apply the frosting. If they’re even slightly warm, the cream cheese frosting will melt, creating a messy situation. Cooling on a wire rack expedites this process by allowing air circulation all around the pan.</li>
<li><strong>Customize Your Frosting:</strong> Feel free to adjust the consistency of your cream cheese frosting. If it’s too thick to spread, add milk or cream a teaspoon at a time. If it’s a bit too thin, gradually mix in a tablespoon or two more powdered sugar until it’s perfect. For an extra zing, a tiny bit of fresh lemon juice or orange zest can be added to the frosting for a brighter flavor profile.</li>
<li><strong>Add a Texture Element:</strong> For an added layer of texture and flavor, sprinkle some finely chopped toasted pecans or walnuts over the frosting. This adds a lovely crunch that contrasts beautifully with the soft bars and creamy frosting. You could even incorporate them into the cinnamon swirl mixture.</li>
<li><strong>A Touch of Sparkle:</strong> Before the frosting sets, a light sprinkle of coarse sea salt flakes can really elevate the flavors, creating a wonderful sweet and salty contrast. Or for a more festive look, some edible glitter or cinnamon sugar could be sprinkled on top.</li>
<li><strong>Cutting Clean Slices:</strong> For neat, professional-looking bars, use a large, sharp knife. Wipe the blade clean with a damp paper towel between each cut, especially after frosting. This prevents the frosting from smearing.</li>
</ul>
<h2>Storage</h2>
<p>Once you’ve made these incredible Cinnamon Roll Bliss Bars, you’ll want to ensure they stay fresh and delicious for as long as possible. Proper storage is key, especially because of that luscious cream cheese frosting!</p>
<ul>
<li><strong>Room Temperature (Short Term):</strong> Due to the cream cheese in the frosting, these bars are best stored in the refrigerator. However, if you plan to serve them within an hour or two and your kitchen isn’t overly warm, they can sit out on the counter. But for any longer, the fridge is your friend.</li>
<li><strong>Refrigerator (Recommended):</strong> For optimal freshness and food safety, always store Cinnamon Roll Bliss Bars in an airtight container in the refrigerator. This will prevent them from drying out and keep the cream cheese frosting perfectly chilled. Stored this way, they will stay fresh for up to 3-4 days. I find they’re particularly delightful when allowed to come to room temperature for about 15-20 minutes before serving, as this softens the frosting and enhances the flavors, making them even more “blissful.”</li>
<li><strong>Freezing (Longer Term):</strong> Yes, you can absolutely freeze these bars!</li>
<ul>
<li><strong>Frosted Bars:</strong> If you want to freeze them frosted, first place the cut bars on a baking sheet and freeze them uncovered for about an hour, or until the frosting is firm. This prevents the frosting from sticking to the wrapping. Once firm, individually wrap each bar tightly in plastic wrap, then place them in an airtight freezer-safe container or a heavy-duty freezer bag. They can be frozen for up to 1 month.</li>
<li><strong>Unfrosted Bars:</strong> Alternatively, you can bake and cool the bars completely, then slice them and freeze them unfrosted using the same method (wrap individually, then store in an airtight container/bag). When you’re ready to serve, thaw the bars, and then whip up a fresh batch of frosting. This option can sometimes yield a slightly fresher tasting frosting.</li>
</ul>
<li><strong>Thawing Frozen Bars:</strong> To thaw, simply remove the desired number of bars from the freezer and let them sit at room temperature for 1-2 hours, or thaw them overnight in the refrigerator. Once thawed, enjoy them as you would fresh bars!</li>
<li><strong>Serving Suggestion:</strong> While delicious straight from the fridge, I highly recommend letting these bars sit out for 15-30 minutes before serving. The frosting will soften, and the flavors will truly come alive, offering the ultimate “bliss” experience.</li>
</ul>
Final Thoughts
And there you have it – your journey to creating the most incredible treat is complete! I truly hope you give these Cinnamon Roll Bliss Bars a try, because they are nothing short of spectacular. Imagine all the warmth and comforting flavors of a classic cinnamon roll, but in an easy-to-serve bar form, perfect for sharing (or not!). The soft, buttery base, the luscious cinnamon swirl, and that dreamy cream cheese frosting all come together in perfect harmony. These Cinnamon Roll Bliss Bars are more than just a dessert; they’re a moment of pure joy, a delightful indulgence that will have everyone asking for the recipe. I promise you, these Cinnamon Roll Bliss Bars are about to become a new favorite in your baking repertoire. Go on, bake some bliss!
Best Cinnamon Roll Bliss Bars Recipe – Simply Divine Taste
These Cinnamon Roll Bliss Bars capture the warm, gooey essence of classic cinnamon rolls in a convenient, sliceable form. Perfect for breakfast or dessert, they are sure to delight everyone who tries them!
- Prep Time: 20 mins
- Cook Time: 30 mins
- Total Time: 50 minutes
- Yield: 24 servings 1x
- Category: Dessert
- Method: Baking
- Cuisine: American
Ingredients
- 1 cup Unsalted Butter, softened
- 1 cup Granulated Sugar
- 2 Large Eggs, at room temperature
- 1 teaspoon Pure Vanilla Extract
- 3 cups All-Purpose Flour
- 1 tablespoon Baking Powder
- 1/2 teaspoon Salt
- 1/2 cup Light Brown Sugar
- 2 teaspoons Ground Cinnamon
- 8 oz Full-fat Cream Cheese, softened
- 2 cups Powdered Sugar (Confectioners' Sugar), sifted
- 2 tablespoons Milk or Cream
Instructions
- Preheat your oven to 350°F (175°C). Line a 9×13-inch baking pan with parchment paper, leaving an overhang on the sides. Lightly grease the parchment paper.
- In a large mixing bowl, cream together the softened unsalted butter and granulated sugar until light and fluffy, about 2-3 minutes. Beat in the eggs one at a time, mixing well after each addition. Stir in the vanilla extract.
- In a separate medium bowl, whisk together the all-purpose flour, baking powder, and salt.
- Gradually add the dry ingredients to the wet ingredients, mixing on low speed until just combined. Be careful not to overmix.
- Press the bar dough evenly into the prepared baking pan.
- In a small bowl, whisk together the melted unsalted butter, light brown sugar, and ground cinnamon until it forms a thick mixture. Dollop this mixture over the top of the bar dough.
- Using a knife or skewer, gently swirl the cinnamon mixture into the bar dough, aiming for distinct swirls.
- Bake for 25-30 minutes, or until the edges are lightly golden and a toothpick inserted into the center comes out with moist crumbs.
- Allow the bars to cool completely in the pan on a wire rack before frosting.
- In a medium bowl, beat together the softened cream cheese and softened unsalted butter until smooth. Gradually add the sifted powdered sugar, mixing until combined, then beat until light and fluffy. Stir in the vanilla extract.
- Once the bars are completely cool, spread the cream cheese frosting generously over the top. Use the parchment paper overhangs to lift the frosted slab out of the pan and cut into squares or rectangles.
Nutrition
- Serving Size: 1 bar
- Calories: 250
- Sugar: 20 g
- Sodium: 150 mg
- Fat: 12 g
- Saturated Fat: 7 g
- Unsaturated Fat: 3 g
- Trans Fat: 0 g
- Carbohydrates: 30 g
- Fiber: 1 g
- Protein: 3 g
- Cholesterol: 40 mg
Keywords: Ensure all ingredients are at room temperature for the best results. For a dairy-free option, substitute with plant-based butter and cream cheese. Don't overbake the bars to keep them moist.
Leave a Comment