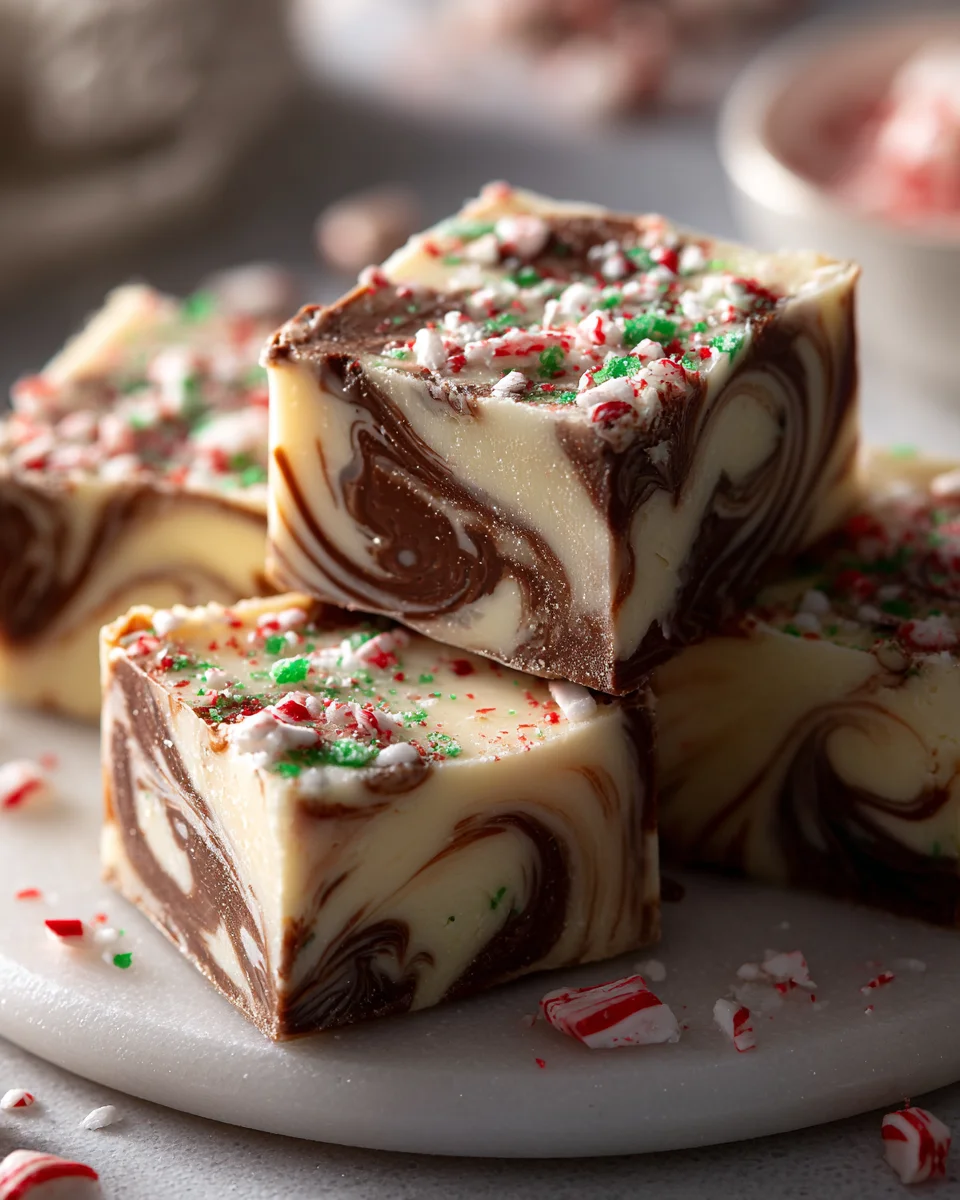
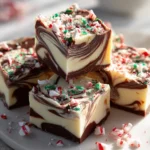
Peppermint Bark Fudge With Creamy Texture
Oh, do I have a treat for you today! I’m absolutely thrilled to share my recipe for Peppermint Bark Fudge With Creamy Texture. Forget everything you thought you knew about traditional fudge; this isn’t your average crumbly, dry kind. No, this is an unbelievably smooth, melt-in-your-mouth experience that perfectly marries two of my favorite festive indulgences: rich, decadent fudge and crisp, refreshing peppermint bark.
What makes this particular Peppermint Bark Fudge so special, you ask? It’s all in that incredible, velvety texture that truly lives up to its name. Each bite delivers a burst of cool peppermint, chunky bits of crunchy candy cane, and swirls of creamy white chocolate, all suspended in a deeply satisfying chocolate fudge base. It’s a symphony of textures and flavors that will have everyone asking for more, making it the star of any holiday gathering or a truly thoughtful homemade gift.
You’re going to adore making this because it’s surprisingly simple to put together, yet the results are utterly show-stopping and undeniably delicious. Prepare to fall head over heels for the ultimate festive treat that promises a creamy, dreamy peppermint bark experience in every single square!

Hey there, fellow dessert lovers! If you’re anything like me, the holiday season just isn’t complete without the classic combo of peppermint and chocolate. But what if we could take that beloved peppermint bark and transform it into something even more decadent, something wonderfully smooth and melt-in-your-mouth creamy? That’s exactly what my Peppermint Bark Fudge with Creamy Texture is all about. This isn’t just any fudge; it’s a luscious, dreamy treat designed to deliver that perfect creamy consistency alongside the festive crunch of peppermint. Forget grainy, crumbly fudge – we’re aiming for silky smooth perfection here. Let’s dive in and make some magic!
Ingredient Notes
To achieve that signature creamy texture in our Peppermint Bark Fudge, the quality and type of ingredients truly matter. Here’s a breakdown of what you’ll need and why:
- Sweetened Condensed Milk: This is the absolute star for creating our fudge’s creamy base. It’s pre-sweetened and thick, providing the essential body and richness. Critical note: Do NOT confuse this with evaporated milk; they are entirely different products and using evaporated milk will result in a runny, unusable mixture. Always double-check the label!
- Good Quality White Chocolate Chips or Bars: For the ultimate creamy texture and a smooth melt, investing in good quality white chocolate makes a huge difference. Cheaper brands often contain less cocoa butter and more emulsifiers, which can lead to a less smooth melt and a slightly waxy or grainy texture in the final fudge. I usually opt for high-quality white chocolate baking bars chopped into small pieces or premium white chocolate chips. This ensures a beautifully even melt and a luxurious mouthfeel.
- Unsalted Butter: Just a touch of butter adds richness and contributes significantly to the fudge’s silky, melt-away texture. It helps to smooth out the mixture and prevent it from becoming too stiff or crumbly. Always use unsalted butter so you can control the salt content yourself; however, if you only have salted, you can use it but omit any additional salt.
- Peppermint Extract: This gives our fudge that classic, refreshing peppermint kick. Start with a small amount and add more to taste, as extracts can vary in strength. For a bright, clean flavor, a good quality extract is key. If you prefer a milder mint flavor, you can reduce the amount slightly. If you wish to use a non-alcohol alternative, be sure to find a brand that specifies it, though most culinary extracts have very little alcohol and it quickly dissipates with heat.
- Crushed Peppermint Candies or Peppermint Bark: This is where the “bark” part of our fudge comes in! You can use pre-crushed peppermint candies (like candy canes), or for an even more decadent touch, chop up store-bought peppermint bark or even make your own for topping. The crunch provides a wonderful textural contrast to the creamy fudge.
- Optional: Pinch of Salt: A tiny pinch of fine sea salt can actually enhance the sweetness and depth of the chocolate and peppermint flavors without making the fudge taste salty. It’s a flavor enhancer.
Substitutions & Considerations:
- Chocolate Type: While this recipe calls for white chocolate for that classic peppermint bark aesthetic, you could certainly experiment with semi-sweet or dark chocolate for a different flavor profile. Just be aware the color will change!
- Flavor Variations: Feel free to swap peppermint extract for a different flavor if you’re feeling adventurous – perhaps almond extract, orange extract, or even a non-alcohol rum alternative for a distinct twist.
Step-by-Step Instructions
Making this Peppermint Bark Fudge is surprisingly simple, especially when you follow these steps to ensure that creamy texture we’re aiming for. The key is gentle heat and patience!
- Prepare Your Pan: First things first, get your baking pan ready. I typically use an 8×8-inch square pan for a good thickness, but a 9×9-inch will work for thinner fudge. Line it with parchment paper, leaving an overhang on the sides. This “sling” will make it incredibly easy to lift the set fudge out of the pan for cutting. Lightly grease the parchment if you like, though it’s often not strictly necessary.
- Gentle Melting is Key: In a heavy-bottomed saucepan, combine your sweetened condensed milk, white chocolate chips (or chopped white chocolate bars), and unsalted butter. The heavy bottom helps distribute heat evenly and prevents scorching. Place the saucepan over low to medium-low heat. This is perhaps the most crucial step for achieving that creamy texture. You want to melt the ingredients slowly and gently, stirring constantly with a heat-proof spatula or wooden spoon. Avoid high heat at all costs, as this can cause the chocolate to seize or burn, leading to a grainy or clumpy texture that we definitely want to avoid.
- Achieve Smoothness: Continue stirring until the chocolate is completely melted and the mixture is silky smooth, uniform, and shiny. There should be no lumps of chocolate remaining. This process usually takes about 5-7 minutes. Once it’s smooth, immediately remove the pan from the heat. The residual heat will continue to cook it slightly, so take it off as soon as it’s fully melted.
- Flavor It Up: Stir in your peppermint extract and the optional pinch of salt. Mix thoroughly until the extract is evenly distributed throughout the fudge base. Give it a quick taste (carefully, it’s hot!) and adjust the peppermint if you desire a stronger mint flavor.
- Pour and Spread: Quickly pour the hot fudge mixture into your prepared pan. Use your spatula to spread it evenly into all corners, creating a smooth, flat surface. Work relatively quickly here, as the fudge will start to set as it cools.
- Add the Bark Topping: Immediately and generously sprinkle the crushed peppermint candies or chopped peppermint bark over the top of the warm fudge. Gently press them down a little with the back of your hand or a clean spatula to ensure they adhere to the fudge as it sets.
- Chill to Set: Transfer the pan to the refrigerator and chill for at least 2-3 hours, or until the fudge is completely firm and set. Don’t rush this step; proper chilling ensures easy cutting and a stable, creamy consistency.
- Cut and Serve: Once completely firm, use the parchment paper overhang to lift the entire block of fudge out of the pan. Place it on a cutting board. Using a sharp knife that has been run under hot water and wiped clean (reheat and wipe after every few cuts for super clean edges), cut the fudge into 1-inch squares.
Tips & Suggestions
Getting that perfect creamy texture for your Peppermint Bark Fudge is all about a few key techniques. Here are my top tips and suggestions to ensure your fudge is nothing short of amazing:
- Embrace Low and Slow Heat: I cannot stress this enough – the absolute number one rule for creamy fudge is gentle, consistent heat. High heat will shock the chocolate, causing it to seize, become grainy, or even burn. Use a heavy-bottomed saucepan and keep the heat on low to medium-low. Stir continuously until everything is just melted and smooth. This patience pays off immensely in the final texture.
- Quality Over Quantity: As mentioned in the ingredient notes, a good quality white chocolate makes a noticeable difference. It melts more smoothly and contributes to a richer, creamier mouthfeel. Cheaper chocolates can be waxy and make your fudge less enjoyable.
- Don’t Overmix Once Melted: Once your fudge mixture is smooth and melted, stir in the extract and topping, then get it into the pan. Excessive stirring after it’s melted can incorporate too much air or start to dry it out, potentially affecting the final creaminess.
- Wipe Your Knife for Clean Cuts: For perfectly neat squares, dip your sharp knife in hot water and wipe it clean before each cut (or every couple of cuts). The warm blade slices through the fudge cleanly without dragging or crumbling, ensuring beautiful presentation.
- Variations for Fun:
- Dark Chocolate Layer: For a truly decadent treat, you could add a bottom layer of dark chocolate fudge. Simply make a separate batch of dark chocolate fudge (using similar ingredients but with dark chocolate) and let it set slightly before pouring the white peppermint fudge on top.
- Chocolate Chips Inside: Stir in a handful of mini chocolate chips (dark or milk) into the white fudge mixture right before pouring it into the pan for an extra chocolatey burst.
- Extra Crunch: Besides the crushed peppermints, consider mixing in some crushed shortbread cookies or even a few finely chopped pecans for added texture, though this will slightly alter the “bark” feel.
- Different Extracts: While peppermint is classic, feel free to experiment with other non-alcohol extracts like almond, orange, or even a hint of espresso for a coffee-mint swirl.
- Make Your Own Bark Topping: If you’re feeling ambitious, melt some white chocolate, spread it thinly on parchment, sprinkle with crushed peppermints, let it set, then break it into pieces. This homemade bark can be fresher and tailored to your preference for topping.
- Don’t Rush the Chill: Let your fudge chill completely in the refrigerator. This firming-up stage is crucial for stability and allows the flavors to meld properly. Cutting warm or semi-set fudge will lead to a messy result.
Storage
Once you’ve gone to all the effort of creating this deliciously creamy Peppermint Bark Fudge, you’ll want to store it properly to maintain its texture and freshness. Here’s how I recommend keeping your sweet treats:
- Room Temperature: For short-term storage (1-2 days), you can keep the fudge in an airtight container at cool room temperature, away from direct sunlight or heat sources. This often maintains the absolute creamiest texture, as it won’t be as firm as fridge-cold fudge.
- Refrigeration: For longer storage, or if your kitchen is particularly warm, I highly recommend storing the fudge in an airtight container in the refrigerator. It will keep beautifully for up to 2-3 weeks. The cold will make the fudge firmer, but it will soften slightly as it comes to room temperature, which often takes about 10-15 minutes.
- Freezing: Yes, fudge freezes wonderfully! For extended storage, arrange the fudge pieces in a single layer in an airtight freezer-safe container. You can separate layers with parchment paper to prevent sticking. It will last in the freezer for up to 3 months. When you’re ready to enjoy it, simply thaw the fudge in the refrigerator overnight or at room temperature for a few hours.
- Prevent Drying Out: Always store your fudge in an airtight container. Exposure to air is the quickest way for fudge to dry out and lose its lovely creamy texture.
Enjoy every single creamy, minty bite of your homemade Peppermint Bark Fudge!
Final Thoughts
I genuinely hope you’re as excited as I am about trying this incredible Peppermint Bark Fudge With Creamy Texture! This isn’t just any fudge; it’s a truly special confection that perfectly balances the crisp, refreshing bite of peppermint bark with an undeniably smooth and luxurious texture. I promise, the “creamy texture” in its name isn’t just a suggestion—it’s the absolute truth, making every bite an melt-in-your-mouth delight.
This Peppermint Bark Fudge With Creamy Texture is a must-try for so many reasons. It’s the ideal treat to brighten up your holiday spread, a wonderful homemade gift that shows you care, or simply a delightful indulgence for yourself and your loved ones. The unique combination of flavors and that unparalleled creamy consistency truly sets it apart. Give it a whirl; I’m confident it will become a beloved staple in your collection of cherished recipes!
Decadent Peppermint Bark Fudge with Creamy Texture
Indulge in this Peppermint Bark Fudge that combines rich chocolate with refreshing peppermint for a melt-in-your-mouth experience. Perfect for holiday gatherings or as a thoughtful homemade gift!
- Prep Time: 15 mins
- Cook Time: 15 mins
- Total Time: 30 minutes
- Yield: 16 servings 1x
- Category: Dessert
- Method: Stovetop
- Cuisine: American
Ingredients
- 1 can sweetened condensed milk
- 2 cups good quality white chocolate chips or bars
- 2 tablespoons unsalted butter
- 1 teaspoon peppermint extract
- 1 cup crushed peppermint candies or peppermint bark
- Optional: pinch of salt
Instructions
- Prepare Your Pan: Line an 8×8-inch square baking pan with parchment paper, leaving an overhang on the sides. Lightly grease the parchment if desired.
- Gentle Melting is Key: In a heavy-bottomed saucepan, combine sweetened condensed milk, white chocolate chips (or chopped white chocolate bars), and unsalted butter. Place over low to medium-low heat, stirring constantly until melted and smooth.
- Achieve Smoothness: Stir until the mixture is silky smooth and shiny, about 5-7 minutes. Remove from heat immediately once fully melted.
- Flavor It Up: Stir in peppermint extract and optional pinch of salt. Mix thoroughly and taste to adjust peppermint flavor if needed.
- Pour and Spread: Quickly pour the hot fudge mixture into the prepared pan and spread evenly into all corners.
- Add the Bark Topping: Sprinkle crushed peppermint candies or chopped peppermint bark over the top of the warm fudge and gently press down.
- Chill to Set: Transfer the pan to the refrigerator and chill for at least 2-3 hours until completely firm.
- Cut and Serve: Once firm, lift the fudge out using the parchment overhang and cut into 1-inch squares.
Nutrition
- Serving Size: 1 square
- Calories: 150
- Sugar: 15 g
- Sodium: 30 mg
- Fat: 8 g
- Saturated Fat: 5 g
- Unsaturated Fat: 2 g
- Trans Fat: 0 g
- Carbohydrates: 20 g
- Fiber: 0 g
- Protein: 1 g
- Cholesterol: 10 mg
Keywords: For best results, use high-quality white chocolate and maintain low, gentle heat while melting. Experiment with different extracts for flavor variations.
Leave a Comment