Cheesy Garlic Bread You Can Make In The Oven (make Ahead Option) is about to become your new kitchen MVP, I promise! Seriously, who can resist the allure of warm, crusty bread, generously slathered with fragrant garlic butter, and then piled high with gooey, melted cheese? Not me, and I bet not you either!
What truly elevates this recipe beyond your everyday garlic bread is twofold: first, that irresistible layer of bubbling, golden cheese that takes every bite to pure comfort food heaven. And second, the absolute game-changer – its fantastic make-ahead option! Imagine the ease: you can assemble this flavor powerhouse in advance, tuck it away, and then simply slide it into the oven just before dinner. No last-minute fuss, just perfect, cheesy goodness ready when you are. It’s ideal for busy weeknights when you need a little something extra with your pasta or a hearty beef stew, or a total lifesaver when you’re hosting friends and want to impress without the stress.
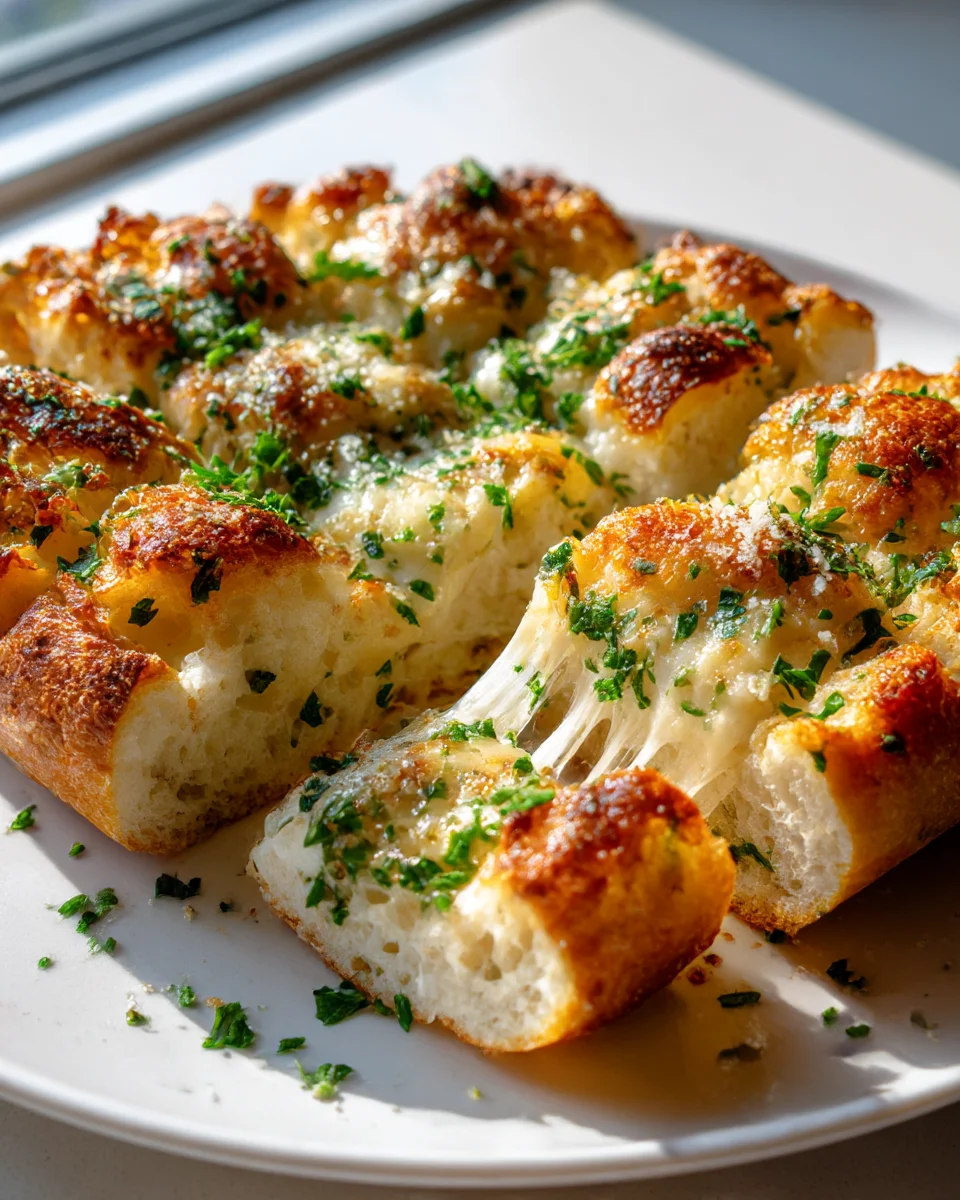
In a nutshell, we’re talking about crafting the ultimate side dish: crispy-edged, soft-centered bread infused with aromatic garlic, herbs, and butter, all crowned with a glorious blanket of melted cheese that stretches with every pull. This isn’t just a recipe; it’s a secret weapon for effortlessly delicious meals and happy gatherings!

Ingredient Notes
Creating truly incredible cheesy garlic bread in your own oven starts with understanding the star players in the ingredient lineup. My goal is always that perfect balance of crispy exterior, tender interior, pungent garlic flavor, and gooey, melty cheese. Here’s what you’ll need and some thoughts on making substitutions to fit your pantry and preferences.
- The Bread: This is your canvas! I personally love using a fresh, crusty baguette or a wider Italian loaf. The key is a bread that can stand up to the moisture of the garlic butter without becoming soggy, but still has a soft, airy crumb inside. A good ciabatta also works beautifully. Avoid overly soft sandwich breads; they just won’t give you that satisfying crunch. If you can find a slightly stale loaf (one or two days old), it can sometimes be even better as it absorbs the butter more readily without getting mushy.
- Butter: Unsalted butter is my go-to for this recipe. It allows me to control the salt content precisely, especially since cheese and garlic salt (if you use it) can be quite salty already. If all you have is salted butter, that’s perfectly fine, just be mindful when adding extra salt later. For a dairy-free version, you can certainly use a good quality plant-based butter substitute or even a robust olive oil for the garlic spread, though the flavor profile will shift slightly.
- Garlic: Fresh garlic is non-negotiable for the best flavor, in my opinion. We’re talking several cloves, finely minced or pressed. The more, the merrier if you’re a true garlic lover! While garlic powder can work in a pinch, it won’t give you the same bright, pungent kick as fresh. If you do use garlic powder, remember it’s more concentrated, so use about 1/4 teaspoon for every fresh clove. Garlic paste is another good option if you want to avoid mincing.
- Cheese: Oh, the cheese! This is where the “cheesy” truly comes in. I love a blend of cheeses for complexity and the ultimate melt. My absolute favorite combination is low-moisture mozzarella for its incredible stretch and melt, combined with freshly grated Parmesan for a salty, nutty depth of flavor. Other excellent choices include provolone for a sharper bite, Monterey Jack for extra creaminess, or a mild cheddar. Feel free to experiment with your favorite melty cheeses. For a truly gourmet touch, a sprinkle of smoked Gouda can add an unexpected layer of deliciousness.
- Fresh Herbs: A touch of fresh parsley, finely chopped, adds a wonderful burst of color and freshness that cuts through the richness. It’s an optional but highly recommended addition. Other herbs like fresh oregano or chives can also be lovely. If fresh herbs aren’t available, a pinch of dried Italian seasoning or dried oregano can work, but use them sparingly as their flavor is more concentrated.
- Salt and Pepper: A good pinch of kosher salt and freshly ground black pepper rounds out the flavors. Always taste your garlic butter mixture before spreading to adjust seasonings.
Step-by-Step Instructions
Making this cheesy garlic bread is delightfully simple, whether you’re serving it immediately or prepping it for later. Here’s how I get that perfect golden, bubbly result every time:
- Preheat Your Oven: Start by preheating your oven to a nice and hot 400°F (200°C). This high temperature is key to getting a beautifully golden and crispy crust while ensuring the cheese melts perfectly without over-baking the bread. If your oven has a convection setting, you can use it for even crispier results.
- Prepare the Garlic Butter: In a small bowl, melt about 1/2 cup (1 stick) of unsalted butter. To this melted butter, add your minced fresh garlic (I typically use 4-6 cloves, depending on their size and my mood!), a pinch of salt, a good grind of black pepper, and if using, your finely chopped fresh parsley. Stir everything together until well combined. This is your flavor base, so take a moment to smell that incredible aroma!
- Prep the Bread: Take your chosen loaf of bread. If using a baguette, I like to slice it lengthwise down the middle. For a wider Italian loaf, you can either slice it in half lengthwise or, if you prefer individual slices but want the convenience of cooking a whole loaf, you can slice it horizontally about 3/4 of the way through, creating thick, connected slices. This allows the garlic butter to get into all the nooks and crannies.
- Spread the Garlic Butter: Place your prepared bread, cut-side up, on a baking sheet. Generously spread the garlic butter mixture evenly over both halves of the bread. Make sure to get it right to the edges! Don’t be shy; this is where all that amazing flavor comes from.
- Add the Cheese: Now for the cheesy goodness! Sprinkle your shredded mozzarella, grated Parmesan, and any other cheeses you’re using generously over the buttered bread. I like to pile it on, ensuring every inch is covered for maximum melt.
- Bake to Perfection (Immediate): Pop the baking sheet into your preheated oven. Bake for 10-15 minutes, or until the edges of the bread are golden brown and crispy, and the cheese is completely melted, bubbly, and slightly browned in spots. Keep a close eye on it during the last few minutes as ovens can vary.
- Serve: Once out of the oven, let it cool for just a minute or two (the cheese will be molten!). Slice the bread (if you didn’t fully slice it beforehand) and serve warm. A sprinkle of extra fresh parsley right before serving adds a nice finishing touch.
Make-Ahead Option:
This is where this recipe truly shines for entertaining or busy weeknights!
- To Refrigerate (short term): Follow steps 1-5 (prepare bread, butter, and cheese). Do not bake. Once assembled, wrap the entire prepared loaf tightly in aluminum foil or plastic wrap. You can store it in the refrigerator for up to 24 hours. When ready to bake, remove it from the fridge while the oven preheats, then bake as directed in step 6, adding an extra 3-5 minutes to the baking time to account for it being chilled.
- To Freeze (long term): For longer storage, follow steps 1-5. Flash freeze the assembled bread on a baking sheet for about 30 minutes until the cheese is firm. Then, wrap the entire loaf very tightly in plastic wrap, followed by a layer of aluminum foil. Label and date it. It can be frozen for up to 1 month. When you’re ready to bake, you can either thaw it overnight in the refrigerator (then bake as if it were refrigerated) or bake it directly from frozen. If baking from frozen, keep it wrapped in foil for the first 15-20 minutes to prevent the edges from burning while the inside thaws and heats through, then unwrap and bake for an additional 10-15 minutes, or until golden and bubbly. Total baking time from frozen will be closer to 25-35 minutes.
Tips & Suggestions
Getting your cheesy garlic bread just right is all about a few key techniques and understanding how to tailor it to your taste. Here are my favorite tips for achieving garlic bread nirvana:
- Choosing the Right Bread Matters: I can’t stress this enough! A good crusty bread is essential. Look for one with a fairly dense but still airy crumb. If your bread is too fresh and soft, it might absorb the butter too much and become soggy. Conversely, a bread that’s too hard can be tough to eat. Aim for something that feels substantial.
- Don’t Skimp on the Garlic: This is garlic bread, after all! If you’re hesitant about using a lot of fresh garlic, trust me on this one. The garlic mellows as it bakes and infuses beautifully with the butter and cheese. You want that robust garlic flavor to shine through. If you find raw garlic too intense, you can briefly sauté the minced garlic in a tablespoon of olive oil before mixing it into the butter – this takes off some of the raw edge and sweetens it slightly.
- Score, Don’t Fully Slice: For a wider loaf, scoring the bread about three-quarters of the way through is a game-changer. It allows the garlic butter and melted cheese to seep into the individual “slices” without compromising the integrity of the loaf. This means easier serving and maximum flavor distribution.
- Layer Your Cheese: While simple mozzarella is delicious, a blend of cheeses adds depth. I often start with a base layer of mozzarella for that epic melt, then sprinkle a bit of Parmesan or Pecorino Romano on top for a sharper, nuttier crust. For those who like a little kick, a very thin layer of provolone can be excellent too.
- Add a Little Heat: For a subtle warmth that enhances the savory flavors, I love to add a tiny pinch of red pepper flakes to my garlic butter mixture. It doesn’t make it spicy, but rather adds a pleasant background hum that makes you want to go back for another bite.
- Bake on a Lower Rack (Sometimes): If you find your cheese is browning too quickly before the bread is perfectly crispy, try moving your baking sheet to a lower rack in the oven. This helps the bread get crispier from the bottom up while the cheese melts more gradually.
- Broil for Extra Crispiness: If your cheese isn’t as golden as you’d like after baking, or you want extra crispy edges, you can briefly switch your oven to broiler mode for the last 1-2 minutes. Keep a very close eye on it, as cheese can go from perfectly golden to burnt in seconds under the broiler!
- Serving Suggestions: Cheesy garlic bread is a fantastic accompaniment to so many meals. It’s perfect with pasta dishes, alongside a hearty soup or chili, or even as a simple appetizer with a marinara dipping sauce.
Storage
One of the best things about homemade cheesy garlic bread is how well it stores, whether you’re planning ahead or dealing with delicious leftovers. Here’s how I manage it:
- Storing Unbaked Make-Ahead Garlic Bread:
- Refrigerated (short term): As mentioned in the instructions, once you’ve spread the garlic butter and added the cheese to your bread, wrap the entire loaf tightly in plastic wrap, then an additional layer of aluminum foil. This keeps air out and prevents the bread from drying out or absorbing fridge odors. It will keep beautifully in the refrigerator for up to 24 hours. When you’re ready to bake, pull it out while your oven preheats, then bake as directed, adding 3-5 minutes to the overall baking time because it’s starting from a chilled state.
- Frozen (long term): For longer storage (up to a month), after assembling your cheesy garlic bread, I highly recommend flash freezing it on a baking sheet for about 30 minutes. This helps the cheese firm up slightly so it doesn’t stick to the wrapping. Once firm, wrap it first in plastic wrap, then a layer of heavy-duty aluminum foil, ensuring it’s sealed as airtight as possible. Label it with the date. You can bake it directly from frozen (adding significant time, as detailed in the “Make-Ahead Option” above), or thaw it in the fridge overnight before baking. Baking from frozen is super convenient for last-minute meals!
- Storing Cooked Leftover Cheesy Garlic Bread:
- If you somehow have leftovers (a rare occurrence in my house!), allow the garlic bread to cool completely to room temperature. This is important to prevent condensation from making it soggy.
- Once cooled, store the slices in an airtight container or a heavy-duty zip-top bag. It will keep well in the refrigerator for 2-3 days.
- Reheating Cooked Leftovers:
- The best way to reheat cooked cheesy garlic bread to restore its crispness is in the oven or a toaster oven.
- Oven/Toaster Oven: Preheat your oven or toaster oven to 350°F (175°C). Place the leftover slices directly on the oven rack or on a baking sheet. Heat for 5-10 minutes, or until the bread is heated through and the cheese is re-melted and bubbly. This method helps to crisp up the bread again, giving it a much better texture than microwave reheating.
- Microwave (least preferred): While you can reheat it in the microwave, I generally advise against it unless you don’t mind a softer, chewier texture. The microwave tends to make the bread soggy and the cheese rubbery. If you must, heat it in 15-second intervals until warmed through.
Final Thoughts
There you have it! I truly hope you’re inspired to whip up a batch of this incredible Cheesy Garlic Bread You Can Make In The Oven (make Ahead Option). From the moment that buttery, garlicky aroma fills your kitchen to the first bite of melted, golden cheese and perfectly toasted bread, you’ll understand why this recipe is a game-changer. It’s not just a side dish; it’s an experience – comforting, indulgent, and incredibly satisfying. The genius of its make-ahead option means less stress and more deliciousness whenever a craving strikes or guests arrive. Trust me, once you try this perfectly crispy, cheesy, and aromatic garlic bread, it’s bound to become a beloved staple in your home!
Ultimate Cheesy Garlic Bread: Oven-Baked & Make-Ahead!

This Cheesy Garlic Bread is the perfect side dish, featuring warm, crusty bread slathered with garlic butter and topped with gooey, melted cheese. With a fantastic make-ahead option, it’s ideal for busy weeknights or impressing guests with minimal stress.
- Prep Time: 15 mins
- Cook Time: 15 mins
- Total Time: 30 minutes
- Yield: 4 servings 1x
- Category: Side Dish
- Method: Baking
- Cuisine: Italian
Ingredients
- 1 fresh, crusty baguette or wider Italian loaf
- 1/2 cup (1 stick) unsalted butter
- 4–6 cloves fresh garlic, finely minced or pressed
- Kosher salt, to taste
- Freshly ground black pepper, to taste
- 1/4 cup finely chopped fresh parsley (optional)
- 1 cup shredded low-moisture mozzarella cheese
- 1/2 cup freshly grated Parmesan cheese
- Additional cheeses (optional, e.g., provolone, Monterey Jack, mild cheddar, smoked Gouda)
- Pinch of dried Italian seasoning or dried oregano (if fresh herbs aren't available)
Instructions
- Preheat your oven to 400°F (200°C).
- In a small bowl, melt about 1/2 cup (1 stick) of unsalted butter. Add minced fresh garlic, a pinch of salt, black pepper, and finely chopped fresh parsley. Stir until well combined.
- Slice your chosen loaf of bread lengthwise down the middle or horizontally about 3/4 of the way through for thicker, connected slices.
- Place the prepared bread cut-side up on a baking sheet and generously spread the garlic butter mixture over both halves.
- Sprinkle shredded mozzarella, grated Parmesan, and any additional cheeses generously over the buttered bread.
- Bake in the preheated oven for 10-15 minutes until the edges of the bread are golden brown and crispy, and the cheese is melted and bubbly.
- Let it cool for a minute or two, slice if necessary, and serve warm with a sprinkle of extra fresh parsley.
Nutrition
- Serving Size: 1 slice
- Calories: 300
- Sugar: 1 g
- Sodium: 500 mg
- Fat: 20 g
- Saturated Fat: 10 g
- Unsaturated Fat: 8 g
- Trans Fat: 0 g
- Carbohydrates: 30 g
- Fiber: 2 g
- Protein: 8 g
- Cholesterol: 30 mg
Keywords: For a make-ahead option, assemble the bread but do not bake. Wrap it tightly and refrigerate for up to 24 hours or freeze for up to 1 month. Adjust baking time if starting from chilled or frozen.


Leave a Comment