Classic Chicken Club Sandwich
There are some dishes that just speak to your soul, and for me, the Classic Chicken Club Sandwich is absolutely one of them. It’s not just a sandwich; it’s an icon, a culinary masterpiece of layers and textures that never disappoints. What makes this recipe so special, you ask? It’s the perfect harmony of simple, high-quality ingredients coming together to create something truly extraordinary. I promise, once you take that first glorious bite, you’ll understand why it’s a timeless favorite around the world.
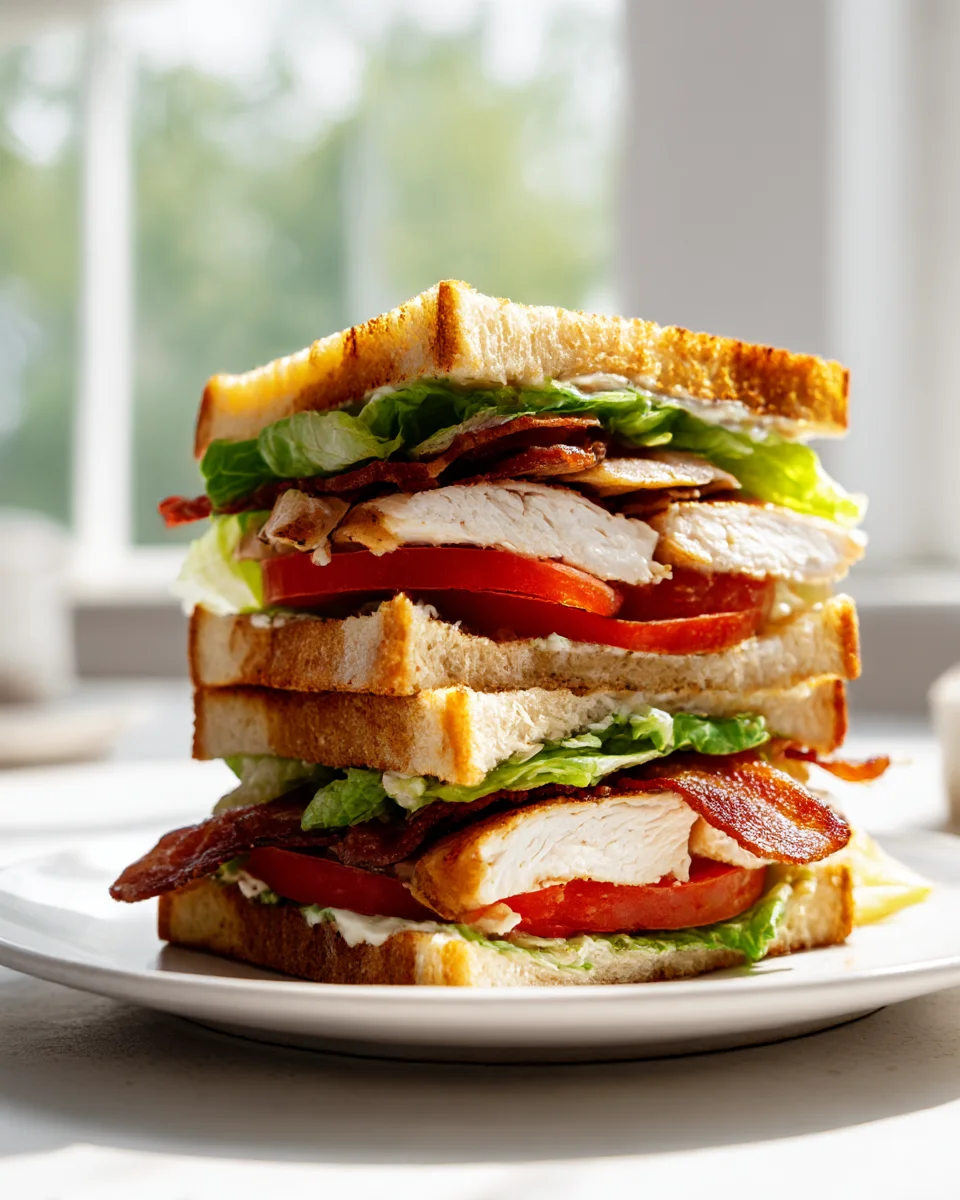
You’re going to absolutely love making (and devouring!) this sandwich because it delivers on every front: flavor, satisfaction, and pure nostalgic joy. It might look impressive with its stacked layers, but trust me, it’s surprisingly straightforward to assemble. Imagine this: perfectly toasted bread, generously slathered with creamy mayonnaise, cradling tender, succulent chicken, crispy strips of savory beef bacon, crisp lettuce, and ripe, juicy tomato. It’s a triple-decker delight that’s substantial enough for a hearty lunch or a light dinner, and perfect for picnics or a cozy meal at home. Get ready to elevate your sandwich game – this classic is about to become your new obsession!

Welcome to my kitchen! Today, we’re diving into the delightful world of the Classic Chicken Club Sandwich. This iconic sandwich is a true masterpiece of flavors and textures, featuring perfectly toasted bread, succulent chicken, crispy beef bacon, fresh vegetables, and a creamy spread. It’s more than just a sandwich; it’s a culinary experience that has stood the test of time. I absolutely adore making these, and I’m excited to share my go-to recipe with you. Let’s get started!
Ingredient Notes
Creating the perfect Classic Chicken Club Sandwich starts with selecting the right ingredients. Here’s a breakdown of what you’ll need and some tips for making the best choices, along with a few substitutions to suit your preferences.
The Essentials
- Chicken Breast: For a truly classic club, I always recommend using freshly cooked chicken breast. You can roast it, grill it, or even poach it – whatever method you prefer. The key is to ensure it’s moist and flavorful. About 8-10 ounces of cooked chicken, thinly sliced or shredded, will be enough for two sandwiches. Using leftover rotisserie chicken is also a fantastic shortcut that I often use on busy days!
- Bread: White bread is the traditional choice for a Classic Club, and for good reason – it toasts up beautifully and provides a soft contrast to the other ingredients. I usually opt for a good quality sandwich loaf. However, if you’re looking to elevate it slightly, sourdough or even a light brioche can be wonderful alternatives, adding a different layer of flavor. You’ll need three slices per sandwich, so ensure your loaf is adequately sized.
- Beef Bacon: This is a non-negotiable for me! Crispy beef bacon adds that essential salty, smoky, and fatty crunch that makes a club sandwich so satisfying. Make sure to cook it until it’s really crisp, but not burnt. I usually bake my beef bacon in the oven for even crispiness, or fry it until perfectly rendered and golden. For two sandwiches, you’ll want about 6-8 strips.
- Lettuce: Fresh, crisp lettuce is vital for texture and a refreshing bite. Iceberg or romaine lettuce are my top picks because they offer that satisfying crunch. You want to make sure it’s clean and thoroughly dried before assembling to prevent any sogginess.
- Tomato: A ripe, juicy tomato is a must. I prefer slicing mine thinly to ensure it doesn’t overwhelm the sandwich but still provides that burst of freshness and acidity. Heirloom tomatoes can add a touch of gourmet flair if you’re feeling fancy!
- Mayonnaise: Good quality mayonnaise is the only spread you need for a classic club. It binds all the flavors together with its creamy tang. Don’t skimp on this! I love a full-fat, rich mayo, but feel free to use your favorite brand.
Substitutions & Variations
- Chicken: While chicken breast is classic, you could experiment with thinly sliced turkey breast for a slightly different flavor profile. Just ensure it’s also freshly cooked or high-quality deli meat.
- Bread: If white bread isn’t your thing, whole wheat or even a hearty rye can work, though it will change the “classic” feel slightly. Always make sure whatever bread you choose is sturdy enough to hold the generous fillings.
- Lettuce: Butter lettuce or green leaf lettuce can be used if you prefer a softer green, but you’ll miss out on some of that signature crunch.
- Spreads: While mayonnaise is king here, a thin layer of Dijon mustard underneath the mayo can add a subtle kick. Sometimes, I’ll even mix a touch of finely chopped chives or a squeeze of lemon juice into my mayo for a little extra zest.
- Cheese: Although not strictly classic, adding a slice of your favorite cheese, like cheddar or Swiss, is a popular variation. Just melt it onto one of the toasted bread slices before assembling for extra deliciousness.
- Avocado: A few slices of ripe avocado can add a wonderful creamy texture and healthy fats, making the sandwich even more indulgent.
Step-by-Step Instructions
Now that we have all our amazing ingredients ready, let’s build this culinary masterpiece! The key to a great club sandwich is organization and careful layering.
Prep Everything First!
- Cook the Chicken: If your chicken isn’t already cooked, prepare it now. I usually grill a couple of chicken breasts until they’re cooked through and have a nice char. Let them rest, then slice them thinly against the grain, or shred them if you prefer. Set aside.
- Cook the Beef Bacon: Lay your beef bacon strips on a baking sheet and bake at 400°F (200°C) for 15-20 minutes, or until perfectly crispy. Alternatively, fry them in a skillet over medium heat until golden and crisp. Drain on paper towels to remove excess fat.
- Prepare Veggies: Wash and thoroughly dry your lettuce leaves. Slice your ripe tomatoes into thin, even rounds.
- Toast the Bread: Pop your bread slices into the toaster. Remember, you’ll need three slices per sandwich. I like a medium toast – firm enough to hold up, but not rock hard.
Assemble Your Club Sandwich (Per Sandwich)
This is where the magic happens! We’re building a triple-decker, so precision is key.
- First Layer – The Base:
- Take one slice of toasted bread.
- Spread a generous layer of mayonnaise evenly on one side of this toast.
- Arrange a few lettuce leaves on top of the mayo.
- Place a few tomato slices over the lettuce.
- Layer half of your prepared chicken slices or shredded chicken over the tomatoes.
- Second Layer – The Middle:
- Take your second slice of toasted bread.
- Spread mayonnaise on both sides of this toast. This is crucial for flavor and moisture throughout the sandwich!
- Carefully place this mayo-coated toast on top of your first layer, mayo-side down onto the chicken.
- Now, on top of this middle toast, arrange your crispy beef bacon strips. I usually use 3-4 strips per layer, broken in half if needed to fit nicely.
- Add another layer of lettuce leaves and a few more tomato slices.
- Layer the remaining half of your chicken slices or shredded chicken here.
- Third Layer – The Top:
- Take your third and final slice of toasted bread.
- Spread mayonnaise on one side of this toast.
- Carefully place this toast, mayo-side down, on top of your second layer.
- Secure and Slice:
- Once assembled, use long skewers or toothpicks to secure the sandwich. I typically use four, one in each corner, to hold everything firmly in place.
- With a sharp serrated knife, carefully slice the sandwich into quarters, creating those iconic triangles. Wipe your knife between cuts for a clean finish.
- Serve Immediately: Arrange your beautiful sandwich quarters on a plate. I love serving mine with a side of potato chips or a small salad. Enjoy!
Tips & Suggestions
I’ve made countless club sandwiches over the years, and I’ve picked up a few tricks that I’d love to share to help you achieve club sandwich perfection every time.
- Quality Ingredients Matter: This isn’t just a cliché; it’s especially true for a simple dish like a club sandwich where every ingredient shines. Use the freshest, best-quality chicken, ripe tomatoes, crisp lettuce, and delicious beef bacon you can find. It truly makes all the difference in the final taste.
- Don’t Skimp on the Toasting: While you don’t want burnt bread, ensure your toast is firm and slightly golden. It needs to be sturdy enough to hold all those wonderful fillings without collapsing or getting soggy too quickly. A medium-dark toast is usually ideal.
- Mayonnaise is Your Friend: A club sandwich is not the time to be shy with mayonnaise. It provides the necessary lubrication and binding for all the layers, and its creamy texture and tangy flavor are essential to the classic taste. Make sure both sides of the middle toast are coated!
- Crispy Beef Bacon is Key: I cannot stress this enough. Soggy beef bacon is a club sandwich crime! Cook it until it’s perfectly crisp and has a good snap when you bite into it. This provides a crucial textural contrast that elevates the whole experience.
- Thin Slices for Everything: Whether it’s your chicken or your tomatoes, aim for thin, even slices. This ensures that you get a bit of everything in each bite and prevents the sandwich from being too chunky or difficult to eat.
- Layering Strategy: Pay attention to the order of layers. I always put the lettuce and tomato directly on the mayo-coated bread to act as a barrier, preventing the chicken or beef bacon from making the toast soggy.
- Serrated Knife for Slicing: To get those clean, professional-looking triangle cuts, use a sharp serrated knife. It glides through the toast and fillings without tearing. Wiggle the knife gently back and forth as you cut.
- Serve Immediately: A club sandwich is at its absolute best when enjoyed right after assembly. The toast is perfectly crisp, the vegetables are fresh, and the beef bacon still has its crunch. Don’t let it sit around too long, or the bread can start to absorb moisture from the fillings.
- Make it Your Own: While I’ve given you the classic framework, feel free to add your personal touch. A thin slice of avocado, a touch of a mild cheddar or Swiss cheese, or even a sprinkle of black pepper can customize it to your liking.
Storage
The Classic Chicken Club Sandwich is truly a dish best enjoyed fresh. Its magic lies in the contrasting textures and temperatures of its components, which start to diminish over time.
- Assembled Sandwich: I really don’t recommend storing an already assembled club sandwich for very long. The toast will inevitably absorb moisture from the mayonnaise, lettuce, and tomato, becoming soggy, and the crispness of the beef bacon will be lost. If you absolutely must store it for a short period (e.g., for a lunch a few hours later), wrap it very tightly in plastic wrap or aluminum foil to minimize air exposure and delay sogginess. However, even then, it won’t be quite the same as when it was first made. It’s definitely not suitable for overnight storage.
- Individual Components: The best approach for making a club sandwich ahead of time is to prepare and store the individual components separately.
- Cooked Chicken: Store thinly sliced or shredded cooked chicken in an airtight container in the refrigerator for up to 3-4 days.
- Cooked Beef Bacon: Crispy beef bacon can be stored in an airtight container at room temperature (if very crispy and dry) for a day, or in the refrigerator for up to 3 days. Reheat briefly in a dry skillet or oven to crisp it up again before use.
- Prepared Vegetables: Wash and dry your lettuce and slice your tomatoes just before assembly to maintain their freshness and crispness. Store whole lettuce and tomatoes in the refrigerator.
- Mayonnaise: Keep your mayonnaise in its original container in the refrigerator.
- Freezing: A club sandwich is absolutely not suitable for freezing. The textures of the fresh vegetables and toasted bread will completely break down upon thawing, resulting in an unappetizing mess.
My advice? Plan to eat your Classic Chicken Club Sandwich right after you’ve made it. That way, you’ll get to experience it at its peak deliciousness!
Final Thoughts
And there you have it! What I truly love about the Classic Chicken Club Sandwich is how it elevates a simple meal into something truly extraordinary. It’s more than just a sandwich; it’s a perfectly orchestrated symphony of fresh, vibrant ingredients and comforting flavors, all layered with precision.
From the tender chicken to the crisp lettuce, juicy tomato, and the delightful tang of mayo, every bite is a testament to its enduring popularity. This isn’t just a recipe to follow; it’s an experience waiting to happen in your kitchen. I promise you, once you take that first bite of your homemade Classic Chicken Club Sandwich, you’ll understand why it’s a timeless favorite. It’s satisfying, it’s hearty, and it’s an absolute triumph of simple culinary pleasures. Go ahead, treat yourself!
Classic Chicken Club Sandwich: Quick & Delicious Recipe

The Classic Chicken Club Sandwich is a culinary masterpiece of layers and textures that delivers flavor and satisfaction. This triple-decker delight is perfect for a hearty lunch or a light dinner.
- Prep Time: 15 mins
- Cook Time: 30 mins
- Total Time: 45 minutes
- Yield: 2 sandwiches 1x
- Category: Lunch
- Method: Grilling and Baking
- Cuisine: American
Ingredients
- 8–10 ounces of cooked chicken breast, thinly sliced or shredded
- 3 slices of white bread (or sourdough or light brioche)
- 6–8 strips of crispy beef bacon
- Fresh iceberg or romaine lettuce, cleaned and dried
- 1 ripe tomato, sliced thinly
- Good quality mayonnaise
Instructions
- Cook the Chicken: If your chicken isn't already cooked, prepare it now. Grill a couple of chicken breasts until they're cooked through and have a nice char. Let them rest, then slice them thinly against the grain, or shred them if you prefer. Set aside.
- Cook the Beef Bacon: Lay your beef bacon strips on a baking sheet and bake at 400°F (200°C) for 15-20 minutes, or until perfectly crispy. Alternatively, fry them in a skillet over medium heat until golden and crisp. Drain on paper towels to remove excess fat.
- Prepare Veggies: Wash and thoroughly dry your lettuce leaves. Slice your ripe tomatoes into thin, even rounds.
- Toast the Bread: Pop your bread slices into the toaster. Remember, you’ll need three slices per sandwich. Aim for a medium toast – firm enough to hold up, but not rock hard.
- First Layer – The Base: Take one slice of toasted bread. Spread a generous layer of mayonnaise evenly on one side of this toast. Arrange a few lettuce leaves on top of the mayo. Place a few tomato slices over the lettuce. Layer half of your prepared chicken slices or shredded chicken over the tomatoes.
- Second Layer – The Middle: Take your second slice of toasted bread. Spread mayonnaise on both sides of this toast. Carefully place this mayo-coated toast on top of your first layer, mayo-side down onto the chicken. Now, on top of this middle toast, arrange your crispy beef bacon strips. Add another layer of lettuce leaves and a few more tomato slices. Layer the remaining half of your chicken slices or shredded chicken here.
- Third Layer – The Top: Take your third and final slice of toasted bread. Spread mayonnaise on one side of this toast. Carefully place this toast, mayo-side down, on top of your second layer.
- Secure and Slice: Once assembled, use long skewers or toothpicks to secure the sandwich. Use four, one in each corner, to hold everything firmly in place. With a sharp serrated knife, carefully slice the sandwich into quarters, creating those iconic triangles.
- Serve Immediately: Arrange your beautiful sandwich quarters on a plate. Serve with a side of potato chips or a small salad.
Nutrition
- Serving Size: 1 sandwich
- Calories: 600
- Sugar: 3 g
- Sodium: 1200 mg
- Fat: 35 g
- Saturated Fat: 10 g
- Unsaturated Fat: 20 g
- Trans Fat: 0 g
- Carbohydrates: 40 g
- Fiber: 2 g
- Protein: 30 g
- Cholesterol: 80 mg
Keywords: Use the freshest, best-quality chicken, ripe tomatoes, crisp lettuce, and delicious beef bacon. Ensure your toast is firm and slightly golden. Don't skimp on the mayonnaise; it provides necessary lubrication and binding for all layers.


Leave a Comment