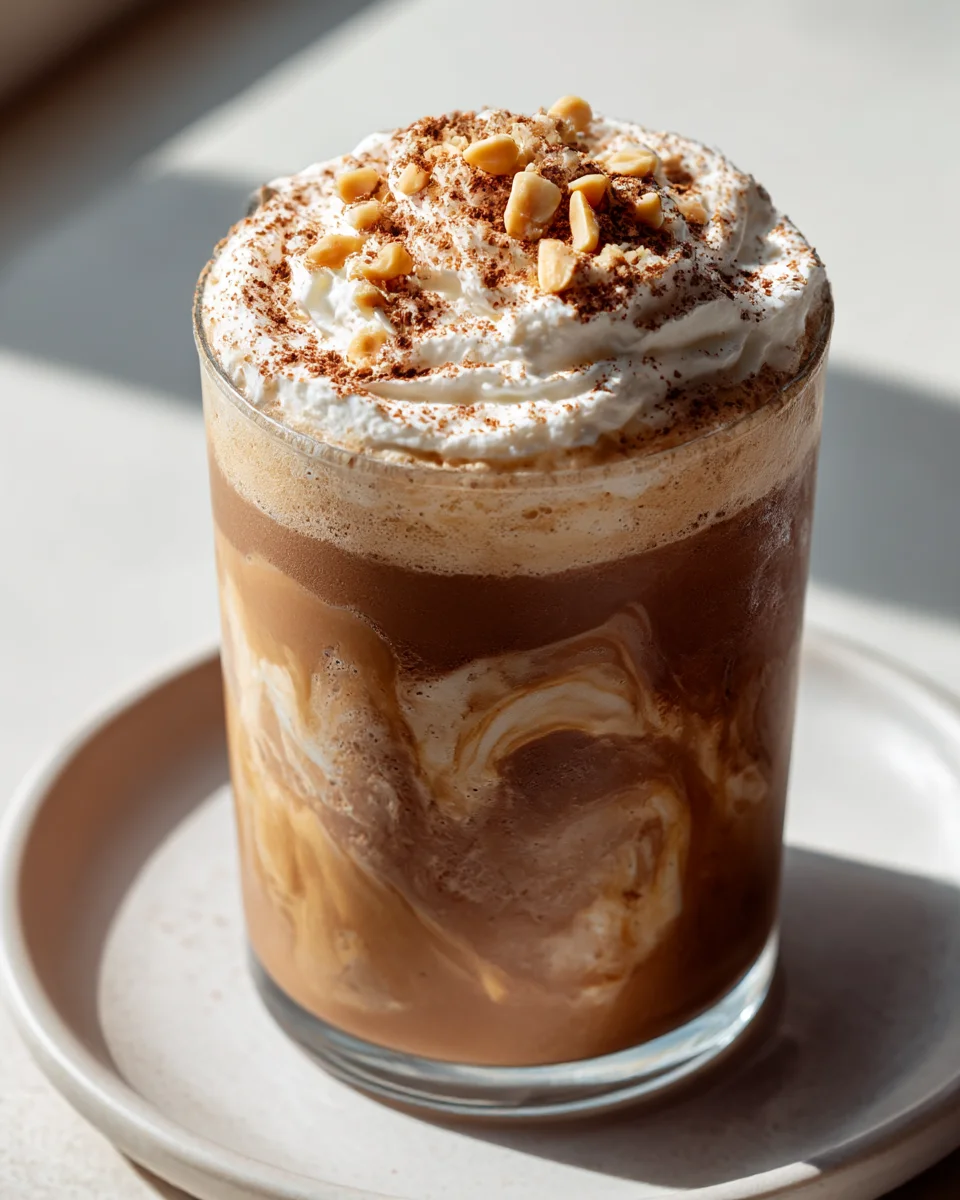
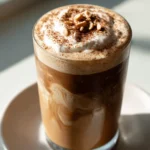
Peanut Butter Mocha Frappuccino (rich & Creamy Treat)
Oh my goodness, get ready for a taste sensation that will absolutely blow your mind! This Peanut Butter Mocha Frappuccino (rich & Creamy Treat) is honestly one of my all-time favorite ways to indulge, and I just know you’re going to fall head over heels for it too. What makes this recipe so incredibly special, you ask? It’s the magical marriage of two beloved flavors – the deep, luxurious notes of chocolate and coffee, perfectly intertwined with the comforting, nutty goodness of peanut butter. This isn’t just a drink; it’s a dessert in a glass!
I crafted this recipe to be super rich and unbelievably creamy, delivering that iconic coffee shop experience right in your own kitchen, but with that extra special homemade touch. You’ll love it because it’s the ultimate pick-me-up for any time of day, whether you need a refreshing afternoon treat or a decadent post-dinner indulgence. Imagine sipping on a thick, icy blend that’s bursting with sweet mocha and savory peanut butter, all whipped up to a velvety smooth perfection. It’s comforting, it’s exciting, and it absolutely satisfies every sweet craving. Trust me, once you try this rich and creamy peanut butter mocha delight, there’ll be no turning back!

Ingredient Notes
Creating the perfect Peanut Butter Mocha Frappuccino is all about selecting the right ingredients. Each component plays a crucial role in achieving that rich, creamy texture and irresistible flavor. Here’s a breakdown of what you’ll need and some helpful notes on substitutions to customize your treat.
The Coffee Base: Frozen Coffee Cubes
- Strong Brewed Coffee: This is the foundation of our frappuccino. I always recommend using a strong brew, perhaps even a dark roast or espresso, to ensure the coffee flavor doesn’t get lost amidst the peanut butter and chocolate. The strength of your coffee directly impacts the final taste.
- Why Frozen Coffee Cubes? This is a non-negotiable for me! Using frozen coffee cubes instead of plain ice cubes prevents your frappuccino from becoming watery and diluted as it blends. It keeps the coffee flavor robust and the texture incredibly thick and creamy. To prepare, simply brew your coffee, let it cool completely, and then pour it into ice cube trays to freeze overnight.
- Substitution: While not ideal for the best texture, if you’re in a pinch and don’t have frozen coffee cubes, you can use regular ice cubes combined with a shot or two of chilled espresso or very strong cold brew coffee. Just be aware the consistency might be slightly thinner.
The Richness: Peanut Butter
- Creamy Peanut Butter: For that ultra-smooth, luxurious texture we’re aiming for, creamy peanut butter is the way to go. It blends seamlessly into the drink, imparting its signature nutty flavor without any chunky surprises.
- Natural vs. Processed: I personally prefer natural, unsweetened creamy peanut butter. It allows me to control the overall sweetness of the frappuccino. If you use a sweetened variety, you might want to reduce the amount of added sweetener in the recipe.
- Substitution: If you have a peanut allergy or simply prefer another nut, almond butter or cashew butter can work wonderfully here, offering a slightly different but equally delicious nutty profile.
The Mocha Element: Cocoa Powder
- Unsweetened Cocoa Powder: This provides the deep, rich chocolate flavor that makes our frappuccino a true mocha delight. Using unsweetened powder gives you full control over the sweetness level.
- Dutch-Processed vs. Natural: Either works, but Dutch-processed cocoa powder tends to give a darker color and a smoother, less bitter chocolate flavor, which I find perfect for this drink.
- Substitution: For an even richer chocolate punch, you could use a tablespoon or two of chocolate syrup instead of cocoa powder, just be mindful of the added sugar content.
The Creaminess: Milk
- Dairy Milk (Whole or 2%): I find that whole milk or 2% milk provides the best creaminess and mouthfeel, contributing significantly to the “rich and creamy” promise of this treat.
- Non-Dairy Milk: This frappuccino is incredibly adaptable! Almond milk, oat milk, or soy milk are excellent non-dairy alternatives. Oat milk, in particular, lends a lovely creamy texture that mimics dairy well. Just choose an unsweetened variety to manage sweetness.
The Sweetness & Flavor Boost
- Granulated Sugar, Maple Syrup, or Honey: My go-to sweeteners are typically granulated sugar or a touch of maple syrup. The amount you add will depend on your personal preference and the sweetness of your peanut butter and milk. Start with a little and add more if needed after blending.
- Vanilla Extract: Just a splash of good quality vanilla extract really elevates all the other flavors, adding a wonderful depth and warmth to the drink. Don’t skip it!
Optional Toppings (Highly Recommended!)
- Whipped Cream: A classic frappuccino topping!
- Chocolate Syrup or Shavings: For extra mocha goodness.
- Peanut Butter Drizzle: Warm a little peanut butter in the microwave for a few seconds to make it pourable, then drizzle over the top. Absolutely decadent!
Step-by-Step Instructions
Making your Peanut Butter Mocha Frappuccino is surprisingly simple, especially once you have those coffee cubes ready! Follow these steps for a perfectly blended, rich, and creamy treat.
- Prepare Your Coffee Cubes (Ahead of Time): The most important first step! Brew about 1.5 cups of strong coffee. Let it cool completely to room temperature, then pour it into an ice cube tray and freeze for at least 4-6 hours, or preferably overnight, until solid. This ensures a thick, undiluted frappuccino.
- Gather Your Ingredients: Once your coffee cubes are frozen, have all your other ingredients measured out and ready to go. This includes your creamy peanut butter, unsweetened cocoa powder, chosen milk, sweetener, and vanilla extract.
- Load the Blender: Into the pitcher of a high-speed blender, first add your frozen coffee cubes (about 12-15 standard size cubes, which is roughly 1.5 cups). Then, add the creamy peanut butter, cocoa powder, milk, sweetener (start with the lower end of the recommended amount), and vanilla extract.
- Blend Until Smooth: Secure the lid on your blender. Start blending on a low speed to break up the larger chunks, then gradually increase to a high speed. Blend until the mixture is completely smooth and creamy, with no visible ice or peanut butter chunks. You might need to use the tamper attachment (if your blender has one) or stop and scrape down the sides of the blender with a spatula a few times to ensure everything is incorporated evenly. The texture should be thick, like a soft-serve ice cream.
- Taste and Adjust: Once blended, pour a small amount into a spoon and taste it. This is your chance to customize!
- Too thick? Add a tablespoon or two more milk and blend again.
- Too thin? Add a few more frozen coffee cubes or a couple of regular ice cubes and blend again.
- Not sweet enough? Add a bit more sweetener (sugar, maple syrup, etc.) and blend until dissolved.
- Missing a kick? Add a tiny pinch of salt to enhance the chocolate and peanut butter flavors, or another splash of vanilla.
- Serve Immediately: Pour your perfectly blended Peanut Butter Mocha Frappuccino into a tall glass. This drink is best enjoyed right away, while it’s at its coldest and thickest.
- Garnish (Optional, but highly recommended!): Top with a generous swirl of whipped cream, a drizzle of chocolate syrup, a sprinkle of chocolate shavings, or even a warm peanut butter drizzle. Enjoy your rich and creamy treat!
Tips & Suggestions
To truly elevate your Peanut Butter Mocha Frappuccino from good to utterly phenomenal, I’ve gathered some of my favorite tips and suggestions. These insights come from countless batches and a deep love for this particular frosty treat!
Mastering the Blend for Ultimate Creaminess
- Invest in a Good Blender: I cannot stress this enough. A high-speed, powerful blender (like a Vitamix or Blendtec) makes an enormous difference in achieving that ultra-smooth, creamy, and lump-free frappuccino texture. If your blender isn’t as powerful, you might need to blend in smaller batches or for a longer time, pausing to scrape down the sides frequently.
- Start Low, Go High: When blending, always start on a low speed to initially break down the frozen coffee cubes, then gradually increase to high. This prevents your blender from getting bogged down and helps create a smoother consistency.
- Don’t Over-Blend: While you want it smooth, blending for too long can actually start to melt the frozen components, leading to a thinner, less frosty drink. Blend just until it reaches your desired creamy consistency.
Flavor Customization and Enhancements
- Salt is Your Friend: A tiny pinch of sea salt (literally a tiny pinch, 1/8 to 1/4 teaspoon) can dramatically enhance the flavors of both the peanut butter and chocolate. It balances the sweetness and makes everything pop!
- Espresso Shot Boost: If you’re a serious coffee lover and want an extra jolt, consider adding a fresh shot of espresso along with your frozen coffee cubes. It will intensify the coffee flavor beautifully.
- Boosted Chocolate Flavor: For an even deeper chocolate profile, you can briefly warm your cocoa powder with a tablespoon of hot water or coffee to create a thick paste before adding it to the blender. This “blooming” process helps release its full flavor.
- Nutty Variations: While I adore peanut butter, feel free to experiment with other nut butters. Cashew butter yields a very creamy, mild flavor, while almond butter offers a slightly different nutty note.
- Add a Banana: For a nutritional boost and an extra layer of creaminess and natural sweetness, add half a frozen banana to your blend. It pairs surprisingly well with the peanut butter and mocha flavors.
- Spice It Up: A tiny pinch of cinnamon or a dash of chili powder (for a Mexican mocha twist) can add an interesting complexity to the chocolate flavor. Start with a very small amount and adjust to taste.
Serving and Presentation
- The Chilled Glass: For the ultimate cold experience, pop your serving glass in the freezer for 10-15 minutes before pouring in your frappuccino. It helps keep the drink colder for longer.
- Layered Decadence: Before pouring the frappuccino, you can drizzle chocolate syrup or warm peanut butter on the inside walls of your glass for an artistic touch and extra flavor in every sip.
- Get Creative with Toppings: Don’t limit yourself to just whipped cream! Consider mini chocolate chips, crushed peanuts or peanut butter cups, a sprinkle of cocoa powder, or even a mini peanut butter cookie on the side.
Storage
As much as I’d love to tell you this Peanut Butter Mocha Frappuccino stores beautifully, the truth is, it’s a drink that truly shines and is meant to be enjoyed immediately after blending. Frappuccinos are designed to be a fresh, icy, and creamy treat, and their texture is very sensitive to temperature changes.
Why Immediate Consumption is Best:
- Texture Degradation: The moment a frappuccino starts to melt, the lovely, thick, icy texture begins to separate. The frozen coffee and ice crystals will melt, turning your creamy drink into a thinner, more liquid consistency.
- Flavor Dilution: As the ice melts, it dilutes the concentrated flavors of coffee, peanut butter, and chocolate, making the drink less robust and satisfying.
- Separation: You’ll likely notice the ingredients starting to separate, with the thicker components sinking to the bottom and the liquid rising.
Short-Term Storage (If Absolutely Necessary):
If you absolutely must store leftovers for a very short period (e.g., you made too much for one serving), here’s what I recommend:
- Refrigeration: Pour any remaining frappuccino into an airtight container and store it in the refrigerator for no more than 1-2 hours. Do not expect it to retain its original texture. It will become much thinner and more like a very cold, flavored milk shake than a thick frappuccino.
- Re-blending (with caveats): If you refrigerate it, you might be able to revive some of its frostiness by pouring it back into a blender with a few fresh frozen coffee cubes (or plain ice) and re-blending. This won’t perfectly restore the original texture, but it can make it more palatable than drinking it completely melted. Be cautious not to add too much additional liquid.
Freezing is Not Recommended:
I strongly advise against freezing your leftover frappuccino. While it might seem like a good idea to preserve the “frozen” aspect, freezing it solid will change its texture dramatically. When thawed (or even partially re-blended from frozen), it will become icy and gritty rather than smooth and creamy. The emulsified fats from the peanut butter and milk will also likely separate, leading to a less appealing consistency.
My best advice? Plan to enjoy your Peanut Butter Mocha Frappuccino as soon as it’s blended. It’s a treat meant for immediate gratification, and trust me, it’s worth every single sip when it’s perfectly fresh and frosty!
Final Thoughts
Well, there you have it! My absolute favorite way to combine two incredible flavors into one unforgettable drink. This isn’t just any cold coffee; it’s a true experience. The perfect blend of rich, decadent chocolate and the creamy, nutty goodness of peanut butter, all whipped into a velvety smooth texture that’s simply heavenly.
I truly believe the Peanut Butter Mocha Frappuccino (rich & Creamy Treat) is a must-try for anyone looking for that ultimate sweet pick-me-up or a delightful dessert in a glass. It’s so easy to whip up, yet tastes like something straight from your favorite cafe. Go ahead, treat yourself – you absolutely deserve this wonderfully indulgent and satisfying blend. I just know you’re going to love every single sip!
Peanut Butter Mocha Frappuccino Recipe – Rich & Creamy
Indulge in this rich and creamy Peanut Butter Mocha Frappuccino that perfectly blends the luxurious flavors of chocolate and coffee with the nutty goodness of peanut butter. It’s a delightful treat that satisfies every sweet craving!
- Prep Time: 15 mins
- Cook Time: 0 mins
- Total Time: 15 minutes
- Yield: 2 servings 1x
- Category: Beverage
- Method: Blending
- Cuisine: American
Ingredients
- 1.5 cups Strong Brewed Coffee (frozen into cubes)
- 1/2 cup Creamy Peanut Butter
- 2 tablespoons Unsweetened Cocoa Powder
- 1 cup Dairy Milk (Whole or 2%) or Non-Dairy Milk (Almond, Oat, or Soy)
- Granulated Sugar, Maple Syrup, or Honey (to taste)
- 1 teaspoon Vanilla Extract
- Whipped Cream (optional topping)
- Chocolate Syrup or Shavings (optional topping)
- Peanut Butter Drizzle (optional topping)
Instructions
- Prepare Your Coffee Cubes (Ahead of Time): Brew about 1.5 cups of strong coffee. Let it cool completely to room temperature, then pour it into an ice cube tray and freeze for at least 4-6 hours, or preferably overnight, until solid.
- Gather Your Ingredients: Once your coffee cubes are frozen, have all your other ingredients measured out and ready to go.
- Load the Blender: Into the pitcher of a high-speed blender, first add your frozen coffee cubes. Then, add the creamy peanut butter, cocoa powder, milk, sweetener, and vanilla extract.
- Blend Until Smooth: Secure the lid on your blender. Start blending on a low speed to break up the larger chunks, then gradually increase to a high speed. Blend until the mixture is completely smooth and creamy.
- Taste and Adjust: Once blended, taste the mixture and adjust the thickness or sweetness as needed.
- Serve Immediately: Pour your perfectly blended Peanut Butter Mocha Frappuccino into a tall glass.
- Garnish (Optional): Top with whipped cream, chocolate syrup, chocolate shavings, or a warm peanut butter drizzle.
Nutrition
- Serving Size: 1 glass
- Calories: 450
- Sugar: 30 g
- Sodium: 150 mg
- Fat: 20 g
- Saturated Fat: 4 g
- Unsaturated Fat: 15 g
- Trans Fat: 0 g
- Carbohydrates: 55 g
- Fiber: 5 g
- Protein: 10 g
- Cholesterol: 10 mg
Keywords: For the best texture, use frozen coffee cubes instead of regular ice cubes. You can substitute creamy peanut butter with almond or cashew butter if desired. Adjust sweetness to your preference with sugar, maple syrup, or honey.

Leave a Comment