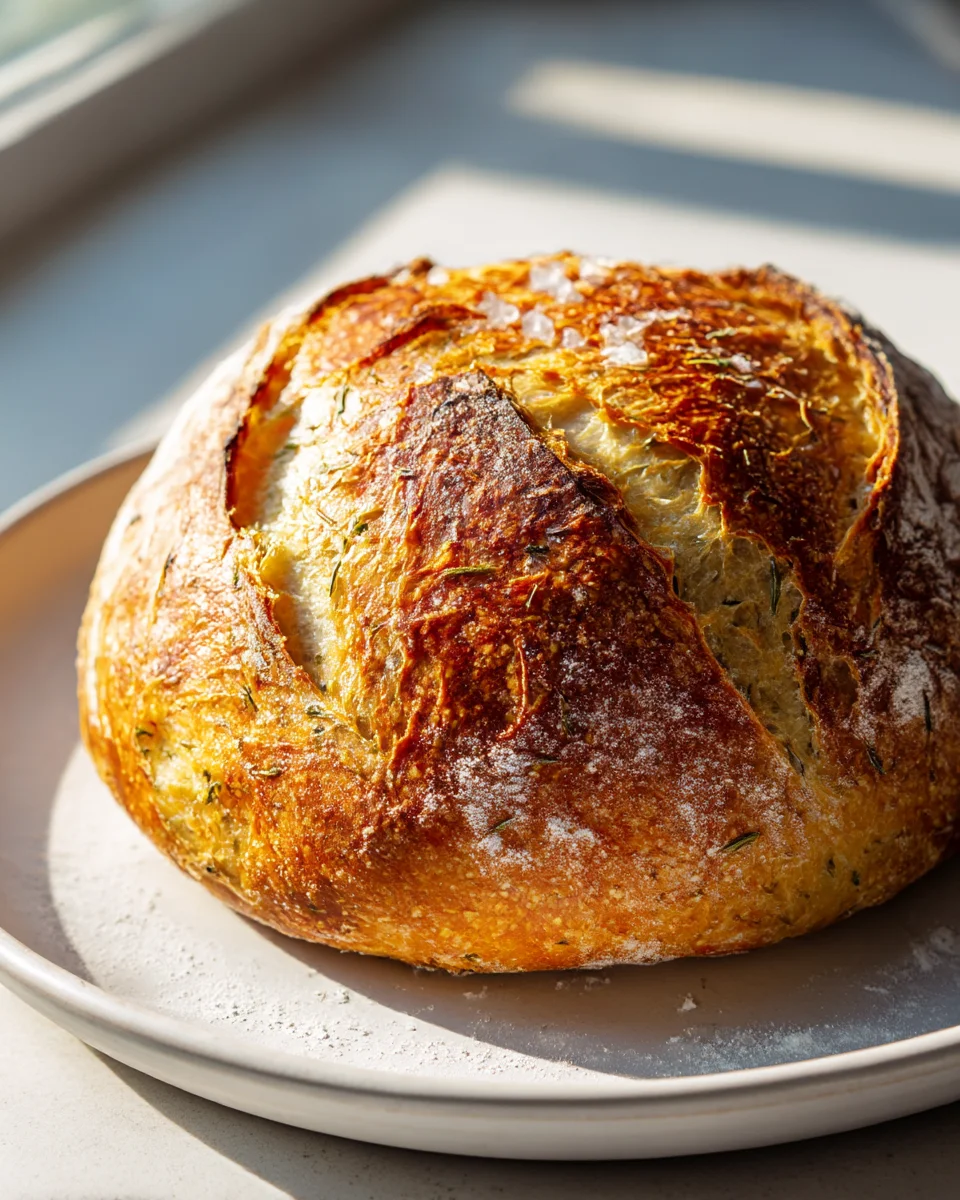
Garlic Herb Dutch Oven Bread Recipe
Oh, prepare yourselves, because the Garlic Herb Dutch Oven Bread Recipe is about to become your new kitchen obsession! If you’ve ever dreamt of baking a loaf of bread that looks like it came straight from an artisan bakery, with a glorious crackly crust and a soft, airy interior bursting with flavor, then you’ve found your perfect match. I’m absolutely thrilled to share this recipe with you because it’s not just bread; it’s an experience.
What makes this bread so incredibly special? It’s all in the magic of the Dutch oven. Baking in a preheated Dutch oven creates the ideal steamy environment that gives you that impossibly crusty exterior while keeping the inside wonderfully tender and chewy. And then there’s the flavor profile: we’re talking about a heavenly infusion of pungent garlic and aromatic fresh herbs (think rosemary, thyme, or oregano) swirled throughout every single bite. It’s truly a game-changer compared to regular loaves.
You, my friends, are going to absolutely adore making (and devouring!) this bread. Imagine the intoxicating aroma of warm garlic and herbs filling your entire home as it bakes – it’s pure comfort. This rustic, savory loaf is deceptively simple to achieve, even if you’re new to bread making. It uses basic ingredients but yields results that will make you feel like a master baker. It’s perfect for tearing off chunks to sop up the last bits of a hearty beef stew, accompanying a fresh salad, or simply slathering with a little butter. Trust me, once you try this incredible Garlic Herb Dutch Oven Bread, there’s no turning back!

Ingredient Notes
There’s nothing quite like the aroma of freshly baked bread filling your kitchen, especially when it’s infused with aromatic garlic and fragrant herbs. For this Garlic Herb Dutch Oven Bread recipe, I’ve carefully selected ingredients that will give you that perfect crusty exterior and soft, chewy interior, bursting with flavor. Here are the key players and a few notes on why they matter.
- All-Purpose Flour: I usually reach for unbleached all-purpose flour for this recipe. It strikes a fantastic balance, giving the bread a lovely crumb and chew. You can certainly use bread flour if you prefer an even chewier texture, but I find AP flour works wonderfully for that classic, rustic feel. If you’re looking to add a little more depth, you could substitute up to a quarter of the AP flour with whole wheat flour, but be aware it might make the bread a tad denser.
- Active Dry Yeast: This is our magic ingredient for lift! Make sure your yeast is fresh and active. I always like to “proof” my active dry yeast first in a little warm water to ensure it’s alive and kicking – it’s a simple step that saves a lot of potential disappointment. Instant yeast can also be used; you can typically mix it directly with the dry ingredients without proofing, but follow package directions.
- Warm Water: The temperature of your water is crucial for activating the yeast. I aim for bathwater warm, usually between 105-115°F (40-46°C). Too cold, and the yeast won’t activate; too hot, and you risk killing it.
- Salt: Don’t underestimate the power of salt in bread making! It not only enhances the flavor of the garlic and herbs but also controls the yeast’s activity and strengthens the gluten structure. I use fine sea salt, but kosher salt works too.
- Fresh Garlic: This is where a lot of our incredible flavor comes from. I always recommend fresh garlic, finely minced. The more finely minced, the better it distributes throughout the dough. If you’re in a pinch, garlic powder can be used (about 1 teaspoon for every clove of fresh garlic), but the flavor won’t be quite as vibrant or nuanced.
- Fresh Herbs: Rosemary, thyme, and oregano are my go-to combination for this bread. They bring a wonderful earthy, aromatic quality that pairs perfectly with garlic. Finely chop them to ensure they’re well distributed. If fresh herbs aren’t available, you can use dried herbs, but you’ll need significantly less – about 1 teaspoon of dried herbs for every tablespoon of fresh. Experiment with other herbs like chives or parsley if you like, but these three are my winning trio.
- Olive Oil (optional): I sometimes like to add a tablespoon or two of good quality extra virgin olive oil to the dough for a richer flavor and a slightly more tender crumb. It’s not strictly necessary, but it’s a lovely addition, especially if you plan to brush some on top before baking for extra crispiness and flavor.
Step-by-Step Instructions
Making this Garlic Herb Dutch Oven Bread is surprisingly straightforward, even for beginner bakers. The Dutch oven does most of the heavy lifting, creating a steamy environment that gives you that incredible crust. Here’s how I do it:
- Prepare the Yeast: In a large mixing bowl, combine the warm water and the active dry yeast. If using sugar, add a pinch here to help activate the yeast. Let it sit for 5-10 minutes until it becomes foamy. This tells you your yeast is alive and ready to work!
- Combine Dry Ingredients: In a separate bowl, whisk together the flour and salt. If you’re using garlic powder and dried herbs, add them to the flour mixture now.
- Mix the Dough: Add the flour mixture to the yeast mixture. Also, add your finely minced fresh garlic and chopped fresh herbs (and olive oil, if using). Using a sturdy spoon or a Danish dough whisk, mix until a shaggy, sticky dough forms. Be careful not to overmix; we’re just aiming for everything to be combined, not a smooth, elastic dough. This is essentially a no-knead dough, which is part of its charm!
- First Rise (Bulk Fermentation): Cover the bowl with plastic wrap or a clean kitchen towel. Let the dough rise in a warm spot for 8-12 hours, or even overnight. I often just leave it on my countertop at room temperature. The long, slow rise develops incredible flavor. The dough should at least double in size and be bubbly.
- Preheat Oven & Dutch Oven: About 30-45 minutes before you’re ready to bake, place your Dutch oven (with its lid) into your oven and preheat to 450°F (232°C). It’s crucial for the Dutch oven to be screaming hot to achieve that perfect crust.
- Shape the Dough: Lightly flour a clean surface. Gently scrape the dough out of the bowl onto the floured surface. With floured hands, gently fold the edges of the dough towards the center a few times to create a rough ball shape. Don’t overwork it! Just a few gentle folds to build some tension on the surface.
- Second Rise (Proofing): Transfer the shaped dough to a piece of parchment paper. You can place the parchment paper with the dough directly into a bowl or a proofing basket for its second, shorter rise. Cover loosely with plastic wrap and let it rest for 20-30 minutes while the Dutch oven finishes preheating. This allows the dough to relax and rise a bit more.
- Bake (Covered): Carefully remove the scorching hot Dutch oven from the oven. Using the parchment paper as a sling, carefully lower the dough into the Dutch oven. Score the top of the dough a few times with a sharp knife or a razor blade (this helps control where the bread expands). Place the lid back on. Bake for 30 minutes with the lid on. The steam trapped inside the Dutch oven creates that amazing crispy crust.
- Bake (Uncovered): Remove the lid from the Dutch oven. Reduce the oven temperature to 425°F (220°C). Continue to bake for another 15-20 minutes, or until the crust is a deep golden brown and sounds hollow when tapped on the bottom. If you have an instant-read thermometer, the internal temperature should reach 200-210°F (93-99°C).
- Cool: Carefully remove the bread from the Dutch oven and transfer it to a wire rack to cool completely. This is perhaps the hardest step – resist the urge to slice into it immediately! Cooling allows the internal structure to set and prevents a gummy texture.
Tips & Suggestions
Baking this Garlic Herb Dutch Oven Bread is a rewarding experience, and a few small tricks can make all the difference in achieving a loaf that’s truly spectacular. Here are my top tips:
- Don’t Rush the Rise: The long, slow rise (bulk fermentation) is key to developing a deep, complex flavor in this no-knead style bread. While you can shorten it, giving it the full 8-12 hours, or even an overnight rest, will yield the best results. The patience pays off!
- Hot Dutch Oven is Non-Negotiable: Seriously, make sure your Dutch oven is fully preheated and piping hot before you drop the dough in. This initial blast of heat is what creates that incredible oven spring and the crackly, perfect crust. Don’t skimp on preheating time.
- Gentle Handling: Since this is a no-knead dough, you want to handle it as gently as possible during shaping. Too much handling will deflate the air bubbles that have formed during the long rise, resulting in a denser loaf. A few gentle folds are all it takes.
- Scoring for Success: Scoring the top of your dough before baking isn’t just for aesthetics; it helps control where the bread expands. If you don’t score it, the bread might burst unpredictably. A sharp knife or razor blade works best.
- The Cooling Rack is Essential: I know, it’s torture to wait, but allowing the bread to cool completely on a wire rack is vital. This prevents the bottom from becoming soggy and allows the internal moisture to redistribute, giving you the best possible texture and crumb.
- Flavor Variations: Feel free to play with your herbs! Beyond rosemary, thyme, and oregano, consider finely chopped chives, parsley, or even a touch of dried sage. For an extra punch, you could also add a sprinkle of red pepper flakes to the dough. A sprinkle of Parmesan cheese in the dough or on top during the last 10 minutes of baking is also delightful!
- Serving Suggestions: This Garlic Herb Dutch Oven Bread is perfect on its own with a smear of butter, or even a drizzle of good olive oil. It’s fantastic for dipping into soups and stews, accompanying pasta dishes, or as an elevated side for any meal. I love to serve it with a fresh caprese salad or a rich beef stew.
Storage
Once you’ve baked this delicious Garlic Herb Dutch Oven Bread, you’ll want to make sure you store it properly to keep it fresh for as long as possible. Here’s how I handle it:
- Room Temperature (Short-Term): For optimal freshness and that beautiful crust, I recommend storing your bread at room temperature. Once it has completely cooled, place the loaf in a paper bag. This allows the crust to breathe and stay crisp. For slightly longer storage (up to 2-3 days), you can store it in a clean linen bag or an airtight bread box. Avoid plastic wrap immediately after cooling, as it can trap moisture and make the crust soft. If you need to keep it for more than a day or two, you might transfer it to an airtight container or plastic bag to prevent it from drying out, though the crust will soften.
- Refrigeration: I generally do not recommend refrigerating homemade bread. The refrigerator can actually accelerate the staling process, making your bread dry and hard much faster than at room temperature.
- Freezing (Long-Term): If you won’t be finishing the loaf within a few days, freezing is an excellent option. Once the bread has completely cooled, you can freeze it whole or sliced. I often slice it first, which makes it easy to grab individual portions later. Wrap the loaf or slices tightly in plastic wrap, then an additional layer of aluminum foil, or place in a freezer-safe bag. It will keep well in the freezer for up to 3 months.
- Reheating:
- From Room Temperature: To refresh a day-old loaf, preheat your oven to 350°F (175°C). Lightly mist the bread with water and bake for 5-10 minutes, or until the crust is crisp again and the interior is warm.
- From Frozen: If reheating a whole loaf from frozen, you can let it thaw on the counter for a few hours, then refresh it in the oven as described above. Alternatively, you can bake it directly from frozen (unwrapped) in a 350°F (175°C) oven for about 20-30 minutes, or until heated through and crusty. For individual slices, you can pop them in a toaster or toast them in a hot pan.
Final Thoughts
There’s truly nothing quite like the aroma of freshly baked bread filling your home, and with the Dutch oven, achieving that professional-level crust and soft interior has never been easier. This Garlic Herb Dutch Oven Bread Recipe is more than just a loaf; it’s an experience. From the moment the enticing scent of roasted garlic and fragrant herbs begins to waft through your kitchen, you’ll know you’re in for a treat.
I genuinely believe this is a must-try recipe because it combines simplicity with incredible flavor. The Dutch oven works its magic, creating a beautifully golden, crackly crust while the inside remains wonderfully airy and infused with savory garlic and aromatic herbs. It’s perfect for slathering with butter, dipping into olive oil, or accompanying your favorite beef stew. Give the Garlic Herb Dutch Oven Bread Recipe a try – I promise you’ll be delighted by the delicious results and the sheer satisfaction of pulling a perfect loaf from your own oven. Happy baking!
Garlic Herb Dutch Oven Bread: Easy & Flavorful Loaf
This Garlic Herb Dutch Oven Bread is a simple yet flavorful loaf that will elevate your baking game. With a crackly crust and a soft, airy interior infused with garlic and fresh herbs, it’s perfect for any meal.
- Prep Time: 15 mins
- Cook Time: 45 mins
- Total Time: 1 hour
- Yield: 1 loaf 1x
- Category: Bread
- Method: Baking
- Cuisine: American
Ingredients
- 3 cups unbleached all-purpose flour
- 1 teaspoon active dry yeast
- 1 1/2 cups warm water (between 105-115°F or 40-46°C)
- 1 teaspoon fine sea salt
- 4 cloves fresh garlic, finely minced
- 2 tablespoons fresh rosemary, finely chopped
- 2 tablespoons fresh thyme, finely chopped
- 2 tablespoons fresh oregano, finely chopped
- 1–2 tablespoons extra virgin olive oil (optional)
Instructions
- In a large mixing bowl, combine the warm water and the active dry yeast. If using sugar, add a pinch here to help activate the yeast. Let it sit for 5-10 minutes until it becomes foamy.
- In a separate bowl, whisk together the flour and salt. If you're using garlic powder and dried herbs, add them to the flour mixture now.
- Add the flour mixture to the yeast mixture. Also, add your finely minced fresh garlic and chopped fresh herbs (and olive oil, if using). Using a sturdy spoon or a Danish dough whisk, mix until a shaggy, sticky dough forms.
- Cover the bowl with plastic wrap or a clean kitchen towel. Let the dough rise in a warm spot for 8-12 hours, or even overnight.
- About 30-45 minutes before you're ready to bake, place your Dutch oven (with its lid) into your oven and preheat to 450°F (232°C).
- Lightly flour a clean surface. Gently scrape the dough out of the bowl onto the floured surface. With floured hands, gently fold the edges of the dough towards the center a few times to create a rough ball shape.
- Transfer the shaped dough to a piece of parchment paper. Cover loosely with plastic wrap and let it rest for 20-30 minutes while the Dutch oven finishes preheating.
- Carefully remove the scorching hot Dutch oven from the oven. Using the parchment paper as a sling, carefully lower the dough into the Dutch oven. Score the top of the dough a few times with a sharp knife or a razor blade. Place the lid back on. Bake for 30 minutes with the lid on.
- Remove the lid from the Dutch oven. Reduce the oven temperature to 425°F (220°C). Continue to bake for another 15-20 minutes, or until the crust is a deep golden brown and sounds hollow when tapped on the bottom.
- Carefully remove the bread from the Dutch oven and transfer it to a wire rack to cool completely.
Nutrition
- Serving Size: 1 slice
- Calories: 150
- Sugar: 0 g
- Sodium: 300 mg
- Fat: 2 g
- Saturated Fat: 0 g
- Unsaturated Fat: 2 g
- Trans Fat: 0 g
- Carbohydrates: 30 g
- Fiber: 1 g
- Protein: 4 g
- Cholesterol: 0 mg
Keywords: The long, slow rise is key to developing flavor. Make sure your Dutch oven is fully preheated for the best crust. Handle the dough gently to maintain air bubbles.


Leave a Comment