One of my fondest memories as a child was sitting in my grandmother’s cozy kitchen on rainy afternoons, the air thick with the sweet aroma of cherries bubbling away on the stove. She would pull a pan of her famous cherry crumble from the oven, its golden crust glistening with melted butter and sugar. Those afternoons were a special treat, filled with laughter and the delightful anticipation of indulging in something sweet that felt like a warm hug.
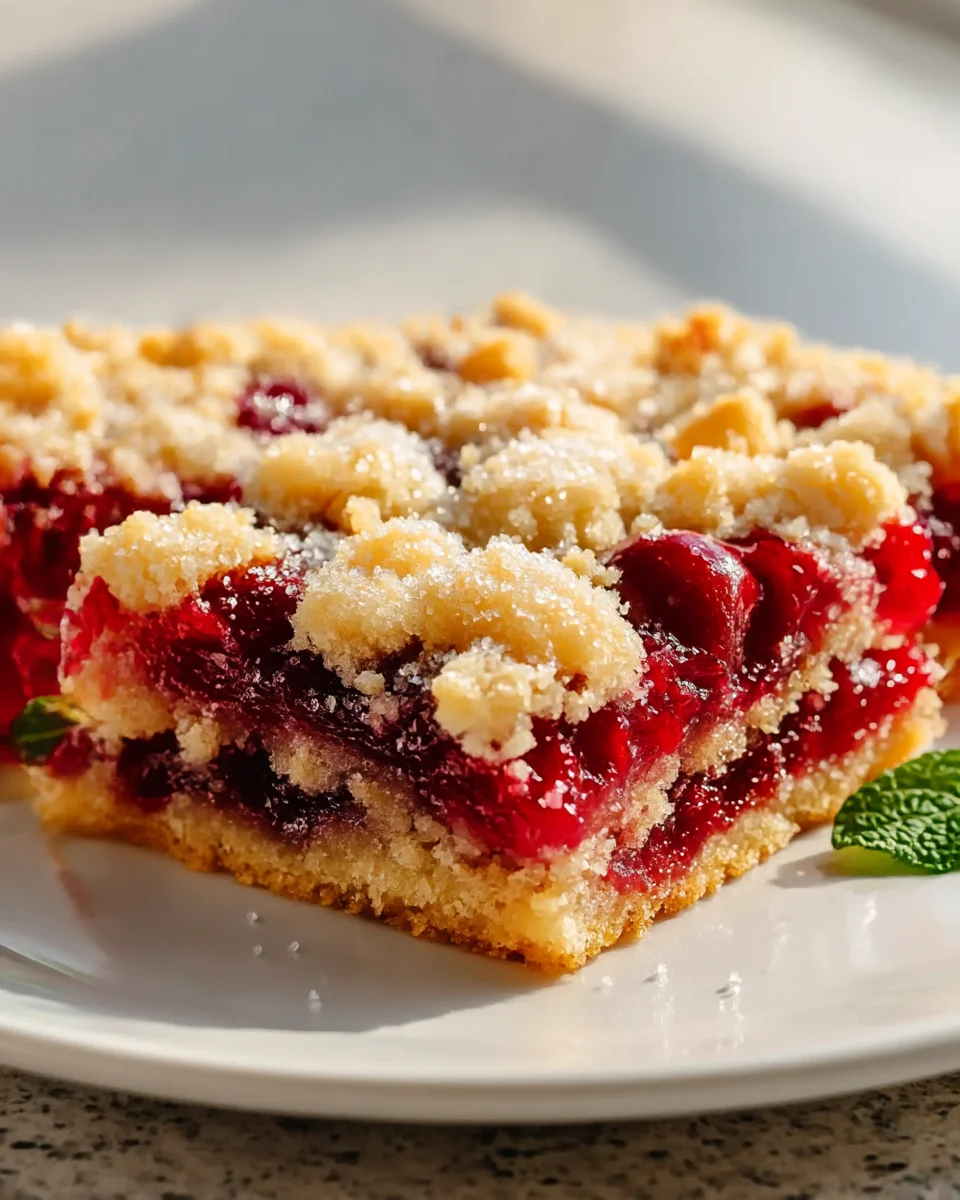
Fast forward to today, and I’ve created my own version of those cherished cherry crum extractable bars. These bars are a beautiful mosaic of vibrant red cherries nestled between layers of buttery, crumbly goodness. When you bite into them, the contrast of the soft, tangy cherries against the crunchy topping is simply irresistible. The aroma? It’s a heavenly mix of baked fruit and sweet vanilla that fills your kitchen and invites everyone in.
What makes my Quick Cherry Crum extractable Bars special is the way I’ve simplified the process without sacrificing flavor. Using fresh or even frozen cherries, they come together in a flash, ensuring that you can whip them up whenever the craving strikes. Plus, they’re easily transportable, making them perfect for gatherings or a sweet treat at home.
Let me show you exactly how to make these delightful bars, so you can create your own sweet memories.

Why You’ll Love This Recipe
- Ready in under 30 minutes with only one pan to wash, making clean-up a breeze.
- Delightfully chewy and fruity, with a crisp crumble topping that will have you reaching for seconds.
- Budget-friendly, using simple ingredients that you may already have in your pantry.
- Perfect for sharing at gatherings, but easy enough to whip up for a cozy night in.
- Use fresh cherries for a burst of summer flavor or frozen ones for year-round enjoyment!
Ingredients
- 1 3/4 cups plain white flour
- 3/4 cup granulated sugar
- 1/2 teaspoon baking powder
- 1/4 teaspoon salt
- 1/2 cup chilled butter
- 1 egg, beaten
- 2 tablespoons milk
- 2 1/4 cups cherries, pitted and fresh
- 3 tablespoons sugar
- 2 tablespoons cornflour
Let’s break down some of the key ingredients that make these Quick Cherry Crum extractble Bars so irresistible. First up, the cherries! Fresh, ripe cherries are the star of this recipe, providing a juicy, tart sweetness that balances perfectly against the sweet crumble topping. When choosing cherries, look for ones that are plump and firm with a deep, vibrant color. If fresh cherries aren’t available, feel free to use frozen cherries—just make sure to thaw and drain them well to avoid excess moisture.
Next, we have the chilled butter. Cold butter is crucial for achieving that signature crumble texture. It helps create small, flaky pieces in the topping, which is what you want for that delightful crunch. If you’re in a pinch, you can substitute the butter with an equal amount of coconut oil for a dairy-free option, though it will impart a slight coconut flavor.
Step-by-Step Instructions
- Preheat your oven to 350°F (175°C) and line an 8×8-inch baking pan with parchment paper. This will ensure easy removal of the bars later on. Make sure the paper hangs over the edges for easy lifting.
- In a large bowl, combine 1 3/4 cups of plain white flour, 3/4 cup of granulated sugar, 1/2 teaspoon of baking powder, and 1/4 teaspoon of salt. Whisk these dry ingredients together until they are evenly mixed, which should take about 1 minute.
- Cut 1/2 cup of chilled butter into small cubes and add it to the dry mixture. Using a pastry cutter or your fingertips, mix until the mixture resembles coarse crumbs. This should take about 3-4 minutes. Avoid over-mixing; you want to see small chunks of butter throughout.
- In a separate small bowl, whisk together 1 beaten egg and 2 tablespoons of milk. Pour this egg mixture into the flour mixture and stir until just combined, about 1 minute. You’ll know it’s ready when no dry flour is visible, but the mixture is still slightly crumbly.
- Spread half of the dough mixture into the prepared baking pan, pressing down firmly to form an even layer. Bake this base in the preheated oven for 10 minutes until it’s lightly golden. This step ensures a sturdy bottom layer for your bars.
- While that’s baking, prepare the cherry filling. In a medium bowl, combine 2 1/4 cups of pitted cherries, 3 tablespoons of sugar, and 2 tablespoons of cornflour. Toss until the cherries are well coated. The cornflour will help thicken the cherry juices as they bake.
- Once the crust is done, remove it from the oven and spread the cherry mixture evenly over the top. Crumble the remaining dough over the cherries, ensuring an even distribution.
- Bake the bars for an additional 22-25 minutes, or until the topping is golden brown and the cherries are bubbly. Keep an eye out for the edges turning a lovely golden color as a sign they’re done.
- Remove from the oven and allow to cool in the pan for at least 15 minutes. Then, lift the bars out using the parchment paper and let them cool completely on a wire rack before cutting into squares.
Pro Tips for the Best Quick Cherry Crum extractble Bars
- Don’t skip the chilling step for the butter! Cold butter is essential for creating a flaky texture in the crumble topping. If you forget to chill it, pop it in the freezer for about 10 minutes before you start.
- Use a sharp knife to cut the bars after they’ve cooled completely. This will help you achieve clean, neat edges instead of a crumbled mess!
- For an extra flavor boost, consider adding a teaspoon of vanilla extract to the egg mixture. It adds a lovely depth to the bars that pairs perfectly with the cherries.
- Watch your baking time closely! Ovens can vary, and overbaking can lead to a dry topping. You want the topping to be just golden and firm, not hard.
- If you prefer a thicker crumble topping, feel free to double the topping ingredients. Just remember to increase the baking time slightly to ensure it’s baked through.
Variations & Serving Ideas
If you’re looking to mix things up a bit, consider these variations for your Quick Cherry Crum extractble Bars. You can swap cherries for other fruits like blueberries or raspberries for a different flavor profile, or even use a combination of berries. For a seasonal twist, add a sprinkle of cinnamon and nutmeg for a cozy fall vibe. If you want a healthier option, try using whole wheat flour instead of plain white flour for added fiber.
When it comes to serving, these bars are delicious on their own, but they pair beautifully with a scoop of vanilla ice cream or a dollop of whipped cream. For a refreshing contrast, serve with a side of tart yogurt. They also make a lovely addition to a picnic spread, alongside a refreshing lemonade or iced tea!
Storage, Make-Ahead & Reheating
Store your Quick Cherry Crum extractble Bars in an airtight container in the fridge for up to 5 days. They can also be frozen for up to 3 months; just make sure to wrap them well in plastic wrap and then place them in a freezer-safe bag. To reheat, simply pop them in a preheated oven at 350°F (175°C) for about 10 minutes until warmed through. Interestingly, these bars taste even better the next day, as the flavors have time to meld together beautifully!
Frequently Asked Questions
Can I make Quick Cherry Crum extractble Bars ahead of time?
Yes — in fact, they taste even better the next day! Make them a day in advance and store them in the fridge. This allows the flavors to meld beautifully, enhancing their deliciousness for serving.
Can I use frozen cherries instead of fresh?
Absolutely! Frozen cherries work well in this recipe. Just make sure to thaw and drain them thoroughly to avoid excess moisture in your filling. This will ensure your bars maintain a lovely texture.
How do I know when my bars are done baking?
You’ll know your Quick Cherry Crum extractble Bars are done when the topping is golden brown and the cherry filling is bubbling at the edges. Keep an eye on them towards the end of the baking time to avoid overbaking.
What can I substitute for cornflour?
If you don’t have cornflour (cornstarch), you can use all-purpose flour as a substitute. However, cornflour is preferred for its thickening properties, which help give the filling a nice consistency.
Can I veganize this recipe?
Yes, you can easily make these bars vegan! Substitute the egg with a flax egg (1 tablespoon ground flaxseed mixed with 2.5 tablespoons water) and use vegan butter in place of regular butter. The results will be just as delightful!
Final Thoughts
The Quick Cherry Crum Extractable Bars are truly a delightful treat that combines the sweet-tart flavor of cherries with a buttery crumble, making them irresistible. They’re not only easy to prepare but also incredibly satisfying, perfect for satisfying a sweet tooth or sharing with friends.
This is the kind of recipe I come back to again and again, especially when I want to impress guests with minimal effort or when I need a quick snack for the family. The joy of pulling these warm, gooey bars from the oven is simply unmatched.
I encourage you to give these bars a try! Don’t hesitate to put your own spin on the recipe, whether it’s adding a sprinkle of nuts or experimenting with different fruits. Share your results and let me know how they turn out!
Quick Cherry Crumble Bars
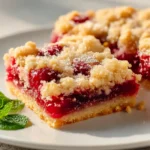
These Quick Cherry Crumble Bars are a delightful treat that combines the sweet-tart flavor of cherries with a buttery crumble. They are easy to prepare and perfect for satisfying a sweet tooth or sharing with friends.
- Prep Time: 15 mins
- Cook Time: 30 mins
- Total Time: 45 minutes
- Yield: 16 servings 1x
- Category: Dessert
- Method: Baking
- Cuisine: American
Ingredients
- 1 3/4 cups plain white flour
- 3/4 cup granulated sugar
- 1/2 teaspoon baking powder
- 1/4 teaspoon salt
- 1/2 cup chilled butter
- 1 egg, beaten
- 2 tablespoons milk
- 2 1/4 cups cherries, pitted and fresh
- 3 tablespoons sugar
- 2 tablespoons cornflour
Instructions
- Preheat your oven to 350°F (175°C) and line an 8×8-inch baking pan with parchment paper. This will ensure easy removal of the bars later on. Make sure the paper hangs over the edges for easy lifting.
- In a large bowl, combine 1 3/4 cups of plain white flour, 3/4 cup of granulated sugar, 1/2 teaspoon of baking powder, and 1/4 teaspoon of salt. Whisk these dry ingredients together until they are evenly mixed, which should take about 1 minute.
- Cut 1/2 cup of chilled butter into small cubes and add it to the dry mixture. Using a pastry cutter or your fingertips, mix until the mixture resembles coarse crumbs. This should take about 3-4 minutes. Avoid over-mixing; you want to see small chunks of butter throughout.
- In a separate small bowl, whisk together 1 beaten egg and 2 tablespoons of milk. Pour this egg mixture into the flour mixture and stir until just combined, about 1 minute. You’ll know it’s ready when no dry flour is visible, but the mixture is still slightly crumbly.
- Spread half of the dough mixture into the prepared baking pan, pressing down firmly to form an even layer. Bake this base in the preheated oven for 10 minutes until it’s lightly golden. This step ensures a sturdy bottom layer for your bars.
- While that’s baking, prepare the cherry filling. In a medium bowl, combine 2 1/4 cups of pitted cherries, 3 tablespoons of sugar, and 2 tablespoons of cornflour. Toss until the cherries are well coated. The cornflour will help thicken the cherry juices as they bake.
- Once the crust is done, remove it from the oven and spread the cherry mixture evenly over the top. Crumble the remaining dough over the cherries, ensuring an even distribution.
- Bake the bars for an additional 22-25 minutes, or until the topping is golden brown and the cherries are bubbly. Keep an eye out for the edges turning a lovely golden color as a sign they're done.
- Remove from the oven and allow to cool in the pan for at least 15 minutes. Then, lift the bars out using the parchment paper and let them cool completely on a wire rack before cutting into squares.
Nutrition
- Serving Size: 1 bar
- Calories: 200
- Sugar: 15 g
- Sodium: 150 mg
- Fat: 8 g
- Saturated Fat: 5 g
- Unsaturated Fat: 3 g
- Trans Fat: 0 g
- Carbohydrates: 30 g
- Fiber: 1 g
- Protein: 2 g
- Cholesterol: 30 mg
Keywords: Don’t skip the chilling step for the butter! Cold butter is essential for creating a flaky texture in the crumble topping. Use a sharp knife to cut the bars after they’ve cooled completely for clean edges.
Leave a Comment