Homemade Jam Donut Focaccia offers a culinary adventure that promises to transform your perception of both beloved baked goods. Have you ever dreamt of a dish that marries the airy, olive oil-rich texture of a classic Italian focaccia with the comforting, sweet embrace of a warm, jam-filled donut? Prepare to have your taste buds tantalized and your expectations delightfully subverted! This isn’t just a recipe; it’s an innovation, a respectful nod to tradition as it beautifully bridges two distinct culinary worlds, and a bold step into extraordinary flavor combinations. I’m truly excited for you to discover this unique creation.
Why This Fusion Focaccia Will Capture Your Heart (and Stomach!)
I understand that the idea of a sweet focaccia, especially one inspired by donuts, might seem unconventional at first. However, the true genius of this creation lies in its harmonious blend. We’ve taken the light, dimpled dough that makes traditional focaccia so irresistible and infused it with just the right amount of sweetness, before dotting it generously with pockets of vibrant, fruity jam. The result is a truly extraordinary treat that delivers a soft, chewy crumb with surprising bursts of sweet fruitiness, all without the need for deep frying. People are falling in love with this dish because it’s a revelation – offering the satisfying chew of a freshly baked focaccia coupled with the nostalgic sweetness of a favorite jam donut. It’s perfect for a unique brunch, a delightful dessert, or a show-stopping treat to share. Trust me, once you experience the sheer joy of this incredible Homemade Jam Donut Focaccia, you’ll wonder how you ever lived without it.

Ingredients:
-
For the Focaccia Dough:
- Warm Water: 400ml (about 1 ½ cups plus 2 tablespoons), ideally between 105-115°F (40-46°C). This temperature is crucial for activating the yeast properly.
- Active Dry Yeast: 7g (or 2 ¼ teaspoons), one standard packet. Make sure it’s fresh for the best rise!
- Granulated Sugar: 1 tablespoon, to feed our hungry yeast and give a hint of sweetness to the dough.
- All-Purpose Flour: 500g (about 4 cups), plus extra for dusting. I always recommend weighing flour for accuracy.
- Fine Sea Salt: 1 ½ teaspoons, to balance the flavors beautifully.
- Olive Oil: 60ml (about ¼ cup), plus an additional 2-3 tablespoons for greasing the bowl and drizzling on top. Good quality olive oil makes a difference!
-
For the Jam Filling:
- Strawberry Jam: 250g (about 1 cup). I absolutely adore a good quality, slightly chunky strawberry jam for this, but feel free to pick your favorite berry jam – raspberry or apricot would also be divine!
-
For the Donut Coating:
- Unsalted Butter: 60g (about ¼ cup), melted. This is what helps the sugar coating stick.
- Granulated Sugar: 100g (about ½ cup).
- Ground Cinnamon: 1 teaspoon. The classic jam donut flavor just wouldn’t be complete without it!
Making the Focaccia Dough
-
Activate the Yeast:
To kick things off, we need to wake up our yeast! In a large mixing bowl, pour in your warm water. It’s really important that the water isn’t too hot (which could kill the yeast) or too cold (which won’t activate it). Aim for that perfect bathwater temperature, between 105-115°F (40-46°C). Sprinkle the 1 tablespoon of granulated sugar and your active dry yeast over the warm water. Give it a gentle stir and then let it sit for about 5-10 minutes. You’ll know it’s working its magic when you see a lovely foamy layer develop on the surface – this tells us our yeast is alive and ready to make our focaccia wonderfully airy! If you don’t see any foam, your yeast might be old, or the water temperature wasn’t quite right, and it would be best to start again with fresh yeast. -
Combine Dry Ingredients:
While the yeast is blooming, in a separate, even larger bowl, whisk together your 500g of all-purpose flour and the 1 ½ teaspoons of fine sea salt. Whisking ensures an even distribution of the salt throughout the flour, preventing pockets of blandness or over-salted areas. -
Mix Wet and Dry Ingredients:
Once your yeast mixture is beautifully foamy, pour it into the bowl with your flour and salt. Add the 60ml (¼ cup) of olive oil. Now, using a sturdy wooden spoon or a spatula, start mixing everything together. It will look quite shaggy and sticky at first, and that’s exactly what we want. Keep mixing until all the flour is hydrated and you have a cohesive, although still rough, dough. -
Knead the Dough:
This dough is quite wet, so traditional hand kneading can be a bit messy but incredibly rewarding. You can either transfer it to a lightly floured surface or, if you’re using a stand mixer with a dough hook, let the machine do the work for you.If kneading by hand: Lightly flour your work surface. Scrape the dough out onto it. We’re not looking for a perfectly smooth dough right away. Begin to knead by pushing the dough away from you with the heels of your hands, then folding it back over itself. It will be sticky, so resist the urge to add too much extra flour, as this can make your focaccia tough. A bench scraper can be a great tool to help gather the sticky dough. Continue kneading for about 8-10 minutes. You’ll notice a significant change in the dough’s texture: it will become much smoother, more elastic, and less sticky, passing the “windowpane test” (where you can stretch a small piece thin enough to see light through it without tearing). This gluten development is key to the focaccia’s signature chewy texture.
If using a stand mixer: Attach the dough hook and knead on medium-low speed for about 7-9 minutes. The dough should gather around the hook and pull away from the sides of the bowl.
-
First Proof (Bulk Fermentation):
Lightly grease a clean large bowl with about 1 tablespoon of olive oil. Transfer your kneaded dough into the bowl, turning it once to coat the entire surface with oil. This prevents it from drying out and sticking. Cover the bowl tightly with plastic wrap or a clean kitchen towel. Place it in a warm, draft-free spot in your kitchen. I sometimes warm my oven slightly and then turn it off, letting the residual heat create a perfect proofing environment. Let the dough rise for 1 to 1 ½ hours, or until it has noticeably doubled in size. This first proof is where a lot of flavor develops, so don’t rush it! You’ll see beautiful bubbles forming, indicating all that lovely yeast activity.
Preparing the Jam Filling
-
Prepare the Jam:
While your dough is undergoing its first proof, you can get your jam ready. If your jam is very thick or contains large fruit pieces, you might want to gently warm it in a small saucepan over low heat for a few minutes, stirring occasionally, just until it becomes a bit more fluid and easier to work with. If it’s already a good, spreadable consistency, you can simply spoon it into a piping bag (with a round tip, if you have one, or just snip a corner off a Ziploc bag) or keep it in a bowl with a spoon ready for later.
Shaping and Second Proofing
-
Prepare Your Baking Pan:
Generously grease a 9×13 inch (23×33 cm) baking pan with about 1 tablespoon of olive oil. Ensure the sides are well-coated too. You can also line it with parchment paper for easier cleanup, but make sure to still oil the parchment as focaccia loves a good oily base. -
Transfer and Gently Shape the Dough:
Once your dough has doubled, gently punch it down to release the air. This isn’t a violent punch, just a light pressing to deflate it. Carefully scrape the dough out of the bowl and transfer it into your prepared baking pan. Pour another tablespoon of olive oil over the dough. Now, using your fingertips, gently start to spread and stretch the dough to fill the pan. It’s okay if it doesn’t stretch all the way at first; dough can be stubborn. Let it rest for 5-10 minutes if it resists, then come back and continue stretching. Be gentle to avoid tearing the delicate gluten structure you’ve worked so hard to build. The olive oil on top will help prevent your fingers from sticking. -
Create Indentations and Add Jam:
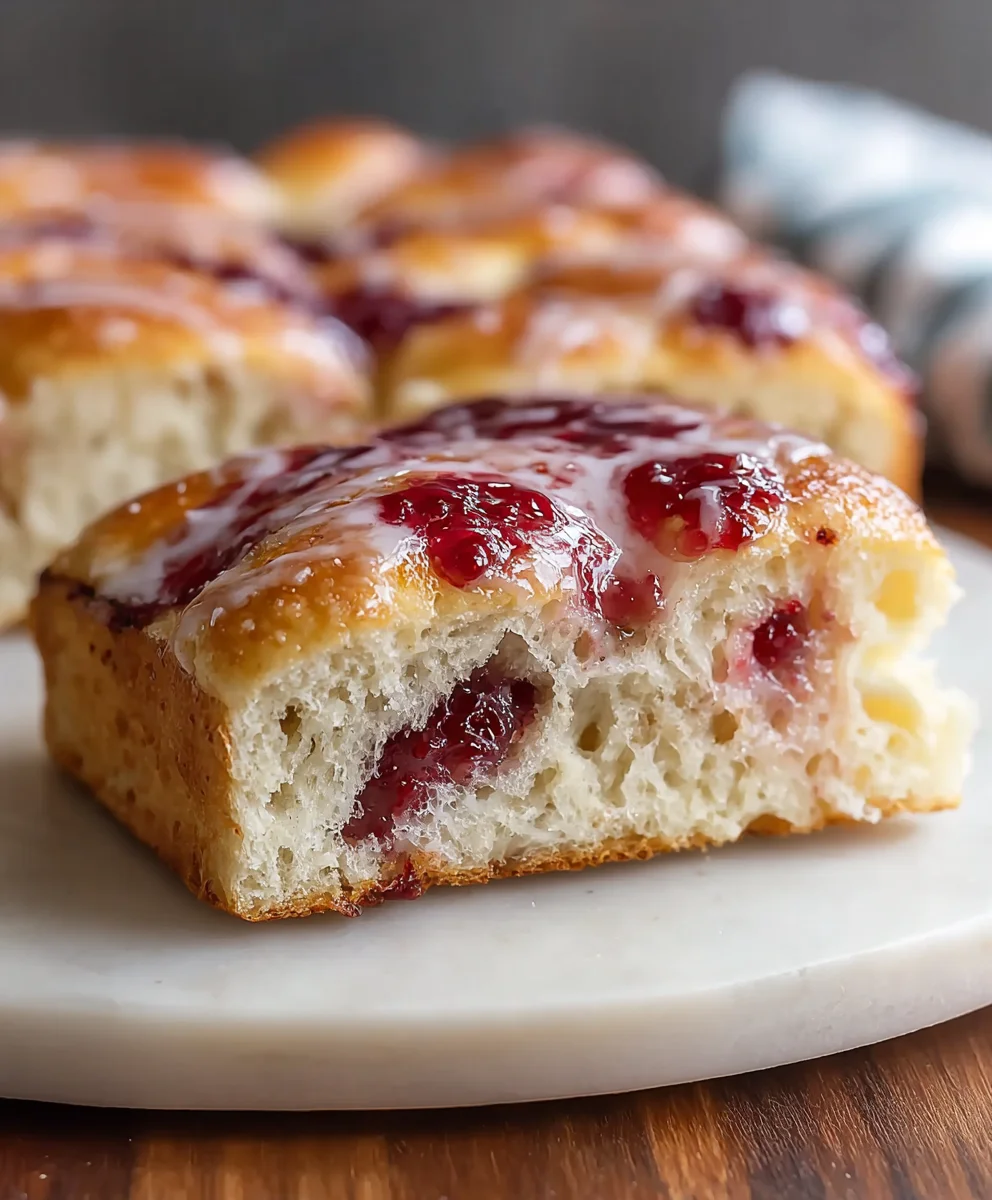
Once the dough is mostly spread out in the pan, it’s time for the signature focaccia dimples! Using all your fingertips, press firmly but gently down into the dough, creating deep indentations. Don’t press all the way through to the bottom of the pan, but aim for a good, deep dimple. Leave some space between them. Now, into some of these dimples (not all, we want some plain dough showing through!), dollop or pipe about a tablespoon of your prepared jam. You can alternate, leaving some dimples empty or filling them with more oil if you prefer, but for our jam donut focaccia, we want those bursts of fruity sweetness! -
Second Proof:
Once the jam is in place, cover the baking pan loosely with plastic wrap or a clean kitchen towel. Let the focaccia dough rise for another 30-45 minutes in a warm spot. During this second proof, the dough will puff up again, becoming airy and light, and the jam will nestle even further into its little pockets. This is a critical step for a light and tender crumb.
Baking the Focaccia
-
Preheat Oven:
About 15 minutes before the end of the second proof, preheat your oven to 400°F (200°C). Make sure your oven rack is in the middle position. -
Bake the Focaccia:
Carefully remove the cover from your focaccia. Place the pan in the preheated oven. Bake for 20-25 minutes, or until the focaccia is beautifully golden brown on top and the jam is bubbling invitingly. The crust should sound hollow when tapped. Keep an eye on it; ovens can vary, so adjust baking time as needed. -
Cool Slightly:
Once baked, carefully remove the focaccia from the oven. Let it cool in the pan for about 5-10 minutes. This helps it set and makes it easier to transfer. -
Transfer to a Wire Rack:
After a brief rest, gently lift the focaccia out of the pan and transfer it to a wire rack to cool completely. This prevents the bottom from becoming soggy.
The Jam Donut Coating
-
Prepare the Coating Mixture:
While the focaccia is cooling, prepare your donut coating. In a small bowl, melt your 60g of unsalted butter. In another small bowl, whisk together the 100g of granulated sugar and the 1 teaspoon of ground cinnamon until well combined. This is going to give us that iconic donut flavor! -
Coat the Focaccia:
Once the focaccia is completely cooled (or at least still slightly warm, but not hot), generously brush the entire top surface with the melted butter. You want a good, even coating, as this is what helps the sugar stick. Immediately after brushing with butter, sprinkle the cinnamon sugar mixture all over the top. Make sure to get every nook and cranny, ensuring a delicious sugary crust with every bite. Don’t be shy with the sugar; this is what transforms it into a true “jam donut” experience!
Serving Your Homemade Jam Donut Focaccia
-
Slice and Serve:
Once coated, your Homemade Jam Donut Focaccia is ready to be devoured! I like to cut it into squares or rectangles, making sure each piece gets a good dollop of jam and plenty of that sweet, cinnamon-spiced crust. -
Enjoy!
Serve it warm or at room temperature. It’s absolutely perfect with a cup of coffee or tea, or even as a delightful dessert. The combination of soft, airy focaccia with sweet jam and a crunchy, buttery cinnamon sugar coating is truly irresistible. -
Storage:
If, by some miracle, you have any leftovers, store them in an airtight container at room temperature for up to 2 days. The focaccia is best enjoyed fresh on the day it’s made, as the coating can become slightly less crisp over time, but it still tastes wonderful. You can gently warm it in a low oven for a few minutes to refresh it.
Conclusion:
Okay, so we’ve journeyed together through the delightful process of creating something truly extraordinary. This isn’t just another bread recipe; it’s a culinary adventure that takes familiar comforts and melds them into an unforgettable experience. The sheer joy of pulling a golden-brown slab of focaccia from the oven, its surface shimmering with sweet jam and dusted with a delicate sugar coating, is an unparalleled feeling. It’s the kind of dish that stops conversations and starts new ones, as people marvel at its unique concept. What makes this recipe an absolute must-try? It’s the audacious yet harmonious blend of textures and flavors. Imagine the light, airy chewiness of a perfectly proofed focaccia, a bread known for its savory versatility, now transformed into a sweet canvas. Then, picture that familiar, comforting burst of fruity jam, traditionally found nestled within a fluffy donut, generously swirled across its tender surface.
The result is a symphony for your taste buds: the subtle saltiness of the bread cutting through the sweetness of the jam, creating a balanced profile that’s neither too rich nor too bland. It’s a delightful paradox, a sweet bread that somehow manages to feel both indulgent and surprisingly light. This isn’t just dessert; it’s an experience, a statement piece for any table, proving that sometimes, the most unexpected combinations yield the most spectacular results.
Now that you’ve mastered this masterpiece, how best to enjoy it? While it’s utterly fantastic on its own, still slightly warm from the oven, there are so many ways to elevate your experience. For a truly luxurious breakfast or brunch spread, serve generous slices alongside a piping hot cup of coffee or a fragrant tea. The robust flavors of a strong brew beautifully complement the sweetness of the jam and the subtle yeastiness of the bread. Imagine a lazy Sunday morning, the aroma of freshly baked focaccia filling your home, inviting everyone to gather.
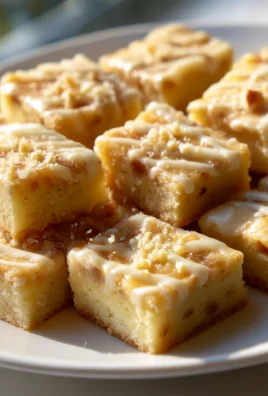
But its charm isn’t limited to the morning. This versatile creation also shines as an afternoon treat, perhaps with a dollop of clotted cream or a scoop of vanilla bean ice cream for an extra touch of indulgence, transforming it instantly into an exquisite dessert. Think about serving it at your next garden party or as a delightful surprise at a potluck. And the beauty of baking is in the improvisation! Don’t feel confined to one type of jam. While classic strawberry or raspberry are undeniably delicious, why not experiment? A vibrant apricot jam would offer a delicate tang, while a rich mixed berry blend could provide layers of fruity complexity. For an extra burst of freshness, consider stirring a little lemon or orange zest into your chosen jam before swirling it onto the dough. If you’re feeling adventurous, a thin layer of sweetened cream cheese or even a simple vanilla glaze drizzled over the top once cooled could add another dimension of flavor and visual appeal. Or, for a classic donut finish, a generous dusting of cinnamon sugar or fine powdered sugar just before serving adds that iconic touch and makes every bite feel even more special. The possibilities are truly endless, limited only by your imagination and the contents of your pantry!
So there you have it – a recipe that promises to surprise, delight, and become an instant favorite. My greatest hope is that you’ll embrace the adventure of baking this unique treat. This Homemade Jam Donut Focaccia isn’t just food; it’s an expression of culinary creativity and a testament to the joy of unexpected flavors. Don’t hesitate, grab your ingredients, and prepare to fill your kitchen with the most incredible aromas. I genuinely believe that once you try this recipe, you’ll wonder how you ever lived without it.
Once you’ve experienced the magic for yourself, I would absolutely love to hear about it! Please, share your baking journey with me and our community. Did you try a different jam? Did you serve it with a special accompaniment? What did your friends and family think? Your insights, your photos, and your triumphs inspire us all. Let’s celebrate the joy of baking together. Happy baking, everyone! I can’t wait to see your delicious creations!

Homemade Jam Donut Focaccia
Homemade Jam Donut Focaccia offers a culinary adventure that promises to transform your perception of both beloved baked goods. This innovation marries the airy, olive oil-rich texture of a classic Italian focaccia with the comforting, sweet embrace of a warm, jam-filled donut, delivering a soft, chewy crumb with surprising bursts of sweet fruitiness without deep frying.
Ingredients
-
1 3/4 cups warm water (105-115°F)
-
2 tsp granulated sugar
-
1 packet active dry yeast
-
2 cups bread flour
-
2 cups all-purpose flour
-
2 tsp fine sea salt
-
6 tbsp olive oil, divided
-
1 jar raspberry preserves (Bonne Maman or similar)
-
2 cups confectioners’ sugar
-
2-4 tbsp whole milk (or as needed for consistency)
Instructions
-
Step 1
In a large bowl, combine warm water, 2 tsp granulated sugar, and yeast. Stir gently and let sit 5-10 minutes until foamy. -
Step 2
In a separate large bowl, whisk together bread flour, all-purpose flour, and 2 tsp fine sea salt. -
Step 3
Pour the foamy yeast mixture and 4 tbsp olive oil into the dry ingredients. Mix with a sturdy spoon until all flour is hydrated and a cohesive, rough dough forms. -
Step 4
Knead dough by hand (8-10 min) or with a stand mixer (7-9 min) until smooth and elastic, passing the windowpane test. -
Step 5
Lightly grease a clean large bowl with 1 tbsp olive oil. Place the dough in the bowl, turn to coat, then cover tightly. Let rise in a warm, draft-free spot for 1 to 1.5 hours, or until doubled in size. -
Step 6
Get your raspberry preserves ready for dolloping or piping into the focaccia. Warm gently if very thick. -
Step 7
Generously grease a 9×13 inch (23×33 cm) baking pan with the remaining 1 tbsp olive oil. (Optionally line with parchment paper first). -
Step 8
Gently punch down the risen dough to deflate it. Transfer to the prepared baking pan and gently stretch it with your fingertips to fill the pan. Ensure the dough surface is coated with the pan oil for easy dimpling. -
Step 9
Using your fingertips, create deep indentations in the dough. Dollop about a tablespoon of raspberry preserves into some of these dimples. -
Step 10
Loosely cover the baking pan with plastic wrap or a kitchen towel. Let the dough rise for another 30-45 minutes in a warm spot. -
Step 11
About 15 minutes before the second proof ends, preheat your oven to 400°F (200°C) with the rack in the middle position. -
Step 12
Carefully remove the cover and place the pan in the preheated oven. Bake for 20-25 minutes, or until golden brown and the jam is bubbling. -
Step 13
Remove from oven and let cool in the pan for 5-10 minutes. -
Step 14
Gently lift the focaccia onto a wire rack to cool completely. -
Step 15
In a small bowl, whisk together confectioners’ sugar and 2-4 tbsp whole milk until a smooth, pourable glaze forms. -
Step 16
Once the focaccia is completely cooled, drizzle or spread the prepared glaze evenly over the top surface. -
Step 17
Cut the glazed focaccia into squares or rectangles. Serve warm or at room temperature. -
Step 18
Store any leftovers in an airtight container at room temperature for up to 2 days. Best enjoyed fresh. Can be gently warmed to refresh.
Important Information
Nutrition Facts (Per Serving)
It is important to consider this information as approximate and not to use it as definitive health advice.
Allergy Information
Please check ingredients for potential allergens and consult a health professional if in doubt.


Leave a Comment