Fruity Pebbles Cheesecake Tacos?utm_source=pinjwd
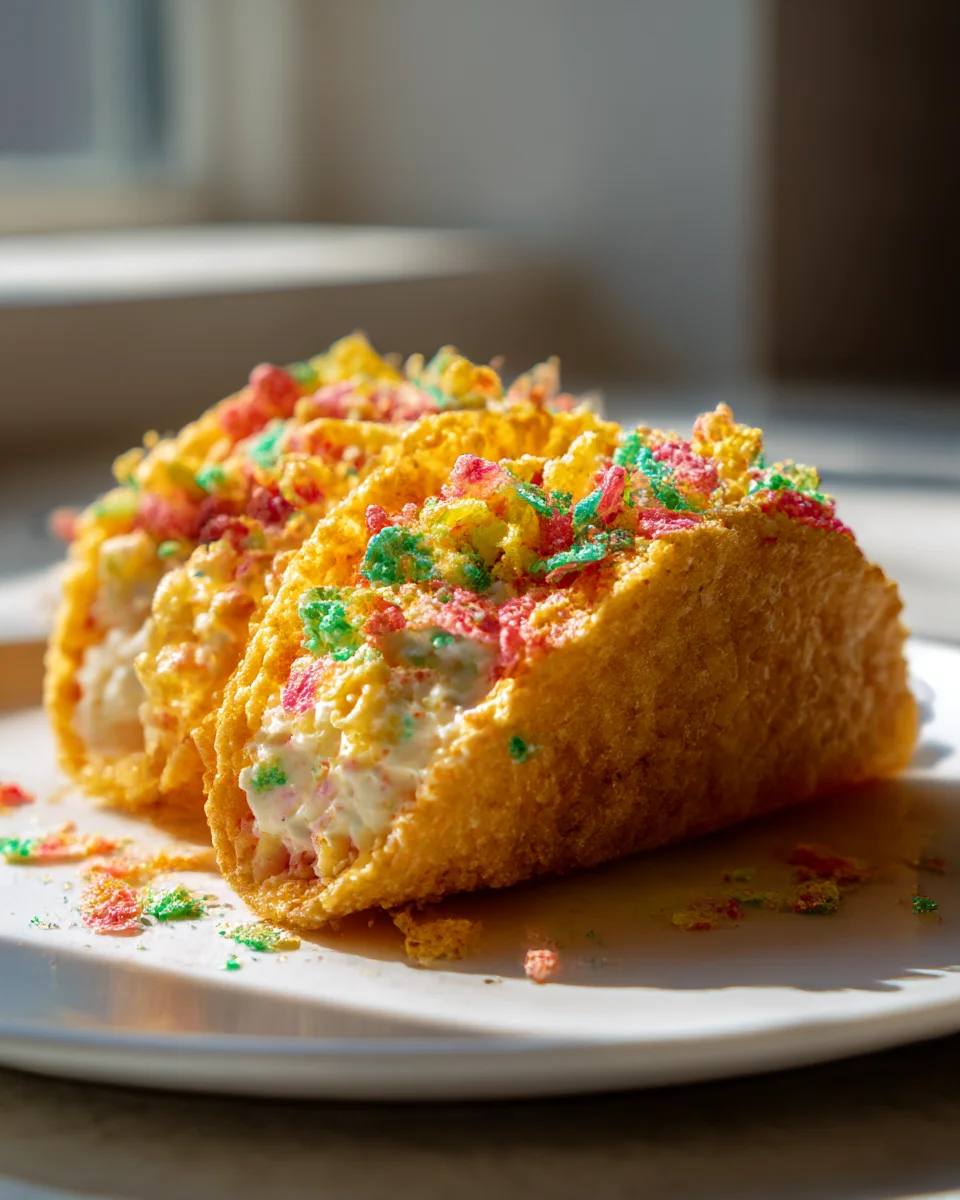
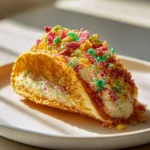
Oh my goodness, get ready for a dessert experience like no other! I am absolutely thrilled to introduce you to a recipe that will bring pure joy and a burst of color to your kitchen: Fruity Pebbles Cheesecake Tacos?utm_source=pinjwd. This isn’t just any dessert; it’s a playful revolution, a whimsical mashup that takes everything you love about creamy, tangy cheesecake, childhood nostalgia, and the sheer fun of a handheld treat, and combines it into one unforgettable bite. What makes this recipe so incredibly special? Well, for starters, it’s the ingenious fusion! We’re talking about crisp, sweet ‘taco shells’ – imagine a delightful crunch that perfectly contrasts with the velvety smooth cheesecake filling inside. But the real showstopper, the vibrant crown jewel, is the generous shower of colorful Fruity Pebbles cereal that adorns each taco. It’s a feast for the eyes as much as it is for the taste buds!
I know you’re going to absolutely adore these because they’re not just ridiculously delicious, they’re an experience. They’re a conversation starter at any party, an instant mood-lifter, and a fantastic way to recapture the simple joy of your favorite breakfast cereal in an entirely new, sophisticated, yet incredibly fun way. Imagine biting into that perfect balance of creamy, crunchy, sweet, and tangy, all wrapped up in a delightfully portable package. Get ready to impress everyone (and yourself!) with this fantastically creative and utterly delicious dessert that brings a smile to every single face.

Oh my goodness, get ready for a dessert experience that’s as fun to make as it is to eat! When I first dreamed up these Fruity Pebbles Cheesecake Tacos, I knew they had to be something special. We’re talking crispy, sweet “taco” shells hugging a creamy, dreamy cheesecake filling, all generously coated with the vibrant, crunchy magic of Fruity Pebbles cereal. It’s a whimsical, colorful, and utterly delicious treat that brings together two of my favorite things: no-bake cheesecake and the nostalgic joy of a classic breakfast cereal. Trust me, these are going to be a huge hit at your next gathering, or simply a delightful indulgence for yourself!
Ingredient Notes
Creating these delightful Fruity Pebbles Cheesecake Tacos involves a few key components, each playing an important role in the final flavor and texture. Here’s what you’ll need and some thoughts on substitutions:
- For the Sweet “Taco” Shells: I usually reach for small flour tortillas, often labeled “street taco” size. They fry up beautifully and are easy to shape. You’ll also need granulated sugar and a touch of ground cinnamon to give them that irresistible churro-like coating, along with a neutral oil for frying, like vegetable, canola, or even coconut oil.
- Substitutions: If you don’t have flour tortillas, you could experiment with large wonton wrappers for smaller, crispier bites, or even homemade crepes cut into rounds. For a less traditional but equally delicious shell, consider using a store-bought waffle cone material, gently softened and shaped.
- For the Creamy No-Bake Cheesecake Filling: This is the heart of our taco! You’ll need a block of full-fat cream cheese, softened to room temperature, which is crucial for a smooth filling. Confectioners’ sugar (also known as powdered sugar) is key for sweetness and a silky texture. Pure vanilla extract adds warmth, and heavy cream, whipped to stiff peaks, gets folded in to create that light, airy, yet rich cheesecake consistency we all adore. A tablespoon or two of milk can help if the mixture seems too thick.
- Substitutions: While full-fat cream cheese truly delivers the best texture, Neufchâtel cheese can be used for a slightly lighter option, though the filling might be a touch less firm. For a dairy-free alternative, you could try a vegan cream cheese substitute and whip up a can of chilled full-fat coconut cream instead of heavy cream. Ensure all dairy-free options are well-chilled before whipping.
- For the Fruity Pebbles Crunch: This is where the magic happens! A generous amount of Fruity Pebbles cereal is essential. We’ll use some to coat the shells and some for sprinkling on top.
- Substitutions: While Fruity Pebbles are iconic for this recipe, you could experiment with other colorful cereals like Trix, or even crush up some Lucky Charms marshmallows for a different kind of whimsy. However, nothing quite matches the vibrant look and specific crunch of Fruity Pebbles.
- For Garnish (Optional but Recommended!): A dollop of extra whipped cream on top, a final sprinkle of Fruity Pebbles, and perhaps a drizzle of melted white chocolate really elevate these tacos visually and texturally.
Step-by-Step Instructions
Let’s get cooking! Follow these steps to create your own batch of incredible Fruity Pebbles Cheesecake Tacos:
- Prepare the No-Bake Cheesecake Filling: In a large mixing bowl, beat the softened full-fat cream cheese with an electric mixer until it’s super smooth and fluffy, with no lumps. Gradually add the confectioners’ sugar, beating until fully incorporated and creamy. Stir in the vanilla extract. In a separate, chilled bowl, whip the heavy cream until stiff peaks form. Gently fold the whipped cream into the cream cheese mixture until just combined. Be careful not to overmix, or you’ll lose that lovely airy texture. Cover the bowl and refrigerate for at least 30 minutes to allow it to firm up slightly, making it easier to pipe.
- Make the Sweet “Taco” Shells: In a shallow dish, combine the granulated sugar and ground cinnamon (if using). Heat about 1 inch of neutral oil in a small, sturdy pot or deep skillet over medium heat until it reaches about 350-375°F (175-190°C). Carefully place one flour tortilla into the hot oil. Fry for about 15-30 seconds per side, until golden brown and slightly crisp.
- Shape the Shells: As soon as you remove a tortilla from the oil, immediately transfer it to a wire rack lined with paper towels to drain excess oil. While it’s still hot and pliable (but cool enough to handle), gently drape it over a rolling pin, a taco stand, or even the handle of a wooden spoon to create the taco shape. Press gently to help it hold its form as it cools and crisps up. Repeat with the remaining tortillas.
- Coat the Shells with Cereal: Once the shaped shells have cooled completely and are crisp, it’s time for the Fruity Pebbles! You can do this in two ways: either brush a thin layer of melted white chocolate (or a simple glaze made from powdered sugar and milk) on the outside of the shell and immediately press it into a bowl of Fruity Pebbles, or you can gently spread a very thin layer of the cheesecake filling itself on the outside before pressing into the cereal. I personally love the white chocolate method for maximum adhesion and extra sweetness! Place the coated shells on a clean tray.
- Assemble Your Tacos: Remove the chilled cheesecake filling from the refrigerator. You can either spoon it into a piping bag fitted with a large star tip (for a pretty presentation) or simply use a spoon. Carefully fill each Fruity Pebbles-coated taco shell with the cheesecake filling. Don’t overfill, but make sure they’re generously packed!
- Garnish and Serve: For the final flourish, I like to add a small dollop of whipped cream on top of the filling in each taco. Then, sprinkle generously with even more fresh Fruity Pebbles cereal. If you’re feeling extra fancy, a light drizzle of melted white chocolate over the top looks absolutely stunning. Serve immediately and watch them disappear!
Tips & Suggestions
To ensure your Fruity Pebbles Cheesecake Tacos are an absolute triumph, here are a few extra tips and suggestions I’ve picked up along the way:
- Shaping Perfection: The trickiest part might be shaping the shells. Work quickly after frying while the tortillas are still hot and flexible. If you don’t have a taco stand, a wooden spoon laid across two glasses, or even just letting them cool slightly folded in half on a wire rack can work. Don’t worry if they’re not all perfectly identical; homemade charm is part of their appeal!
- Cereal Crunch Control: To keep your Fruity Pebbles as crunchy as possible, coat the shells just before filling, or even just before serving. If they sit on the filling for too long, they might start to soften. For an extra textural surprise, you could even fold a small amount of crushed Fruity Pebbles directly into the cheesecake filling itself!
- Make-Ahead Magic: You can prepare the cheesecake filling a day in advance and store it in an airtight container in the fridge. The fried and shaped taco shells can also be made a day ahead and stored in an airtight container at room temperature. This way, assembly day is a breeze! Just don’t coat them with cereal until closer to serving time.
- Flavor Variations: Don’t limit yourself! While Fruity Pebbles are stellar, imagine these with crushed Oreos, Golden Grahams, or even a mix of sprinkles. You could also infuse your cheesecake filling with a different flavor, like a little lemon zest or cocoa powder for a chocolate version. The possibilities are endless!
- Serving Presentation: These tacos are naturally vibrant and fun. Arrange them on a colorful platter, or for individual servings, place them on small plates. They’re perfect for parties, brunches, or just a fun dessert night at home.
Storage
While these Fruity Pebbles Cheesecake Tacos are best enjoyed fresh for maximum crispiness and vibrant color, I understand you might have leftovers or want to prepare some in advance. Here’s my advice:
- Assembled Tacos: If you have fully assembled tacos remaining, store them in an airtight container in the refrigerator. However, please note that the cereal coating and the taco shells will inevitably soften over time due to the moisture from the cheesecake filling. They’ll still be delicious for up to 1-2 days, but they won’t have that initial crispness. I recommend eating them within 24 hours for the best experience.
- Components Separately: This is my preferred method for longer storage or making ahead.
- Cheesecake Filling: The no-bake cheesecake filling can be stored in an airtight container in the refrigerator for up to 3-4 days. Give it a quick whisk before using if it seems to have settled.
- Sweet “Taco” Shells: The fried, shaped, and coated (with white chocolate/glaze) shells can be stored in an airtight container at room temperature for up to 2-3 days. To help maintain their crispness, you can place a piece of paper towel at the bottom of the container. If they lose a little crispness, a quick 1-2 minute reheat in a toaster oven (without the cereal, if possible, or very gently) might help, but be careful not to burn them.
- Fruity Pebbles: Keep the cereal in its original sealed box or an airtight container at room temperature to prevent it from going stale.
- Reassembly: If storing components separately, simply fill and garnish the shells with the chilled cheesecake filling and fresh Fruity Pebbles right before serving. This ensures the best texture and visual appeal.
Final Thoughts
I just know you’re going to adore these Fruity Pebbles Cheesecake Tacos?utm_source=pinjwd! They’re not just a dessert; they’re an experience that playfully combines the nostalgic crunch of your favorite cereal with the rich, creamy decadence of cheesecake, all wrapped up in a fun taco shape. That vibrant pop of color from the Fruity Pebbles, paired with the cool, tangy cheesecake filling, creates a truly unique texture and flavor profile you simply have to taste to believe.
If you’re looking for a treat that stands out, sparks joy, and offers an unexpected twist on dessert, then making these Fruity Pebbles Cheesecake Tacos?utm_source=pinjwd is an absolute must. Trust me, once you take that first delightful bite, you’ll understand why this recipe is destined to become a new favorite in your culinary repertoire. Go ahead, dive in and create some edible happiness!
Amazing Fruity Pebbles Cheesecake Tacos for a Sweet Treat!
Experience a delightful fusion of creamy cheesecake and crispy taco shells, all topped with colorful Fruity Pebbles. These Fruity Pebbles Cheesecake Tacos are not just a dessert; they are a whimsical treat that brings joy to any gathering!
- Prep Time: 30 mins
- Cook Time: 15 mins
- Total Time: 45 minutes
- Yield: 12 tacos
- Category: Dessert
- Method: No-Bake
- Cuisine: American
Ingredients
- Small flour tortillas (street taco size)
- Granulated sugar
- Ground cinnamon
- Neutral oil (vegetable, canola, or coconut oil)
- Block of full-fat cream cheese, softened to room temperature
- Confectioners' sugar (powdered sugar)
- Pure vanilla extract
- Heavy cream, whipped to stiff peaks
- Milk (1-2 tablespoons, if needed)
- Generous amount of Fruity Pebbles cereal
- Whipped cream (for garnish, optional)
- Melted white chocolate (for garnish, optional)
Instructions
- Prepare the No-Bake Cheesecake Filling: In a large mixing bowl, beat the softened full-fat cream cheese with an electric mixer until it's super smooth and fluffy, with no lumps. Gradually add the confectioners' sugar, beating until fully incorporated and creamy. Stir in the vanilla extract. In a separate, chilled bowl, whip the heavy cream until stiff peaks form. Gently fold the whipped cream into the cream cheese mixture until just combined. Cover the bowl and refrigerate for at least 30 minutes to allow it to firm up slightly.
- Make the Sweet 'Taco' Shells: In a shallow dish, combine the granulated sugar and ground cinnamon (if using). Heat about 1 inch of neutral oil in a small, sturdy pot or deep skillet over medium heat until it reaches about 350-375°F (175-190°C). Carefully place one flour tortilla into the hot oil. Fry for about 15-30 seconds per side, until golden brown and slightly crisp.
- Shape the Shells: As soon as you remove a tortilla from the oil, immediately transfer it to a wire rack lined with paper towels to drain excess oil. While it's still hot and pliable, gently drape it over a rolling pin, a taco stand, or the handle of a wooden spoon to create the taco shape. Press gently to help it hold its form as it cools and crisps up. Repeat with the remaining tortillas.
- Coat the Shells with Cereal: Once the shaped shells have cooled completely and are crisp, brush a thin layer of melted white chocolate on the outside of the shell and immediately press it into a bowl of Fruity Pebbles, or gently spread a thin layer of the cheesecake filling on the outside before pressing into the cereal. Place the coated shells on a clean tray.
- Assemble Your Tacos: Remove the chilled cheesecake filling from the refrigerator. Spoon it into a piping bag fitted with a large star tip or simply use a spoon. Carefully fill each Fruity Pebbles-coated taco shell with the cheesecake filling, ensuring they're generously packed.
- Garnish and Serve: Add a small dollop of whipped cream on top of the filling in each taco. Sprinkle generously with more Fruity Pebbles cereal and drizzle with melted white chocolate if desired. Serve immediately.
Nutrition
- Serving Size: 1 taco
- Calories: 250
- Sugar: 15 g
- Sodium: 200 mg
- Fat: 12 g
- Saturated Fat: 7 g
- Unsaturated Fat: 3 g
- Trans Fat: 0 g
- Carbohydrates: 30 g
- Fiber: 1 g
- Protein: 3 g
- Cholesterol: 30 mg
Keywords: Work quickly after frying the tortillas while they are still hot and flexible for shaping. To keep the Fruity Pebbles crunchy, coat the shells just before filling or serving. The cheesecake filling can be made a day in advance, and the taco shells can be prepared ahead of time as well.

Leave a Comment