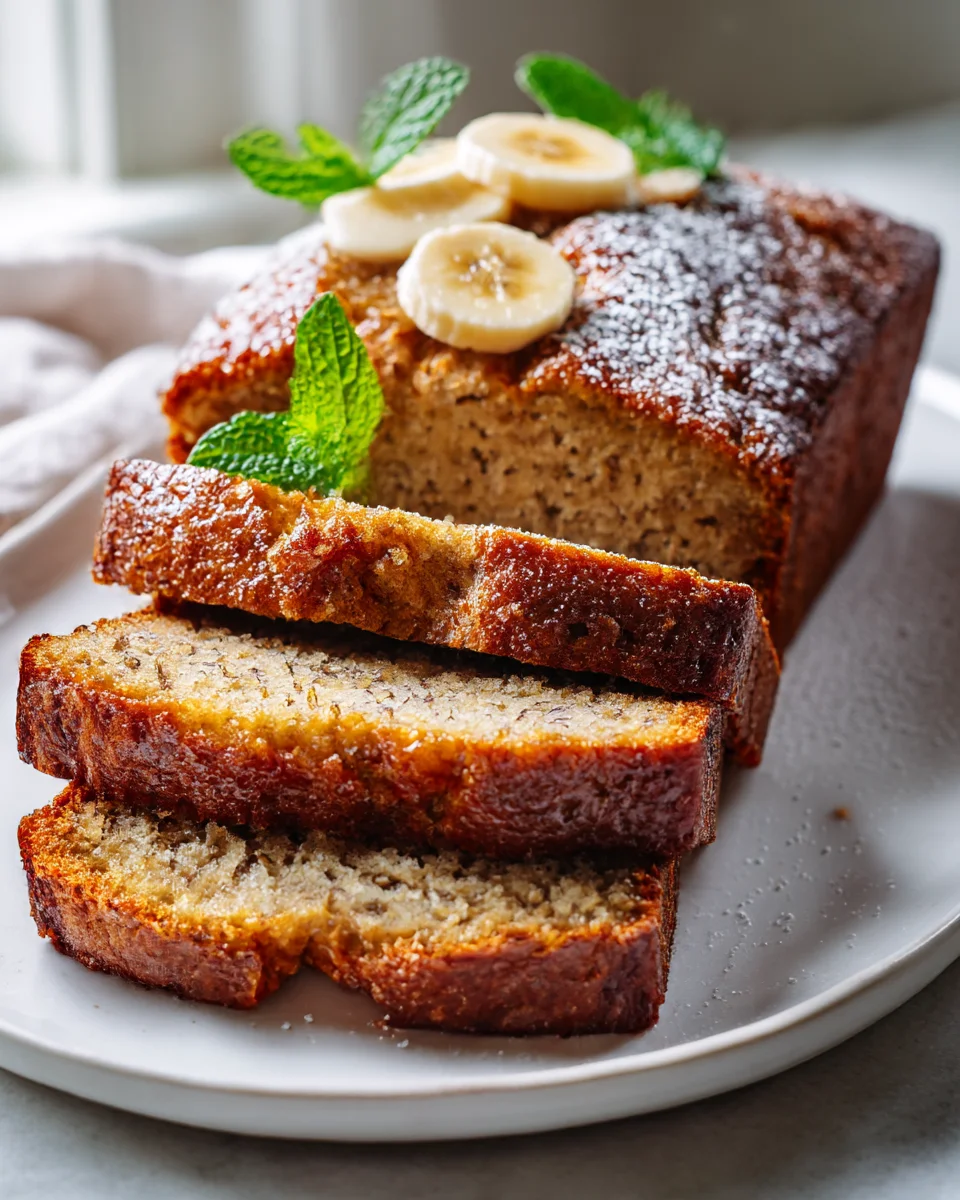
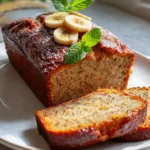
Best Banana Bread Recipe With Bakery Style Texture
Oh, hello there, fellow banana bread lover! If you’ve ever dreamed of baking a banana bread that doesn’t just taste good, but looks and feels like it came straight from a charming local bakery, then you’ve landed in the right spot. I’m absolutely thrilled to share my go-to recipe for the Best Banana Bread Recipe With Bakery Style Texture. This isn’t just any banana bread; it’s the one.
What makes this recipe so incredibly special, you ask? It’s all about that glorious texture. We’re talking about a loaf that boasts an unbelievably moist and tender crumb, a beautiful golden-brown crust, and a rich, deeply banana-infused flavor that will make your taste buds sing. There’s no dense or dry outcome here – just pure, melt-in-your-mouth perfection that genuinely rivals anything you could buy from a professional.
You are going to absolutely adore this recipe for so many reasons! First, it’s surprisingly simple to achieve professional results right in your own kitchen. It’s the perfect way to transform those overly ripe, forgotten bananas on your counter into a comforting masterpiece. Whether you’re looking for a delightful breakfast treat, an afternoon pick-me-up, or a satisfying dessert, this banana bread is an instant crowd-pleaser that will have everyone begging for the recipe. Get ready to impress yourself and your loved ones with a slice of pure, bakery-quality bliss!

Ingredient Notes
Achieving that coveted bakery-style texture in your banana bread isn’t just about following steps; it starts with understanding the role each ingredient plays. I’ve meticulously selected these components to ensure your loaf turns out incredibly moist, tender, and with that perfectly golden crust we all adore.
- Very Ripe Bananas: This is arguably the most crucial ingredient for flavor and that naturally moist, tender crumb. Don’t shy away from bananas with plenty of brown spots or even fully blackened peels. As bananas ripen, their starches convert to sugars, intensifying their sweetness and making them incredibly soft and easy to mash. The more ripe they are, the more profound the banana flavor and the moister your bread will be. Under-ripe bananas will result in a drier, less flavorful loaf.
- Unsalted Butter: My go-to fat for that rich, classic banana bread flavor and a wonderfully tender texture. Using unsalted butter allows me to control the salt content in the recipe. Creaming butter with sugar is a fundamental step for bakery-style goods, as it incorporates air, contributing to a lighter, softer crumb. You can substitute with salted butter, just reduce the added salt by a quarter teaspoon.
- Granulated Sugar & Brown Sugar: This combination is my secret weapon for the ideal balance of sweetness, moisture, and a beautiful golden-brown crust. Granulated sugar provides structure and helps with browning, while brown sugar (especially light brown sugar) adds a deeper, more caramel-like flavor and significant moisture, which is key for that desirable bakery-style tenderness.
- Large Eggs: Eggs act as a binder, adding richness, moisture, and helping with the bread’s structure. For the best results, ensure your eggs are at room temperature. This helps them emulsify better with the butter and sugar mixture, leading to a more uniform and tender batter.
- All-Purpose Flour: The backbone of our banana bread. I use standard all-purpose flour. It provides the necessary structure without making the bread too dense, provided you don’t overmix the batter.
- Leavening Agents (Baking Soda & Baking Powder): This dynamic duo ensures our banana bread gets a fantastic lift, resulting in a light, airy, and beautifully domed loaf, just like you’d find at a bakery. Baking soda reacts with the acids in the ripe bananas and brown sugar, while baking powder provides additional lift and helps create that desirable open crumb texture.
- Sour Cream (or Full-Fat Greek Yogurt): This is a secret ingredient for ultimate moisture and a truly decadent, tender crumb. The fat and acidity in sour cream help tenderize the gluten in the flour, making the bread incredibly soft and moist. If you don’t have sour cream, full-fat plain Greek yogurt is an excellent substitute, offering similar benefits.
- Vanilla Extract: A splash of good quality vanilla extract enhances all the other flavors in the bread, adding a warm, aromatic depth that’s essential for a truly delicious bakery treat.
- Salt: A pinch of salt might seem insignificant, but it’s vital for balancing the sweetness and bringing out the complex flavors of the bananas and other ingredients.
- Optional Add-ins: For an extra layer of bakery indulgence, consider folding in 1 cup of chopped walnuts or pecans, or even chocolate chips.
Step-by-Step Instructions
Follow these steps carefully, and you’ll be on your way to the best banana bread with an irresistible bakery-style texture!
- Preparation is Key: Begin by preheating your oven to 350°F (175°C). Grease a 9×5-inch loaf pan with butter or baking spray. If you want easy removal, line the bottom with parchment paper, leaving an overhang on the longer sides. This helps you lift the bread out once baked.
- Mash the Bananas: In a medium bowl, mash your very ripe bananas with a fork until mostly smooth, with a few small lumps remaining for texture. Set aside.
- Cream Butter and Sugars: In a large mixing bowl, using an electric mixer (stand mixer with paddle attachment or a hand mixer), cream together the softened unsalted butter, granulated sugar, and brown sugar on medium-high speed. Beat for 2-3 minutes until the mixture is light, fluffy, and pale in color. This step is crucial for incorporating air, which contributes to the light and tender bakery texture. Scrape down the sides of the bowl as needed.
- Add Eggs and Vanilla: Reduce mixer speed to medium. Add the eggs, one at a time, beating well after each addition until fully incorporated. Mix in the vanilla extract. The mixture might look slightly curdled at this point, which is perfectly normal.
- Combine Dry Ingredients: In a separate medium bowl, whisk together the all-purpose flour, baking soda, baking powder, and salt. Make sure these are thoroughly combined to ensure even leavening.
- Alternate Wet and Dry: With the mixer on low speed, add about one-third of the dry ingredients to the wet ingredients, mixing until just combined. Then, add half of the sour cream, mixing until just incorporated. Repeat with another third of the dry ingredients, followed by the remaining sour cream, and finally the last third of the dry ingredients. Remember, the key here is to mix until just combined after each addition. Do NOT overmix! Overmixing develops the gluten in the flour, leading to a tough, dense banana bread, not the tender bakery texture we’re aiming for.
- Fold in Bananas and Add-ins: Gently fold in the mashed bananas until evenly distributed. If using, fold in any optional add-ins like chopped nuts or chocolate chips at this stage. Use a spatula for this to prevent overmixing.
- Transfer to Pan and Bake: Pour the batter into your prepared loaf pan, smoothing the top with your spatula. Bake for 55-70 minutes, or until a wooden skewer or toothpick inserted into the center comes out clean or with only a few moist crumbs attached. The top should be deeply golden brown and slightly cracked. If the top starts to brown too quickly, you can tent it loosely with aluminum foil during the last 15-20 minutes of baking.
- Cooling: Once baked, remove the loaf pan from the oven and let the banana bread cool in the pan on a wire rack for 10-15 minutes. This allows the bread to set and prevents it from crumbling. After this initial cooling, carefully lift the bread out of the pan using the parchment paper overhangs (if used) or invert onto the wire rack. Let it cool completely on the rack before slicing. Slicing too early can compromise the delicate, moist texture.
Tips & Suggestions
To truly achieve that bakery-style perfection, a few extra tips can make all the difference. I’ve learned these through countless batches, and they consistently deliver superior results:
- Embrace the Brown Bananas: I cannot stress this enough – the browner your bananas, the better your banana bread will be. Blackened peels mean maximum sweetness and moisture. If your bananas aren’t quite ripe enough, you can speed up the process by baking them in their peels on a baking sheet at 300°F (150°C) for 15-30 minutes until they’re soft and black. Let them cool completely before using.
- Room Temperature Ingredients are Your Friend: Make sure your butter, eggs, and sour cream are at room temperature. This allows them to emulsify properly, creating a smooth, homogenous batter. Cold ingredients can lead to a lumpy batter and a less tender crumb. I usually take them out about an hour before I plan to bake.
- The Golden Rule: Do NOT Overmix! Once you add the dry ingredients to the wet, mix only until just combined. As I mentioned in the instructions, overmixing develops gluten, making your bread tough and chewy instead of wonderfully tender. A few lumps in the batter are perfectly fine and even desirable.
- A Dash of Spice: For an elevated bakery flavor, I sometimes like to add ½ teaspoon of ground cinnamon or a pinch of nutmeg to the dry ingredients. It complements the banana flavor beautifully without overpowering it.
- Toppings for Extra Flair: For an even more “bakery-style” look and texture, consider sprinkling a tablespoon of turbinado sugar (sugar in the raw) on top of the batter before baking. It adds a lovely sparkle and a slight crunchy crust. Or, for true indulgence, you could add a streusel topping!
- Testing for Doneness: Every oven is a little different. While a toothpick test is generally reliable, I also like to look at the color of the crust and gently press the top. If it springs back slightly, it’s likely done. If it feels very soft or mushy, it needs more time. Don’t be afraid to add another 5-10 minutes if needed.
- Patience is a Virtue (Especially When Cooling): I know it’s tempting to slice into a warm loaf, but resist! Allowing the banana bread to cool completely on a wire rack allows the internal structure to set and ensures maximum moisture retention. Cutting into it too soon can result in a gummy texture.
Storage
Proper storage is essential to maintain that incredible bakery-style texture and ensure your banana bread stays fresh and delicious for as long as possible. Here’s how I recommend storing it:
- At Room Temperature: For short-term storage, your banana bread will stay beautifully moist and fresh on the countertop for 2-3 days. Make sure it’s completely cooled before storing. I typically wrap the entire loaf tightly in plastic wrap, then place it in an airtight container or a large zip-top bag. This double layer of protection is key to preventing it from drying out and maintaining its tender crumb.
- In the Refrigerator: If you want to extend its shelf life, you can store banana bread in the refrigerator for up to a week. Again, wrap it tightly in plastic wrap and place it in an airtight container. Be aware that refrigeration can sometimes alter the texture slightly, making it a bit denser, but it will still be delicious. I often find warming a slice gently in the microwave for 10-15 seconds brings back some of its initial softness.
- Freezing for Longer Storage: Banana bread freezes wonderfully, making it perfect for meal prep or enjoying a fresh-tasting slice anytime.
- Whole Loaf: Ensure the loaf is completely cooled. Wrap it tightly in several layers of plastic wrap, then an additional layer of aluminum foil. This prevents freezer burn. Place the well-wrapped loaf in a freezer-safe bag. It will last for up to 3 months in the freezer.
- Individual Slices: For easy portioning, slice the cooled banana bread before freezing. Place parchment paper between slices to prevent them from sticking together. Stack them, then wrap the stack tightly in plastic wrap and foil. Store in a freezer-safe bag or container. This way, you can grab just one slice to thaw.
To thaw, simply unwrap the desired portion and let it sit at room temperature for a few hours, or warm gently in the microwave or toaster oven until heated through. Freezing is an excellent way to lock in that bakery-fresh taste and texture for future enjoyment!
Final Thoughts
And there you have it! I am absolutely confident that this Best Banana Bread Recipe With Bakery Style Texture is about to become a beloved staple in your kitchen. I truly believe it’s a game-changer, consistently delivering that ideal balance of an incredibly moist crumb, a beautifully golden exterior, and the kind of tender texture you usually dream of finding at a high-end bakery. It’s more than just a simple treat; it’s an invitation to experience pure comfort and joy. Don’t hesitate to give it a try – I promise you’ll be delighted by the captivating aroma that fills your home and the utterly delicious taste. Get ready to bake happiness!
Best Banana Bread Recipe: Bakery-Style Soft & Moist!
This banana bread recipe delivers a bakery-style texture with an incredibly moist and tender crumb. Perfect for breakfast or dessert, it’s sure to impress everyone who tries it!
- Prep Time: 15 mins
- Cook Time: 60 mins
- Total Time: 1 hour 15 minutes
- Yield: 1 loaf
- Category: Dessert
- Method: Baking
- Cuisine: American
Ingredients
- Very Ripe Bananas
- Unsalted Butter
- Granulated Sugar
- Brown Sugar
- Large Eggs
- All-Purpose Flour
- Leavening Agents (Baking Soda & Baking Powder)
- Sour Cream (or Full-Fat Greek Yogurt)
- Vanilla Extract
- Salt
- Optional Add-ins (1 cup of chopped walnuts or pecans, or chocolate chips)
Instructions
- Begin by preheating your oven to 350°F (175°C). Grease a 9×5-inch loaf pan with butter or baking spray. If you want easy removal, line the bottom with parchment paper, leaving an overhang on the longer sides.
- In a medium bowl, mash your very ripe bananas with a fork until mostly smooth, with a few small lumps remaining for texture. Set aside.
- In a large mixing bowl, using an electric mixer, cream together the softened unsalted butter, granulated sugar, and brown sugar on medium-high speed for 2-3 minutes until light, fluffy, and pale in color.
- Reduce mixer speed to medium. Add the eggs, one at a time, beating well after each addition. Mix in the vanilla extract.
- In a separate medium bowl, whisk together the all-purpose flour, baking soda, baking powder, and salt.
- With the mixer on low speed, add about one-third of the dry ingredients to the wet ingredients, mixing until just combined. Then, add half of the sour cream, mixing until just incorporated. Repeat with another third of the dry ingredients, followed by the remaining sour cream, and finally the last third of the dry ingredients.
- Gently fold in the mashed bananas until evenly distributed. If using, fold in any optional add-ins like chopped nuts or chocolate chips.
- Pour the batter into your prepared loaf pan, smoothing the top with your spatula. Bake for 55-70 minutes, or until a wooden skewer or toothpick inserted into the center comes out clean or with only a few moist crumbs attached.
- Once baked, remove the loaf pan from the oven and let the banana bread cool in the pan on a wire rack for 10-15 minutes. After this initial cooling, carefully lift the bread out of the pan using the parchment paper overhangs or invert onto the wire rack. Let it cool completely on the rack before slicing.
Nutrition
- Serving Size: 1 slice
- Calories: 200
- Sugar: 15 g
- Sodium: 150 mg
- Fat: 8 g
- Saturated Fat: 5 g
- Unsaturated Fat: 3 g
- Trans Fat: 0 g
- Carbohydrates: 30 g
- Fiber: 1 g
- Protein: 3 g
- Cholesterol: 40 mg
Keywords: For best results, use very ripe bananas and ensure all ingredients are at room temperature. Avoid overmixing the batter to maintain a tender crumb.


Leave a Comment