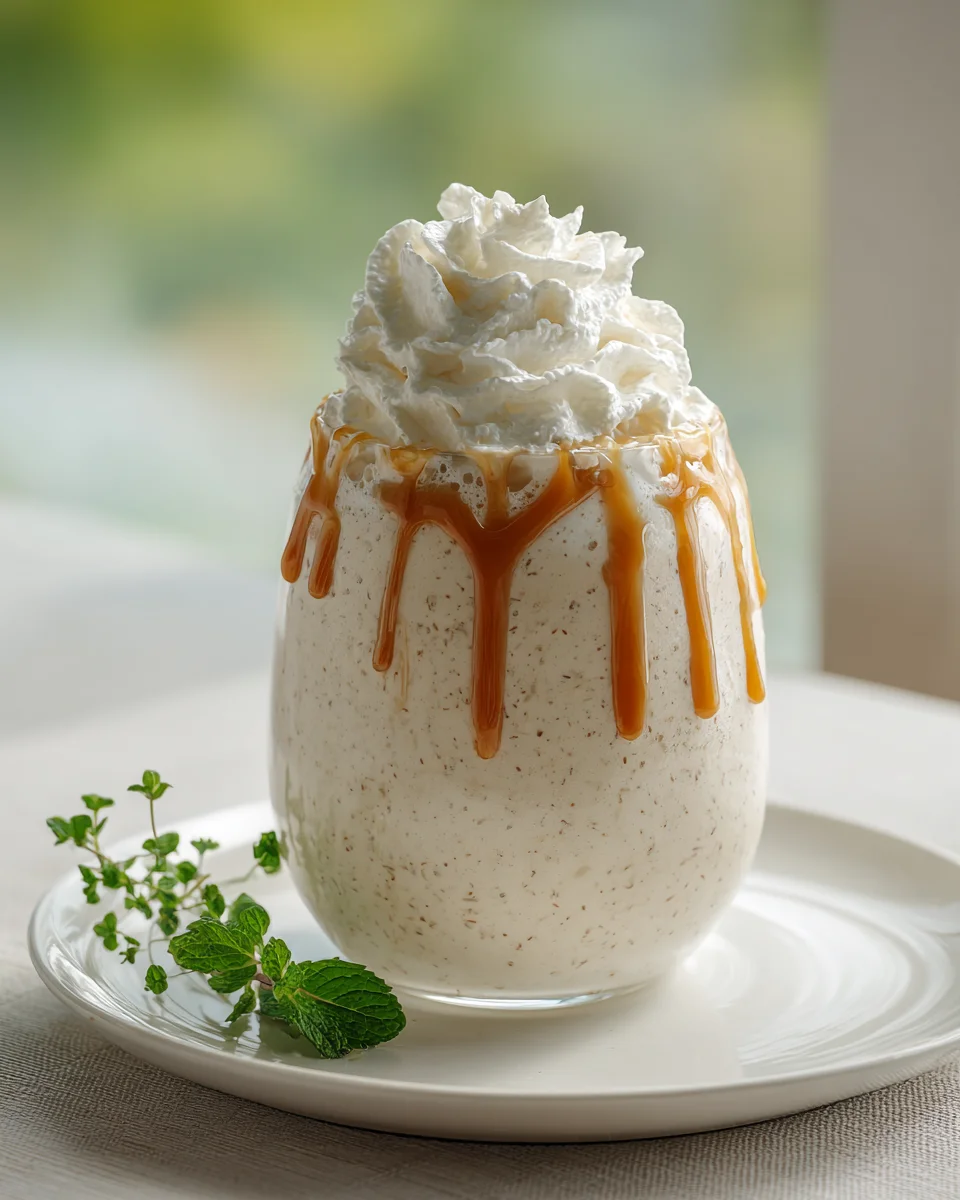
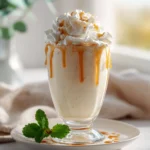
Creamy Vanilla Milkshake With Whipped Cream
Creamy Vanilla Milkshake With Whipped Cream – oh, where do I even begin with this absolute dream of a treat? It’s more than just a drink; it’s a hug in a glass, a little slice of pure happiness that I can’t wait for you to experience. I truly believe this isn’t just any milkshake; it’s the quintessential vanilla milkshake, elevated to pure perfection.
What truly makes this specific Creamy Vanilla Milkshake so special? It’s the meticulous attention to achieving that perfect, velvety-smooth texture and the authentic, rich vanilla flavor that shines through without being artificial or overly sweet. We’re talking about a milkshake that’s thick enough to require a spoon initially but still perfectly sippable, delivering an intensely satisfying chill with every mouthful. And of course, the crown jewel – that cloud of freshly whipped cream – isn’t just a topping; it’s an integral part of the experience, melting delightfully into the cold vanilla goodness, adding an extra layer of creamy decadence that takes it straight to heaven.
You are absolutely going to love making and savoring this recipe because it effortlessly brings that classic, nostalgic diner-style treat right into your own kitchen, but with the superior quality of homemade ingredients. It’s incredibly simple to whip up, making it the ideal solution for satisfying a sudden sweet craving, cooling down on a hot afternoon, or simply indulging in a moment of pure, unadulterated comfort. It’s a guaranteed crowd-pleaser and a personal pick-me-up rolled into one delicious package.
At its heart, this dish is a beautifully crafted dessert beverage: a blissful blend of premium vanilla ice cream, a splash of milk, and a hint of pure vanilla extract, all churned together until it reaches a wonderfully thick and smooth consistency. We then pour this luscious liquid into a tall glass and generously top it with a luxurious swirl of fluffy whipped cream, perhaps even a cherry or a sprinkle of chocolate shavings if you’re feeling extra fancy. It’s wonderfully cold, perfectly sweet, and utterly delightful – prepare yourself for a taste of pure vanilla bliss!

Welcome to my ultimate guide for crafting the most delectable Creamy Vanilla Milkshake With Whipped Cream! This isn’t just any milkshake; it’s a nostalgic, indulgent treat that promises pure bliss with every sip. I’ve spent countless afternoons perfecting this recipe, ensuring it delivers that rich, smooth, and utterly satisfying vanilla flavor, crowned with a cloud of airy whipped cream. Whether you’re making it for a special occasion or just to brighten an ordinary day, this recipe is designed to be simple, enjoyable, and incredibly rewarding. Let’s dive in and create some magic!
Ingredient Notes
Crafting the perfect creamy vanilla milkshake truly begins with selecting the right ingredients. Each component plays a crucial role in achieving that signature smooth texture and irresistible vanilla flavor. I’ve found that paying attention to these details makes all the difference.
- Vanilla Ice Cream: This is the star of our show, so don’t skimp on quality! I always recommend using a premium, full-fat vanilla ice cream. Look for brands that list real vanilla beans or pure vanilla extract in their ingredients. The higher fat content contributes significantly to the “creamy” aspect of our milkshake, giving it that luxurious mouthfeel we’re aiming for. French vanilla or vanilla bean ice cream varieties are fantastic choices, adding an extra layer of richness and depth. For those who prefer a dairy-free option, there are many excellent dairy-free vanilla ice creams available today that can create a wonderfully creamy alternative; just be mindful that the texture might be slightly different.
- Milk: For the ultimate creamy texture, I swear by whole milk. Its higher fat content emulsifies beautifully with the ice cream, resulting in a thick, velvety smooth milkshake. However, if you prefer, 2% milk can also work well, yielding a slightly lighter but still delicious result. For non-dairy alternatives, unsweetened almond milk, oat milk, or soy milk are great choices. Oat milk, in particular, tends to lend a lovely creaminess that mimics dairy milk quite closely. Just be sure to choose an unflavored variety so it doesn’t compete with our lovely vanilla.
- Vanilla Extract: While the ice cream provides a base of vanilla flavor, a little extra pure vanilla extract really amplifies it and brings it to life. I prefer pure vanilla extract over imitation because its flavor is more complex and natural. A good quality extract can elevate the entire milkshake, adding a warmth and depth that imitation simply can’t replicate. If you’re feeling fancy, a tiny bit of vanilla bean paste or even scraping the seeds from half a fresh vanilla bean can take this milkshake from delicious to absolutely divine, offering those beautiful specks of vanilla throughout.
- Whipped Cream: What’s a creamy vanilla milkshake without a generous dollop of whipped cream on top? For the best results, I love making my own whipped cream from heavy cream. It’s surprisingly easy and tastes infinitely better than the canned stuff, offering a lighter, fresher texture and flavor. To make it, you’ll need cold heavy cream (at least 36% milk fat) and a touch of powdered sugar (confectioners’ sugar) for sweetness. If you’re short on time or prefer convenience, a good quality store-bought canned whipped cream is a perfectly acceptable alternative. Just make sure it’s well-chilled before using.
- Optional Sweetener: Depending on the sweetness of your ice cream and your personal preference, you might want to add a tiny bit of extra sugar. A tablespoon or two of granulated sugar or a drizzle of maple syrup or agave nectar can boost the sweetness without overpowering the vanilla. I sometimes add a pinch of salt too, as it surprisingly enhances the sweet flavors and balances the richness.
Step-by-Step Instructions
Making this creamy vanilla milkshake is incredibly straightforward, but I’ve got a few tips to ensure yours turns out perfectly smooth and irresistibly delicious every single time. It’s all about combining the ingredients in the right order and blending until just right.
- Gather Your Tools and Ingredients: First things first, get everything ready! You’ll need a sturdy blender, a tall glass for serving, and all your chilled ingredients. I find that having everything prepped makes the blending process super quick and enjoyable. If you plan to make homemade whipped cream, do that first and set it aside in the refrigerator.
- Start with the Milk: Pour the milk into your blender first. I’ve found that adding the liquid component first helps the blender blades get a good start and prevents the ice cream from getting stuck at the bottom, making for a much smoother blending experience. For a standard size, I usually start with about 1/2 cup of milk per serving, but we can adjust this later for thickness.
- Add the Ice Cream: Next, scoop your vanilla ice cream directly into the blender with the milk. I typically use about 1.5 to 2 cups of ice cream per serving. If your ice cream is rock solid, let it sit out on the counter for just a minute or two to soften slightly; this makes blending much easier and prevents over-blending, which can warm up the milkshake too much.
- Introduce the Vanilla Extract (and Optional Sweetener): Now, add your pure vanilla extract. I usually go with about 1/2 teaspoon per serving for a noticeable but not overpowering vanilla kick. If you’re adding any optional sweetener, like a tablespoon of sugar or a pinch of salt, now is the time to toss it in.
- Blend Until Smooth and Creamy: Secure the lid on your blender and begin blending on a low speed, gradually increasing to a medium or high speed. Blend until the mixture is completely smooth and creamy, with no large chunks of ice cream remaining. This usually takes about 30-60 seconds, depending on your blender’s power. Keep an eye on the consistency; you want it thick enough to hold a spoon but still pourable.
- Adjust Consistency (If Needed): This is where you can truly customize your milkshake. If it’s too thick for your liking, add a splash more milk and blend again for a few seconds. If it’s too thin, add another scoop of ice cream and blend until you reach your desired consistency. Remember, it’s easier to add more liquid or ice cream than to fix an overly runny milkshake!
- Pour and Top with Whipped Cream: Once your milkshake reaches that perfect creamy consistency, pour it immediately into your chilled tall glass. I always chill my glasses in the freezer for about 10-15 minutes beforehand; it helps keep the milkshake colder for longer! Now for the grand finale: generously top your vanilla milkshake with a beautiful swirl of homemade or store-bought whipped cream.
- Garnish and Serve Immediately: For an extra touch of elegance and flavor, I love adding a simple garnish. A vanilla wafer cookie, a maraschino cherry, a sprinkle of vanilla bean specks, or even a light dusting of cinnamon can make it feel extra special. Serve immediately with a wide straw and a long spoon, and prepare to enjoy pure vanilla bliss!
Tips & Suggestions
To truly master the art of the Creamy Vanilla Milkshake With Whipped Cream, I’ve gathered some of my favorite tips and tricks that go beyond the basic instructions. These suggestions will help you achieve that perfect balance of flavor and texture, and maybe even inspire you to get a little creative!
- Achieving Optimal Thickness and Creaminess: The secret to a truly creamy milkshake lies in the ratio of ice cream to milk. I aim for about 2 parts ice cream to 1 part milk. If your ice cream is very hard, let it soften on the counter for 5-10 minutes before blending; this helps achieve a smoother texture without having to add too much milk, which can thin it out. Also, blending for just the right amount of time is key – too little and you’ll have chunks; too much and you risk melting the ice cream and warming up your shake. Blend until smooth, but don’t overdo it.
- Chill Your Glassware: This might seem like a small detail, but I promise it makes a huge difference! Placing your serving glasses in the freezer for at least 15-20 minutes before pouring in your milkshake will help keep your drink colder for longer, preventing it from melting too quickly. There’s nothing worse than a warm, watery milkshake!
- Customizing Sweetness: Taste as you go! Depending on the brand of vanilla ice cream you use, the sweetness can vary. After an initial blend, give it a quick taste. If you prefer it sweeter, add a teaspoon of granulated sugar, maple syrup, or a touch of sweetened condensed milk, then blend again briefly. Conversely, if your ice cream is very sweet, you might even consider using unsweetened milk to balance it out.
- Enhancing the Vanilla Flavor: Beyond pure vanilla extract, consider using a vanilla bean. Scrape the seeds from half a vanilla bean and add them to the blender with the other ingredients. Those tiny black flecks not only look beautiful but provide an unparalleled depth of vanilla flavor. Vanilla bean paste is another excellent alternative that offers similar visual appeal and flavor intensity.
- Make Your Own Whipped Cream: While convenient, canned whipped cream pales in comparison to homemade. For a truly superior experience, whisk cold heavy cream (about 1 cup for 2-3 servings) with 1-2 tablespoons of powdered sugar and 1/2 teaspoon of vanilla extract until soft peaks form. It’s quick, easy, and tastes wonderfully fresh and light, without any artificial aftertaste.
- Flavor Variations (while keeping vanilla prominent):
- Spice It Up: A tiny pinch of cinnamon, nutmeg, or even a dash of cardamom can add a warm, comforting note that complements the vanilla beautifully without overpowering it.
- Chocolate Swirl: For a classic combo, drizzle chocolate syrup inside your serving glass before pouring the milkshake, or on top of the whipped cream.
- Caramel Delight: A swirl of dulce de leche or caramel sauce can add a rich, buttery sweetness that pairs wonderfully with vanilla.
- Coffee Kiss: For a subtle mocha twist, add 1/2 teaspoon of instant espresso powder to the blender. It deepens the vanilla flavor without making it taste like a coffee shake.
- Serving Suggestions: A tall glass is a must, and a wide straw makes sipping thick milkshakes much easier. A long-handled spoon is also great for scooping up any stubborn ice cream or accessing that last bit of whipped cream.
- Preventing “Melt-Down”: Milkshakes are best enjoyed immediately after blending. They are designed to be a fleeting pleasure, savored for their cold, creamy texture. Don’t let it sit too long, or you’ll lose that perfect consistency!
Storage
When it comes to the Creamy Vanilla Milkshake With Whipped Cream, I really have to emphasize that this is a “make it and enjoy it immediately” kind of treat. Milkshakes, by their very nature, are designed for instant gratification. Their magic lies in that perfectly chilled, thick, and creamy consistency that starts to degrade almost as soon as it’s made.
- Immediate Consumption is Best: I strongly recommend consuming your milkshake within 10-15 minutes of blending. As it sits, the ice cream will begin to melt, separating from the milk, and the texture will become thin and watery. The beautiful emulsified creaminess that makes it so delightful will simply disappear.
- If You Absolutely Must Store It (Not Recommended for Long): If you find yourself with leftover milkshake (which is rare in my household!), you can store it in an airtight container in the refrigerator for a very short period, ideally no more than 30 minutes to an hour. However, be prepared for a significant change in texture. It will no longer be thick and creamy like a fresh milkshake.
- Re-blending and Its Effects: If you do refrigerate it, you might be tempted to re-blend it later to try and bring back that creamy texture. While re-blending can somewhat re-emulsify the ingredients, it often results in a icier, less smooth consistency. The ice cream crystals will have reformed in the fridge, and even a quick blend won’t perfectly restore the original silkiness. It also further warms the mixture, making it less refreshing.
- Whipped Cream Storage: If you’ve made homemade whipped cream, it’s best stored separately from the milkshake. Place any leftover whipped cream in an airtight container in the refrigerator for up to 1-2 days. It might lose some of its airiness over time, but it will still be delicious. If you’re using canned whipped cream, ensure it’s properly sealed and refrigerated according to its package instructions. Never store the milkshake with the whipped cream already on top; the whipped cream will melt and dissolve into the drink.
So, my best advice for enjoying your Creamy Vanilla Milkshake With Whipped Cream is to plan to drink it all in one sitting. It’s a simple pleasure that truly shines in its fresh, cold, and creamy state!
Final Thoughts
Well, there you have it! I truly hope you’re inspired to whip up this incredible Creamy Vanilla Milkshake With Whipped Cream. There’s something truly magical about the rich, velvety texture combined with that classic, comforting vanilla flavor, all crowned with a generous swirl of fluffy whipped cream. It’s not just a drink; it’s a delightful experience that brings a little bit of joy to any moment.
I promise you, taking just a few minutes to create this indulgent treat is absolutely worth it. Whether you’re looking for a quick pick-me-up, a special dessert, or simply a delicious way to cool down, this Creamy Vanilla Milkshake With Whipped Cream is an absolute must-try. Go on, treat yourself to a sip of pure bliss – I know you’ll love every single spoonful!
Best Creamy Vanilla Milkshake: Whipped Cream Perfection
Indulge in the ultimate creamy vanilla milkshake topped with fluffy whipped cream, delivering a nostalgic treat that’s both thick and refreshing. This recipe combines premium ingredients for a rich, satisfying experience in every sip.
- Prep Time: 10 mins
- Cook Time: 0 mins
- Total Time: 10 minutes
- Yield: 2 servings 1x
- Category: Dessert
- Method: Blending
- Cuisine: American
Ingredients
- 1.5 to 2 cups premium vanilla ice cream
- 1/2 cup whole milk (or 2% milk, or unsweetened almond/oat/soy milk)
- 1/2 teaspoon pure vanilla extract (or vanilla bean paste/seeds from half a fresh vanilla bean)
- Cold heavy cream (at least 36% milk fat) for whipped cream
- Powdered sugar (confectioners' sugar) for whipped cream
- Optional sweetener (granulated sugar, maple syrup, or agave nectar)
- Pinch of salt (optional)
- Garnishes (vanilla wafer cookie, maraschino cherry, chocolate shavings, or cinnamon)
Instructions
- Gather your tools and ingredients: a sturdy blender, a tall glass for serving, and all your chilled ingredients.
- Start with the milk: Pour the milk into your blender first.
- Add the ice cream: Scoop your vanilla ice cream directly into the blender with the milk.
- Introduce the vanilla extract (and optional sweetener): Add your pure vanilla extract and any optional sweetener.
- Blend until smooth and creamy: Secure the lid and blend on low speed, gradually increasing to medium or high speed until smooth.
- Adjust consistency (if needed): If too thick, add more milk; if too thin, add another scoop of ice cream and blend again.
- Pour and top with whipped cream: Pour the milkshake into your chilled tall glass and top with whipped cream.
- Garnish and serve immediately: Add a garnish like a vanilla wafer, cherry, or sprinkle of cinnamon.
Nutrition
- Serving Size: 1 glass
- Calories: 500
- Sugar: 45 g
- Sodium: 150 mg
- Fat: 25 g
- Saturated Fat: 15 g
- Unsaturated Fat: 5 g
- Trans Fat: 0 g
- Carbohydrates: 60 g
- Fiber: 0 g
- Protein: 8 g
- Cholesterol: 80 mg
Keywords: For the best results, chill your glasses before serving and taste as you blend to adjust sweetness. Homemade whipped cream is recommended for superior flavor.

Leave a Comment