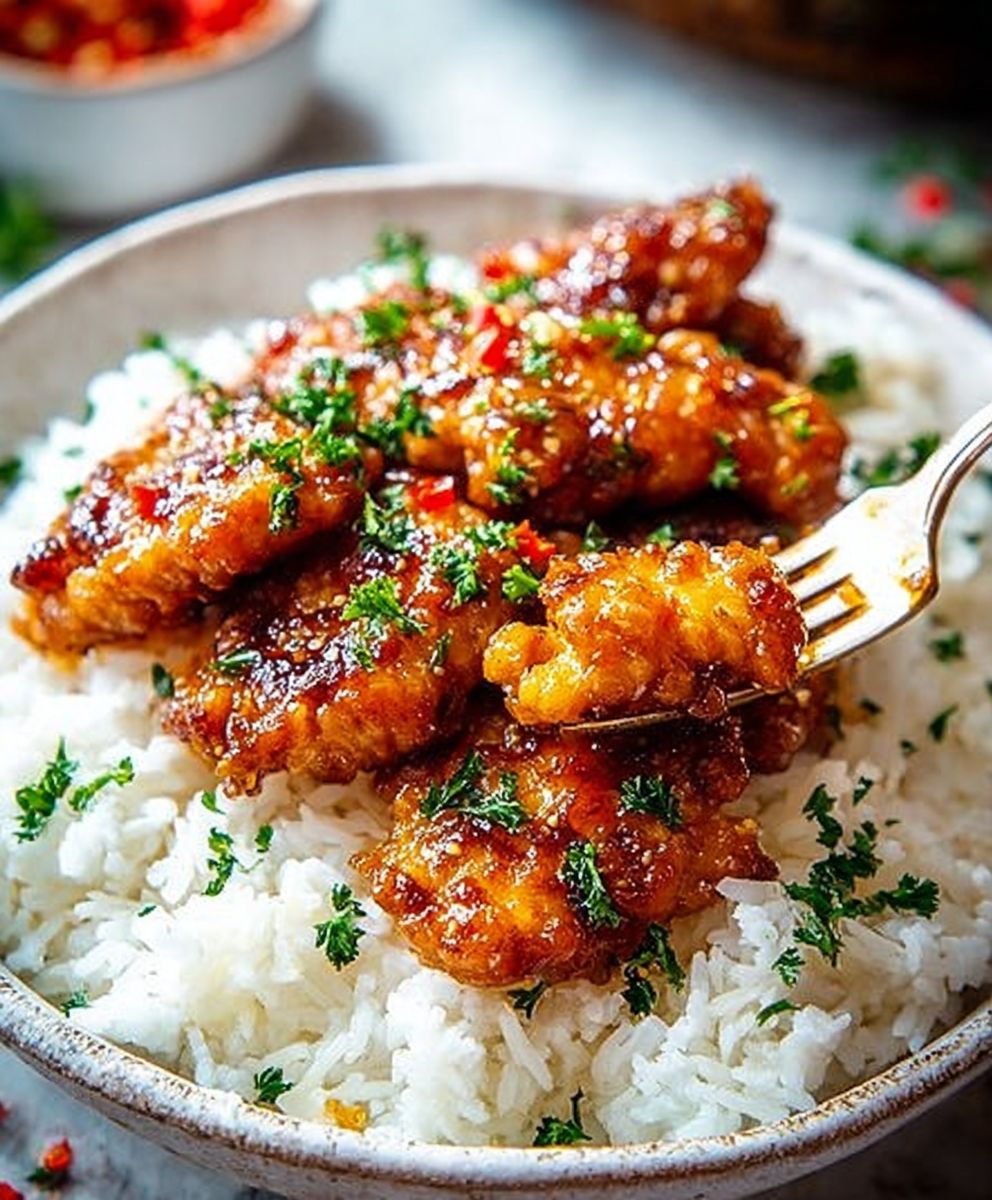
Honey Garlic Chicken: Just the name conjures up images of glistening, sticky, and utterly irresistible chicken, doesn’t it? I know I’m not alone in craving that perfect balance of sweet and savory, and this recipe delivers it in spades. Forget takeout; you can create restaurant-quality Honey Garlic Chicken right in your own kitchen, and trust me, it’s easier than you think!
While the exact origins of this delectable dish are debated, the combination of honey and garlic has been a culinary staple in various cultures for centuries. From ancient Chinese medicinal practices to traditional European folk remedies, both ingredients have long been valued for their health benefits and, of course, their incredible flavor. It’s no surprise that they eventually found their way into countless recipes, culminating in the sticky, sweet, and savory masterpiece we know and love today.
But what is it about Honey Garlic Chicken that makes it so universally appealing? I think it’s the symphony of flavors and textures. The sweetness of the honey perfectly complements the pungent garlic, creating a harmonious blend that dances on your taste buds. The chicken, often pan-fried or baked to crispy perfection, provides a satisfying textural contrast to the luscious, sticky sauce. And let’s not forget the convenience! This recipe is quick, easy, and requires minimal ingredients, making it a weeknight dinner champion. Whether you’re serving it over rice, noodles, or alongside roasted vegetables, Honey Garlic Chicken is guaranteed to be a crowd-pleaser. So, let’s get cooking!

Ingredients:
- For the Chicken:
- 2 lbs boneless, skinless chicken thighs, cut into 1-inch pieces
- 1/4 cup cornstarch
- 1/4 teaspoon salt
- 1/4 teaspoon black pepper
- 1 tablespoon olive oil
- For the Honey Garlic Sauce:
- 1/2 cup honey
- 1/4 cup soy sauce (low sodium preferred)
- 1/4 cup water
- 4 cloves garlic, minced
- 1 tablespoon rice vinegar
- 1 teaspoon sesame oil
- 1/2 teaspoon red pepper flakes (optional, for heat)
- 1 tablespoon cornstarch (for thickening)
- For Garnish (optional):
- Sesame seeds
- Chopped green onions
- Serving Suggestions:
- Cooked rice (white or brown)
- Steamed broccoli
- Stir-fried vegetables
Preparing the Chicken:
- In a large bowl, combine the chicken pieces, cornstarch, salt, and pepper. Toss well to ensure the chicken is evenly coated. This cornstarch coating is key for getting that lovely crispy texture when we cook the chicken. Don’t skip this step!
- Heat the olive oil in a large skillet or wok over medium-high heat. Make sure the skillet is nice and hot before adding the chicken.
- Add the chicken to the skillet in a single layer, being careful not to overcrowd it. Overcrowding will steam the chicken instead of searing it. If necessary, cook the chicken in batches.
- Cook the chicken for about 5-7 minutes per side, or until it’s golden brown and cooked through. The internal temperature should reach 165°F (74°C). Use a meat thermometer to be sure! Once cooked, remove the chicken from the skillet and set aside.
Making the Honey Garlic Sauce:
- In a medium bowl, whisk together the honey, soy sauce, water, minced garlic, rice vinegar, sesame oil, and red pepper flakes (if using). Make sure everything is well combined. This is where all the magic happens!
- In a separate small bowl, whisk together the remaining 1 tablespoon of cornstarch with 2 tablespoons of cold water to create a slurry. This will help thicken the sauce.
- Pour the honey garlic sauce mixture into the same skillet you used to cook the chicken (no need to clean it!).
- Bring the sauce to a simmer over medium heat.
- Slowly pour the cornstarch slurry into the simmering sauce, whisking constantly. This will prevent lumps from forming.
- Continue to simmer the sauce for 1-2 minutes, or until it has thickened to your desired consistency. It should be able to coat the back of a spoon.
Combining Chicken and Sauce:
- Add the cooked chicken back to the skillet with the honey garlic sauce.
- Toss the chicken to coat it evenly with the sauce. Make sure every piece is glistening with that delicious honey garlic goodness!
- Continue to cook for another 1-2 minutes, allowing the sauce to further caramelize and cling to the chicken.
Serving and Garnishing:
- Remove the skillet from the heat.
- Garnish with sesame seeds and chopped green onions, if desired. These add a nice visual appeal and a little extra flavor.
- Serve immediately over cooked rice (white or brown) and alongside steamed broccoli or your favorite stir-fried vegetables.
Tips and Variations:
- Chicken Options: While I prefer using chicken thighs for their tenderness and flavor, you can also use chicken breasts. Just be sure not to overcook them, as they can become dry. Cut the chicken breasts into 1-inch pieces as well.
- Spice Level: Adjust the amount of red pepper flakes to your liking. If you’re sensitive to spice, you can omit them altogether. For extra heat, you can add a pinch of cayenne pepper to the sauce.
- Vegetable Additions: Feel free to add your favorite vegetables to the skillet along with the chicken. Bell peppers, onions, carrots, and snap peas all work well. Add them after you’ve cooked the chicken and before you add the sauce.
- Ginger: For an extra layer of flavor, add 1 teaspoon of grated fresh ginger to the sauce along with the garlic.
- Pineapple: For a sweet and tangy twist, add 1/2 cup of pineapple chunks to the skillet along with the chicken.
- Thickening the Sauce: If you prefer a thicker sauce, you can add a little more cornstarch slurry. Just be careful not to add too much, as it can make the sauce gloppy.
- Thinning the Sauce: If the sauce becomes too thick, you can add a little more water to thin it out.
- Make Ahead: You can prepare the honey garlic sauce ahead of time and store it in the refrigerator for up to 3 days. Just reheat it before adding the chicken.
- Storage: Leftover honey garlic chicken can be stored in an airtight container in the refrigerator for up to 3 days. Reheat it in the microwave or in a skillet over medium heat.
- Serving Suggestions: This dish is also great served over noodles, quinoa, or even mashed potatoes. Get creative and experiment with different sides!
- Gluten-Free Option: To make this dish gluten-free, use tamari instead of soy sauce. Tamari is a gluten-free soy sauce alternative.
- Sweetness Adjustment: If you find the sauce too sweet, add a splash more rice vinegar or a squeeze of lemon juice to balance the flavors.
- Garlic Intensity: If you’re a garlic lover, feel free to add more than 4 cloves! Just be mindful that the garlic flavor will intensify as it cooks.
- Sesame Oil: Don’t skip the sesame oil! It adds a wonderful nutty aroma and flavor to the sauce. A little goes a long way, so stick to the recommended amount.
- Rice Vinegar Substitute: If you don’t have rice vinegar, you can substitute it with apple cider vinegar or white wine vinegar.
- Cornstarch Alternative: If you don’t have cornstarch, you can use arrowroot powder as a substitute. Use the same amount as you would cornstarch.
Troubleshooting:
- Chicken is Dry: Make sure you don’t overcook the chicken. Chicken thighs are more forgiving than chicken breasts, but both can become dry if cooked for too long. Use a meat thermometer to ensure the chicken is cooked to the correct internal temperature.
- Sauce is Too Thin: If the sauce isn’t thickening enough, add a little more cornstarch slurry. Make sure you whisk the slurry well before adding it to the sauce to prevent lumps.
- Sauce is Too Thick: If the sauce becomes too thick, add a little more water to thin it out.
- Sauce is Too Sweet: If the sauce is too sweet, add a splash more rice vinegar or a squeeze of lemon juice to balance the flavors.
- Chicken is Sticking to the Pan: Make sure the skillet is hot enough before adding the chicken. Also, don’t overcrowd the skillet. If necessary, cook the chicken in batches.
- Garlic is Burning: Keep a close eye on the garlic while it’s cooking. If it starts to burn, reduce the heat or add a little water to the skillet.
Enjoy your homemade Honey Garlic Chicken! I hope you find this recipe easy to follow and delicious. Let me know in the comments how it turns out for you!
Conclusion:
Okay, friends, let’s be honest – if you’ve made it this far, you’re already halfway to experiencing the pure joy that is this Honey Garlic Chicken. And trust me, you absolutely need this recipe in your life. Why? Because it’s the perfect trifecta of easy, delicious, and impressive. It’s the kind of dish that makes you feel like a culinary rockstar, even if you’re just starting out in the kitchen. The sweet and savory glaze, the tender chicken, the aroma that fills your home – it’s an experience, not just a meal.
But beyond the sheer deliciousness, this recipe is a winner because it’s incredibly versatile. Need a quick weeknight dinner? This is your answer. Want to impress guests without spending hours slaving away? Look no further. Craving something comforting and satisfying? This Honey Garlic Chicken hits all the right notes. It’s a true crowd-pleaser, guaranteed to earn you rave reviews.
And the best part? You can easily customize it to your liking! Serve it over fluffy white rice or quinoa for a complete and satisfying meal. Toss it with noodles and stir-fried vegetables for a quick and easy stir-fry. Shred the chicken and use it in tacos or lettuce wraps for a fun and flavorful twist. For a spicier kick, add a pinch of red pepper flakes to the glaze. If you’re watching your sodium intake, use low-sodium soy sauce. The possibilities are endless! You can even try different cuts of chicken – boneless, skinless thighs work beautifully and stay incredibly moist.
Serving Suggestions and Variations:
- Serve over rice or quinoa with steamed broccoli or green beans.
- Toss with your favorite noodles and stir-fried vegetables.
- Shred the chicken and use it in tacos or lettuce wraps.
- Add a pinch of red pepper flakes for a spicy kick.
- Use low-sodium soy sauce to reduce sodium content.
- Try using chicken thighs for extra moisture.
I truly believe that this Honey Garlic Chicken will become a staple in your recipe repertoire. It’s a dish that you’ll turn to again and again, whether you’re cooking for yourself, your family, or a crowd. It’s simple enough for a beginner, yet sophisticated enough to impress even the most discerning palate.
So, what are you waiting for? Gather your ingredients, preheat your oven (or fire up your skillet!), and get ready to experience the magic of this incredible recipe. I’m confident that you’ll love it as much as I do. And when you do, please, please, please share your experience! I’d love to hear how it turned out, what variations you tried, and what your family and friends thought. Tag me in your photos on social media – I can’t wait to see your culinary creations! Happy cooking, and enjoy every delicious bite of your Honey Garlic Chicken!
Don’t forget to rate the recipe and leave a comment below! Your feedback helps other home cooks discover this amazing dish.
Honey Garlic Chicken: The Ultimate Recipe for Deliciousness
Tender chicken thighs coated in a sweet and savory honey garlic sauce. This easy recipe is perfect for a quick weeknight dinner!
Ingredients
- 2 lbs boneless, skinless chicken thighs, cut into 1-inch pieces
- 1/4 cup cornstarch
- 1/4 teaspoon salt
- 1/4 teaspoon black pepper
- 1 tablespoon olive oil
- 1/2 cup honey
- 1/4 cup soy sauce (low sodium preferred)
- 1/4 cup water
- 4 cloves garlic, minced
- 1 tablespoon rice vinegar
- 1 teaspoon sesame oil
- 1/2 teaspoon red pepper flakes (optional, for heat)
- 1 tablespoon cornstarch (for thickening)
- Sesame seeds
- Chopped green onions
- Cooked rice (white or brown)
- Steamed broccoli
- Stir-fried vegetables
Instructions
- Prepare the Chicken: In a large bowl, combine the chicken pieces, cornstarch, salt, and pepper. Toss well to ensure the chicken is evenly coated.
- Heat the olive oil in a large skillet or wok over medium-high heat.
- Add the chicken to the skillet in a single layer, being careful not to overcrowd it. If necessary, cook the chicken in batches.
- Cook the chicken for about 5-7 minutes per side, or until it’s golden brown and cooked through. The internal temperature should reach 165°F (74°C). Remove the chicken from the skillet and set aside.
- Make the Honey Garlic Sauce: In a medium bowl, whisk together the honey, soy sauce, water, minced garlic, rice vinegar, sesame oil, and red pepper flakes (if using).
- In a separate small bowl, whisk together the remaining 1 tablespoon of cornstarch with 2 tablespoons of cold water to create a slurry.
- Pour the honey garlic sauce mixture into the same skillet you used to cook the chicken.
- Bring the sauce to a simmer over medium heat.
- Slowly pour the cornstarch slurry into the simmering sauce, whisking constantly.
- Continue to simmer the sauce for 1-2 minutes, or until it has thickened to your desired consistency.
- Combine Chicken and Sauce: Add the cooked chicken back to the skillet with the honey garlic sauce.
- Toss the chicken to coat it evenly with the sauce.
- Continue to cook for another 1-2 minutes, allowing the sauce to further caramelize and cling to the chicken.
- Serve and Garnish: Remove the skillet from the heat.
- Garnish with sesame seeds and chopped green onions, if desired.
- Serve immediately over cooked rice (white or brown) and alongside steamed broccoli or your favorite stir-fried vegetables.
Notes
- Chicken Options: You can also use chicken breasts. Just be sure not to overcook them.
- Spice Level: Adjust the amount of red pepper flakes to your liking.
- Vegetable Additions: Feel free to add your favorite vegetables to the skillet along with the chicken.
- Ginger: For an extra layer of flavor, add 1 teaspoon of grated fresh ginger to the sauce along with the garlic.
- Pineapple: For a sweet and tangy twist, add 1/2 cup of pineapple chunks to the skillet along with the chicken.
- Thickening the Sauce: If you prefer a thicker sauce, you can add a little more cornstarch slurry.
- Thinning the Sauce: If the sauce becomes too thick, you can add a little more water to thin it out.
- Make Ahead: You can prepare the honey garlic sauce ahead of time and store it in the refrigerator for up to 3 days.
- Storage: Leftover honey garlic chicken can be stored in an airtight container in the refrigerator for up to 3 days.
- Serving Suggestions: This dish is also great served over noodles, quinoa, or even mashed potatoes.
- Gluten-Free Option: To make this dish gluten-free, use tamari instead of soy sauce.
- Sweetness Adjustment: If you find the sauce too sweet, add a splash more rice vinegar or a squeeze of lemon juice to balance the flavors.
- Garlic Intensity: If you’re a garlic lover, feel free to add more than 4 cloves!
- Sesame Oil: Don’t skip the sesame oil!
- Rice Vinegar Substitute: If you don’t have rice vinegar, you can substitute it with apple cider vinegar or white wine vinegar.
- Cornstarch Alternative: If you don’t have cornstarch, you can use arrowroot powder as a substitute.

Leave a Comment