Honey sesame chicken, a symphony of sweet and savory, is about to become your new weeknight obsession. Imagine sinking your teeth into crispy, golden-brown chicken, coated in a luscious honey-sesame glaze that’s both sticky and utterly irresistible. Are you already drooling? I know I am! This isn’t just another chicken recipe; it’s a culinary adventure that brings the vibrant flavors of Asian-inspired cuisine right to your kitchen.
While the exact origins of honey sesame chicken are debated, it’s clear that this dish draws inspiration from classic Chinese-American takeout fare. The combination of sweet honey and nutty sesame seeds has been a staple in Asian cooking for centuries, often symbolizing prosperity and good fortune. Over time, it has evolved into the beloved dish we know today, enjoyed by millions around the world.
So, what makes honey sesame chicken so universally appealing? It’s the perfect balance of textures and tastes. The crispy chicken provides a satisfying crunch, while the honey-sesame sauce offers a delightful sweetness that’s perfectly balanced by the savory notes of soy sauce and ginger. Plus, it’s incredibly easy to make at home, often quicker and healthier than ordering takeout. Get ready to impress your family and friends with this delectable dish that’s sure to become a new family favorite!

Ingredients:
- For the Chicken:
- 2 lbs boneless, skinless chicken thighs, cut into 1-inch pieces
- 1 cup cornstarch
- 1/2 cup all-purpose flour
- 1 teaspoon baking powder
- 1/2 teaspoon salt
- 1/4 teaspoon black pepper
- 1 large egg, beaten
- 1/2 cup water
- Vegetable oil, for frying
- For the Honey Sesame Sauce:
- 1/2 cup honey
- 1/4 cup soy sauce
- 2 tablespoons rice vinegar
- 1 tablespoon sesame oil
- 1 tablespoon cornstarch
- 1/4 cup water
- 2 cloves garlic, minced
- 1 teaspoon ginger, minced
- 1/4 teaspoon red pepper flakes (optional)
- 2 tablespoons sesame seeds, for garnish
- 1 green onion, thinly sliced, for garnish
- For Serving (Optional):
- Cooked white rice or brown rice
- Steamed broccoli or other vegetables
Preparing the Chicken
Alright, let’s get started with the chicken! This is the foundation of our delicious honey sesame chicken, so we want to make sure it’s perfectly crispy and tender.
- Prepare the Chicken Pieces: First, take your chicken thighs and cut them into bite-sized, 1-inch pieces. I prefer using chicken thighs because they stay nice and juicy during frying, but you can also use chicken breasts if you prefer. Just be careful not to overcook them!
- Combine Dry Ingredients: In a large bowl, whisk together the cornstarch, flour, baking powder, salt, and pepper. This mixture will create a light and crispy coating for the chicken. The baking powder helps to make the coating extra airy.
- Create the Batter: In a separate bowl, whisk together the beaten egg and water. This wet mixture will help the dry ingredients adhere to the chicken.
- Coat the Chicken: Now, here’s the fun part! Dip each piece of chicken into the egg mixture, making sure it’s fully coated. Then, dredge it in the cornstarch mixture, pressing gently to ensure the chicken is evenly coated on all sides. Make sure to shake off any excess flour – this will prevent the oil from getting too gunky.
- Rest the Chicken (Optional but Recommended): Place the coated chicken pieces on a wire rack for about 10-15 minutes. This allows the coating to adhere better and helps create a crispier crust when frying. This step is optional, but I highly recommend it for the best results!
Frying the Chicken
Now for the frying! This is where the magic happens and our chicken transforms into golden, crispy perfection. Safety first, though, so be careful when working with hot oil.
- Heat the Oil: Pour about 2-3 inches of vegetable oil into a large, heavy-bottomed pot or deep fryer. Heat the oil over medium-high heat to 350°F (175°C). You can use a thermometer to check the temperature, or if you don’t have one, you can test the oil by dropping a small piece of the coated chicken into the oil. If it sizzles and floats to the top within a few seconds, the oil is ready.
- Fry in Batches: Carefully add the chicken pieces to the hot oil in batches, making sure not to overcrowd the pot. Overcrowding will lower the oil temperature and result in soggy chicken. Fry for about 4-5 minutes per batch, or until the chicken is golden brown and cooked through. The internal temperature should reach 165°F (74°C).
- Remove and Drain: Use a slotted spoon or spider to remove the fried chicken from the oil and place it on a wire rack lined with paper towels to drain excess oil. This will help keep the chicken crispy.
- Repeat: Repeat the frying process with the remaining chicken pieces until all the chicken is cooked.
Making the Honey Sesame Sauce
While the chicken is draining, let’s whip up that irresistible honey sesame sauce! This sauce is the perfect balance of sweet, savory, and tangy, and it’s what really brings this dish together.
- Combine Sauce Ingredients: In a medium saucepan, whisk together the honey, soy sauce, rice vinegar, sesame oil, cornstarch, and water. Make sure the cornstarch is fully dissolved to prevent lumps in the sauce.
- Add Aromatics: Add the minced garlic and ginger to the saucepan. If you’re using red pepper flakes, add them now as well. The garlic and ginger add a wonderful depth of flavor to the sauce, and the red pepper flakes provide a touch of heat.
- Cook the Sauce: Place the saucepan over medium heat and bring the sauce to a simmer, stirring constantly. Continue to simmer for about 2-3 minutes, or until the sauce has thickened to your desired consistency. The cornstarch will help thicken the sauce as it cooks.
- Taste and Adjust: Taste the sauce and adjust the seasonings as needed. If you prefer a sweeter sauce, add a little more honey. If you want it more tangy, add a splash more rice vinegar. If you like it saltier, add a dash more soy sauce.
Combining Chicken and Sauce
Now for the grand finale! It’s time to bring the crispy chicken and the luscious honey sesame sauce together in a harmonious culinary embrace.
- Toss the Chicken: Add the fried chicken to the saucepan with the honey sesame sauce. Toss gently to coat the chicken evenly with the sauce. Make sure every piece of chicken is glistening with that delicious sauce!
- Heat Through: Cook for another 1-2 minutes, stirring occasionally, until the chicken is heated through and the sauce is nicely glazed.
Serving and Garnishing
Almost there! Now it’s time to plate up our masterpiece and add those final touches that will make it truly irresistible.
- Serve Immediately: Serve the honey sesame chicken immediately over cooked white rice or brown rice. You can also serve it with steamed broccoli or other vegetables for a complete and balanced meal.
- Garnish: Sprinkle the chicken with sesame seeds and green onions for garnish. The sesame seeds add a nutty flavor and a nice visual appeal, while the green onions provide a fresh, vibrant touch.
- Enjoy! Dig in and enjoy your homemade honey sesame chicken! I hope you love it as much as I do.
Tips and Variations:
- Crispier Chicken: For even crispier chicken, you can double-fry it. After the first frying, let the chicken cool slightly, then fry it again for another 1-2 minutes.
- Healthier Option: To make this dish healthier, you can bake the chicken instead of frying it. Preheat your oven to 400°F (200°C), place the coated chicken on a baking sheet lined with parchment paper, and bake for 20-25 minutes, or until cooked through.
- Spice it Up: If you like a little more heat, add more red pepper flakes to the sauce, or serve the chicken with a side of sriracha.
- Add Vegetables: You can add vegetables like bell peppers, onions, or carrots to the sauce for extra flavor and nutrition.
- Make it Gluten-Free: To make this dish gluten-free, use gluten-free soy sauce and gluten-free flour.
- Storage: Leftover honey sesame chicken can be stored in an airtight container in the refrigerator for up to 3 days. Reheat in the microwave or oven until heated through. The chicken may not be as crispy after reheating, but it will still be delicious!
Enjoy your meal!
Conclusion:
And there you have it! This honey sesame chicken recipe is truly a game-changer, and I’m not just saying that. The perfect balance of sweet, savory, and slightly tangy flavors, combined with the satisfying crunch of sesame seeds, makes it an absolute winner. It’s so much better than takeout, and honestly, it’s surprisingly simple to make at home. Forget those greasy, overly-sweet versions you’re used to – this recipe delivers a restaurant-quality dish without all the unnecessary additives and preservatives.
Why is this a must-try? Well, beyond the incredible taste, it’s incredibly versatile. It’s a crowd-pleaser that’s perfect for weeknight dinners, family gatherings, or even a special occasion. Plus, you can easily adjust the level of sweetness and spice to suit your personal preferences. Want it a little hotter? Add a pinch of red pepper flakes. Prefer a more pronounced honey flavor? Go ahead and drizzle a little extra on top before serving.
Speaking of serving, the possibilities are endless! My personal favorite is to serve this honey sesame chicken over a bed of fluffy steamed rice, garnished with some chopped green onions for a pop of freshness. But it’s also fantastic with quinoa, brown rice, or even noodles. For a complete meal, add a side of steamed broccoli, stir-fried vegetables, or a simple salad.
Serving Suggestions and Variations:
* Rice Bowls: Create delicious rice bowls by layering the chicken over rice with your favorite toppings like avocado, pickled ginger, and a drizzle of sriracha mayo.
* Lettuce Wraps: For a lighter option, serve the chicken in crisp lettuce cups with shredded carrots, cucumbers, and a peanut sauce.
* Noodle Stir-Fry: Toss the chicken with cooked noodles, stir-fried vegetables, and a splash of soy sauce for a quick and easy stir-fry.
* Spicy Kick: Add a tablespoon of sriracha or chili garlic sauce to the marinade for a spicy twist.
* Vegetarian Option: Substitute the chicken with tofu or tempeh for a vegetarian-friendly version. Just be sure to press the tofu well to remove excess moisture before marinating.
I’m genuinely excited for you to try this recipe and experience the deliciousness for yourself. I’ve poured my heart into perfecting it, and I truly believe it’s one you’ll make again and again. It’s a guaranteed hit with both kids and adults, and it’s a fantastic way to impress your friends and family with your culinary skills.
So, what are you waiting for? Gather your ingredients, follow the simple steps, and get ready to enjoy the most amazing honey sesame chicken you’ve ever tasted. And please, don’t be shy! I’d love to hear about your experience. Share your photos and comments on social media using [Your Hashtag] or leave a review on the blog. Let me know what variations you tried and how you made it your own. I can’t wait to see your creations! Happy cooking!
Honey Sesame Chicken: The Ultimate Recipe Guide
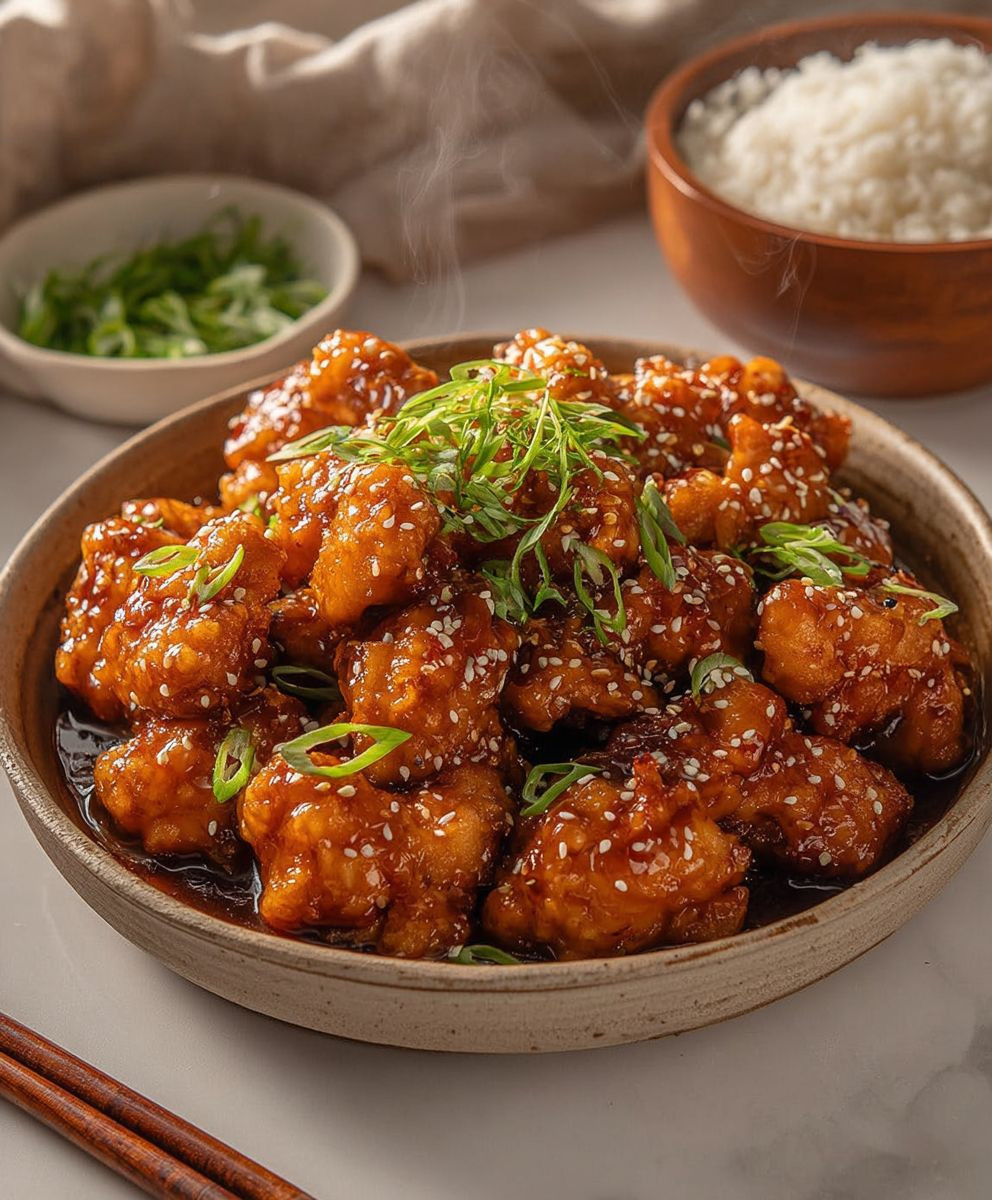
Crispy, golden chicken pieces tossed in a sweet, savory, and tangy honey sesame sauce. Perfect served over rice with your favorite vegetables.
Ingredients
- 2 lbs boneless, skinless chicken thighs, cut into 1-inch pieces
- 1 cup cornstarch
- 1/2 cup all-purpose flour
- 1 teaspoon baking powder
- 1/2 teaspoon salt
- 1/4 teaspoon black pepper
- 1 large egg, beaten
- 1/2 cup water
- Vegetable oil, for frying
- 1/2 cup honey
- 1/4 cup soy sauce
- 2 tablespoons rice vinegar
- 1 tablespoon sesame oil
- 1 tablespoon cornstarch
- 1/4 cup water
- 2 cloves garlic, minced
- 1 teaspoon ginger, minced
- 1/4 teaspoon red pepper flakes (optional)
- 2 tablespoons sesame seeds, for garnish
- 1 green onion, thinly sliced, for garnish
- Cooked white rice or brown rice
- Steamed broccoli or other vegetables
Instructions
- Cut chicken thighs into 1-inch pieces.
- In a large bowl, whisk together cornstarch, flour, baking powder, salt, and pepper.
- In a separate bowl, whisk together the beaten egg and water.
- Dip each chicken piece into the egg mixture, then dredge in the cornstarch mixture, pressing gently to coat. Shake off excess flour.
- Place coated chicken on a wire rack for 10-15 minutes for a crispier crust.
- Pour 2-3 inches of vegetable oil into a heavy-bottomed pot or deep fryer. Heat to 350°F (175°C).
- Carefully add chicken pieces to the hot oil in batches, avoiding overcrowding. Fry for 4-5 minutes per batch, until golden brown and cooked through (internal temperature of 165°F/74°C).
- Remove fried chicken with a slotted spoon and place on a wire rack lined with paper towels to drain excess oil.
- Repeat the frying process with the remaining chicken.
- In a medium saucepan, whisk together honey, soy sauce, rice vinegar, sesame oil, cornstarch, and water. Ensure cornstarch is fully dissolved.
- Add minced garlic and ginger to the saucepan. Add red pepper flakes if using.
- Place the saucepan over medium heat and bring the sauce to a simmer, stirring constantly. Simmer for 2-3 minutes, until the sauce has thickened.
- Taste the sauce and adjust seasonings as needed (more honey for sweetness, rice vinegar for tanginess, soy sauce for saltiness).
- Add the fried chicken to the saucepan with the honey sesame sauce. Toss gently to coat evenly.
- Cook for another 1-2 minutes, stirring occasionally, until the chicken is heated through and the sauce is nicely glazed.
- Serve the honey sesame chicken immediately over cooked white rice or brown rice. Serve with steamed broccoli or other vegetables.
- Sprinkle with sesame seeds and green onions.
- Enjoy!
Notes
- Crispier Chicken: Double-fry the chicken for extra crispiness. After the first frying, let it cool slightly, then fry again for 1-2 minutes.
- Healthier Option: Bake the chicken instead of frying. Preheat oven to 400°F (200°C), place coated chicken on a baking sheet lined with parchment paper, and bake for 20-25 minutes, or until cooked through.
- Spice it Up: Add more red pepper flakes to the sauce or serve with sriracha.
- Add Vegetables: Add bell peppers, onions, or carrots to the sauce.
- Make it Gluten-Free: Use gluten-free soy sauce and gluten-free flour.
- Storage: Store leftovers in an airtight container in the refrigerator for up to 3 days. Reheat in the microwave or oven.


Leave a Comment