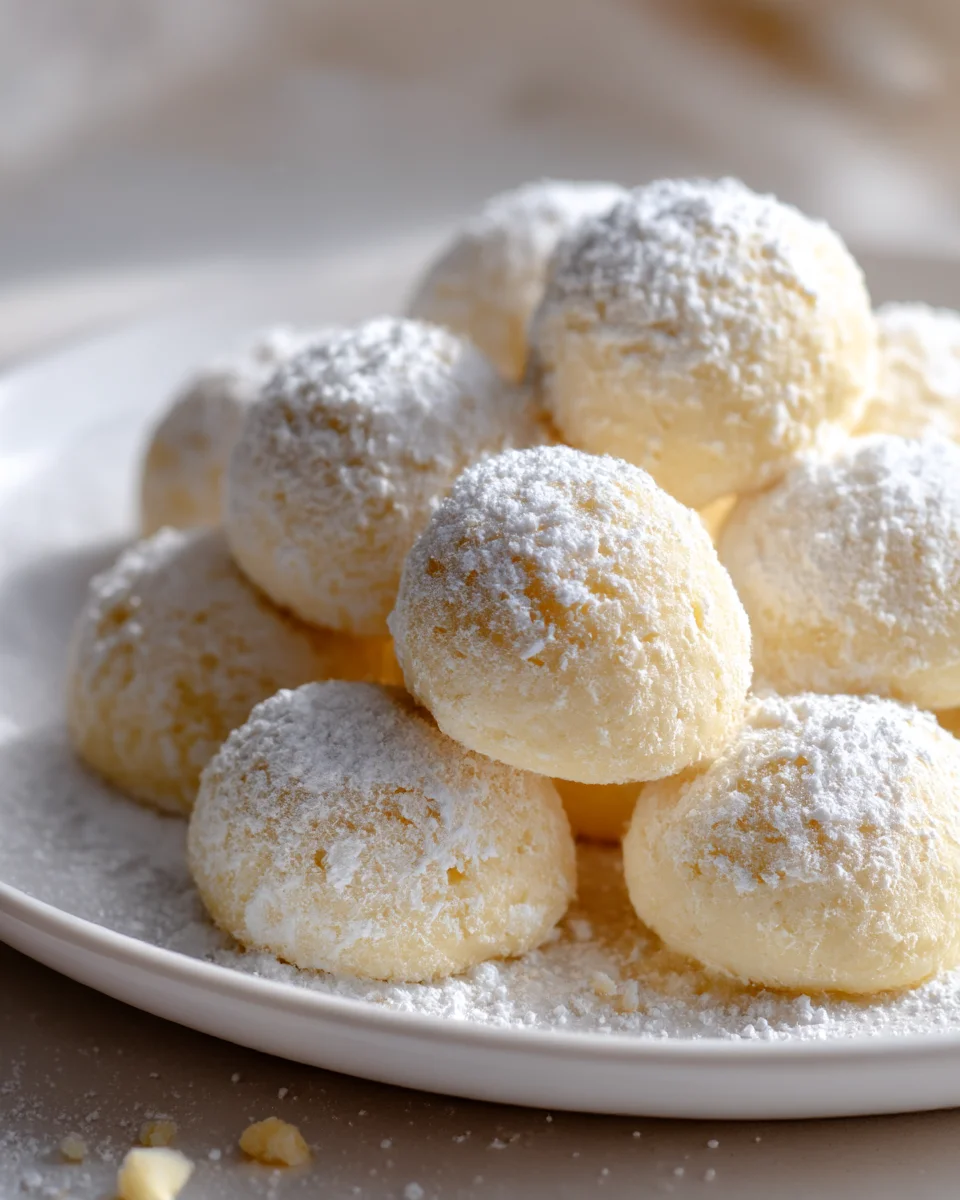
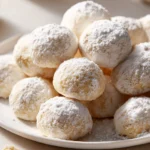
Sweetened Condensed Milk Snowballs
Oh my goodness, get ready to fall head over heels for the simplest, most delightful little treat you’ve ever made! I’m absolutely obsessed with Sweetened Condensed Milk Snowballs because they are pure magic – no baking required, just a handful of ingredients, and you end up with something truly special. What makes these snowballs so unique is their incredible melt-in-your-mouth texture and rich, sweet flavor, all without ever turning on the oven. You’ll adore them because they’re ridiculously easy to whip up, perfect for satisfying that sudden sweet craving, or for impressing guests with minimal effort and maximum deliciousness. These charming, bite-sized delights are essentially creamy, dense, sweet morsels, typically rolled into perfect spheres and then coated in a lovely flurry of ingredients like coconut flakes or powdered sugar, making them look just like their wintery namesake. Trust me, these sweet gems are about to become your new favorite no-bake go-to!

Ingredient Notes
Creating these delightful Sweetened Condensed Milk Snowballs truly hinges on a few simple yet crucial ingredients. Each one plays a vital role in achieving that perfect balance of sweetness, chewiness, and melt-in-your-mouth texture that makes these treats so irresistible. I love how a handful of pantry staples can transform into something so magical and festive!
- Sweetened Condensed Milk: This is the star of our show, the very heart of these snowballs. I always recommend using full-fat sweetened condensed milk for the best results. It provides the essential sweetness and, more importantly, the sticky binder that holds everything together. Lower-fat versions might make your mixture a bit too loose, resulting in snowballs that don’t hold their shape as well. If you’re looking for a dairy-free alternative, there are excellent coconut-based sweetened condensed milks available on the market, which work wonderfully and add another layer of coconut flavor. Just be sure it’s sweetened condensed milk, not evaporated milk!
- Shredded Coconut: For that classic ‘snowball’ texture and distinct flavor, finely shredded unsweetened coconut is my go-to. While sweetened shredded coconut can also be used, I find that unsweetened allows me to control the overall sweetness more effectively, given the condensed milk is already quite sweet. If you’re not a fan of coconut, you could experiment with finely ground blanched almonds or even oats, though the texture and flavor will, of course, be different. For a truly smooth snowball, some people even pulse the shredded coconut in a food processor for a finer texture, but I love the chewiness the regular shreds provide.
- Vanilla Extract: A splash of vanilla extract brightens all the flavors and adds that comforting, familiar warmth. I usually opt for pure vanilla extract, but if you prefer an alcohol-free option, non-alcohol vanilla flavoring works just as well. You could also experiment with other extracts like almond, rum (non-alcohol alternative), or even a touch of orange zest for a different flavor profile.
- Powdered Sugar (for coating): This is what truly gives our snowballs their snowy appearance and a lovely, delicate finish. Powdered sugar dissolves beautifully and provides a soft outer layer. Don’t skip sifting it before rolling, as this helps prevent lumps and ensures a smooth coating.
These ingredients are quite forgiving, but remember, the quality of each will directly impact the deliciousness of your final snowballs!
Step-by-Step Instructions
Making these Sweetened Condensed Milk Snowballs is incredibly straightforward and a joy from start to finish. You’ll be amazed at how quickly you can whip up such an impressive and tasty treat. Here’s how I do it:
- Prepare Your Workspace: First things first, gather all your ingredients. I like to have everything measured out and ready to go. Line a baking sheet with parchment paper or wax paper; this will be for chilling your snowballs later. Also, have a shallow bowl or plate ready with your powdered sugar for coating.
- Combine the Wet Ingredients: In a medium-sized mixing bowl, pour in your full can of sweetened condensed milk. Add the vanilla extract and any other liquid flavorings you might be using. Give it a good stir with a spatula or spoon until everything is well combined and fragrant.
- Fold in the Coconut: Now, gradually add your shredded coconut to the condensed milk mixture. I usually add it in two or three batches, mixing thoroughly after each addition. You want to ensure every shred of coconut is coated in the sticky sweetness. Keep mixing until you have a thick, cohesive mixture that pulls away from the sides of the bowl. It should be firm enough that you can press it together.
- Chill the Mixture: This step is absolutely critical! Cover the bowl with plastic wrap and refrigerate the mixture for at least 1 hour, or preferably 2 hours. Chilling allows the mixture to firm up considerably, making it much easier to handle and roll into perfect balls. If you skip this, your snowballs will be sticky and difficult to shape.
- Roll into Snowballs: Once thoroughly chilled, remove the mixture from the fridge. I find it easiest to work with slightly damp hands or hands lightly coated in powdered sugar to prevent sticking. Using a small cookie scoop (about 1 tablespoon in size) helps immensely in creating uniform snowballs, but you can also just use a spoon. Scoop out a portion and roll it gently between your palms to form a smooth, compact ball.
- Coat with Powdered Sugar: Immediately after rolling each snowball, drop it into the bowl of powdered sugar. Gently roll it around until it’s completely coated on all sides. I sometimes like to give it a second roll in the sugar right before serving for an extra “freshly fallen snow” look.
- Arrange and Chill Again: Place the coated snowballs onto your prepared baking sheet. Once all the mixture has been rolled and coated, return the baking sheet to the refrigerator for another 15-30 minutes. This final chill helps the coating set and firms up the snowballs even further, making them perfect for serving.
And there you have it! Simple, delicious, and so much fun to make.
Tips & Suggestions
These Sweetened Condensed Milk Snowballs are already pretty perfect as they are, but over the years, I’ve picked up a few tricks and gathered some fun ideas to make them even better or to customize them for any occasion. Here are my favorite tips and suggestions:
- Don’t Skimp on Chilling Time: I can’t stress this enough – proper chilling is the secret to perfectly firm, easy-to-roll snowballs. If your mixture feels too sticky after an hour, don’t hesitate to give it another 30-60 minutes in the fridge. It truly makes all the difference in handling.
- Uniformity is Key (for aesthetics): For a professional-looking platter, try to make your snowballs roughly the same size. A small cookie scoop (1-tablespoon size is ideal) is your best friend here. It ensures consistency and speeds up the rolling process.
- Handle with Care (and a little powder): If the mixture is still a bit sticky when rolling, try lightly dusting your hands with powdered sugar or even chilling your hands under cold water for a moment. This helps prevent sticking and makes the process much cleaner.
- Get Creative with Coatings: While powdered sugar is traditional, don’t limit yourself!
- Cocoa Powder: Roll some in unsweetened cocoa powder for a rich, chocolatey contrast.
- Finely Chopped Nuts: Almonds, pecans, or walnuts, finely chopped, add a lovely crunch and nutty flavor.
- Sprinkles: For a festive touch, especially during holidays, colorful sprinkles are always a hit.
- Melted Chocolate: You could drizzle or dip half the snowball in melted dark or white chocolate for an elegant finish.
- Add Zest for Brightness: A teaspoon of lemon or orange zest folded into the mixture with the vanilla extract can add a wonderful bright, citrusy note that cuts through the sweetness beautifully.
- Flavor Extracts: Beyond vanilla, consider adding a few drops of almond extract for a marzipan-like flavor, or a non-alcohol peppermint extract for a holiday twist. Just be mindful, extracts can be potent, so start with a small amount.
- Serving Suggestions: These snowballs are fantastic on their own, but they also make a wonderful addition to a dessert platter, a holiday cookie exchange, or as a small, sweet bite after dinner with coffee or tea.
- Make Ahead: These are an excellent make-ahead treat, which makes them perfect for busy holidays or parties. They hold up beautifully in the fridge for several days.
With these tips, you’re not just making a dessert; you’re crafting a memorable treat!
Storage
One of the many great things about Sweetened Condensed Milk Snowballs is how well they store, making them perfect for preparing in advance or enjoying over several days. Proper storage ensures they retain their delightful texture and fresh taste.
- Refrigeration is Key: Due to the sweetened condensed milk, these snowballs are best stored in the refrigerator. The cool temperature helps maintain their firm shape and prevents them from becoming too soft or sticky.
- Airtight Container: Always store your snowballs in an airtight container. This prevents them from absorbing any unwanted odors from your fridge and helps to keep them fresh and moist.
- Layering: If you’re stacking the snowballs, I highly recommend placing a piece of parchment paper or wax paper between each layer. This prevents them from sticking together, especially if some of the powdered sugar coating has absorbed moisture.
- Shelf Life: When stored correctly in an airtight container in the refrigerator, Sweetened Condensed Milk Snowballs will stay fresh and delicious for up to 1 week. Beyond that, while they might still be edible, their texture and flavor might start to diminish slightly.
- Freezing for Longer Storage: If you want to make a big batch or store them for an extended period, these snowballs freeze beautifully.
- Arrange the fully coated snowballs in a single layer on a parchment-lined baking sheet.
- Freeze them for about 1-2 hours, or until they are solid. This “flash freezing” prevents them from sticking together in a larger container.
- Once frozen solid, transfer the snowballs to a freezer-safe airtight container or a heavy-duty freezer bag. Again, you can layer them with parchment paper.
- They will keep well in the freezer for up to 1-2 months.
- Thawing: When you’re ready to enjoy frozen snowballs, simply transfer them from the freezer to the refrigerator and let them thaw for a few hours. For a quicker thaw, you can leave them at room temperature for about 30 minutes, but I usually prefer the fridge to maintain their texture. If they look a little less “snowy” after thawing, a quick re-roll in fresh powdered sugar can perk them right up!
So go ahead and make a big batch; you’ll be glad you did!
Final Thoughts
And there you have it! I truly hope you’re as excited as I am about making these delightful treats. Creating Sweetened Condensed Milk Snowballs is not just about baking; it’s about bringing a little bit of magic into your kitchen with minimal effort and maximum reward. The simplicity of the ingredients, combined with the utterly irresistible flavor and texture, makes this recipe an absolute triumph.
These Sweetened Condensed Milk Snowballs are a dream come true for anyone seeking a quick, sweet escape. They’re wonderfully soft, melt-in-your-mouth delicious, and carry that comforting, rich sweetness of condensed milk in every single bite. Whether you’re whipping them up for a party, a cozy evening in, or just because you deserve a treat, they are guaranteed to bring smiles.
So, go ahead and give these incredible Sweetened Condensed Milk Snowballs a try. I promise you, you’ll find yourself reaching for another one before you know it. Happy making, and enjoy every sweet, snowy bite!
Melt-in-Your-Mouth Sweetened Condensed Milk Snowballs
These Sweetened Condensed Milk Snowballs are a delightful no-bake treat that melts in your mouth. With just a handful of ingredients, they are perfect for satisfying your sweet cravings or impressing guests.
- Prep Time: 15 mins
- Cook Time: 0 mins
- Total Time: 15 minutes
- Yield: 24 snowballs 1x
- Category: Dessert
- Method: No-bake
- Cuisine: American
Ingredients
- 1 can full-fat Sweetened Condensed Milk
- 1 cup finely shredded unsweetened Coconut
- 1 teaspoon Vanilla Extract
- Powdered Sugar (for coating)
Instructions
- Prepare Your Workspace: Gather all your ingredients and line a baking sheet with parchment paper or wax paper for chilling your snowballs. Have a shallow bowl or plate ready with your powdered sugar for coating.
- Combine the Wet Ingredients: In a medium-sized mixing bowl, pour in your full can of sweetened condensed milk. Add the vanilla extract and any other liquid flavorings you might be using. Stir until well combined.
- Fold in the Coconut: Gradually add your shredded coconut to the condensed milk mixture in two or three batches, mixing thoroughly after each addition until you have a thick, cohesive mixture.
- Chill the Mixture: Cover the bowl with plastic wrap and refrigerate for at least 1 hour, or preferably 2 hours to firm up the mixture.
- Roll into Snowballs: Remove the mixture from the fridge and use slightly damp hands or hands coated in powdered sugar to scoop out portions and roll them into smooth balls.
- Coat with Powdered Sugar: Immediately after rolling each snowball, drop it into the bowl of powdered sugar and roll until completely coated.
- Arrange and Chill Again: Place the coated snowballs onto your prepared baking sheet and return to the refrigerator for another 15-30 minutes to set.
Nutrition
- Serving Size: 1 snowball
- Calories: 100
- Sugar: 10 g
- Sodium: 15 mg
- Fat: 4 g
- Saturated Fat: 3 g
- Unsaturated Fat: 1 g
- Trans Fat: 0 g
- Carbohydrates: 14 g
- Fiber: 1 g
- Protein: 1 g
- Cholesterol: 5 mg
Keywords: Proper chilling is crucial for firm, easy-to-roll snowballs. You can customize coatings with cocoa powder, finely chopped nuts, or sprinkles for a festive touch.


Leave a Comment