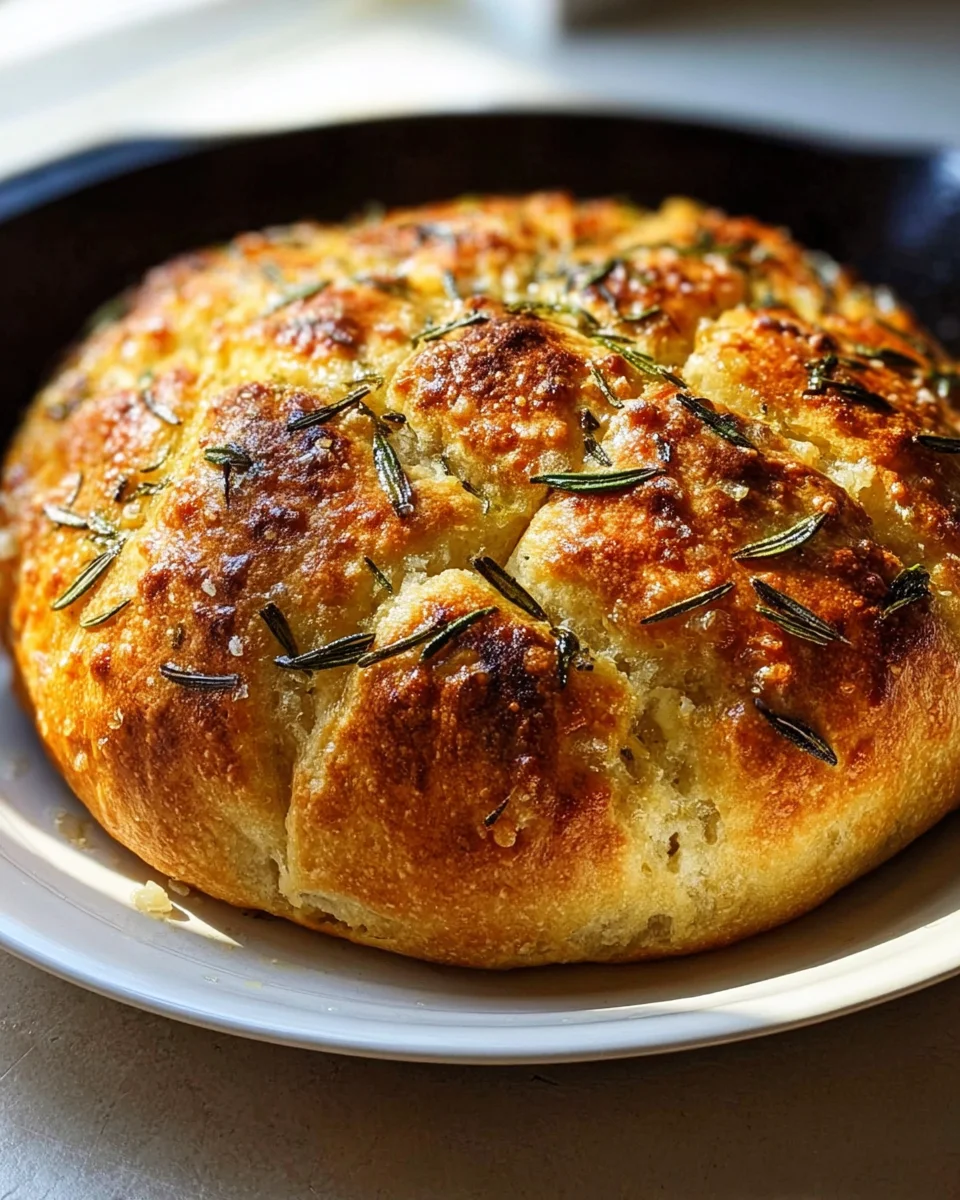
Rustic Garlic Rosemary Skillet Bread Recipe
Oh, prepare yourselves, because I am absolutely thrilled to share the Rustic Garlic Rosemary Skillet Bread Recipe with you today! This isn’t just any bread; it’s a game-changer, a warm hug, and a flavor explosion all rolled into one delightful package. What makes this recipe truly special, you ask? Well, imagine a beautiful, golden-crusted bread that’s ridiculously easy to make, baked right in your favorite skillet, infusing your entire kitchen with the intoxicating aroma of fresh garlic and aromatic rosemary. It’s got that perfect rustic charm – slightly irregular, wonderfully textured, and bursting with incredible savory flavors. You’re going to adore how simple it is to bring such an impressive, soul-satisfying bread to your table. Each bite offers a crispy exterior from the skillet, giving way to a soft, airy interior, making it absolutely perfect for tearing and sharing. Whether you’re serving it alongside a hearty beef stew or simply with a good olive oil for dipping, this Skillet Bread is guaranteed to become a new favorite in your home, bringing warmth and comfort with every delicious piece.

Ingredient Notes
There’s nothing quite like the aroma of freshly baked bread, and my Rustic Garlic Rosemary Skillet Bread is truly a standout! To get that perfect, comforting loaf with a gorgeous crust and fragrant interior, the ingredients you choose make all the difference. I’ll walk you through my essentials and some handy substitutions.
Flour
- All-Purpose Flour: This is my go-to for a reliably tender crumb with a good rise. For this rustic bread, I love how it handles.
- Substitution Tip: If you want a chewier texture and a slightly more “rustic” whole-grain feel, you can substitute up to 1 cup of the all-purpose flour with whole wheat flour. Just be aware that whole wheat flour absorbs more liquid, so you might need to add an extra tablespoon or two of water to achieve the right dough consistency. Bread flour also works wonderfully for a chewier texture.
Yeast
- Active Dry Yeast: I always use active dry yeast for this recipe. It needs to be activated in warm water first, which gives you a visual cue that your yeast is alive and ready to work its magic.
- Substitution Tip: You can absolutely use instant yeast. If using instant yeast, you can skip the activation step and simply whisk it directly into your dry ingredients with the flour and salt. Just make sure your water is still warm when you add it.
Water
- Warm Water: The temperature is crucial! It needs to be warm enough (around 105-115°F or 40-46°C) to activate the yeast but not so hot that it kills it. Think bathwater warm.
- Substitution Tip: While water is traditional, for an added layer of flavor and richness, you could try substituting a portion (about half a cup) with a non-alcoholic beer or even a plain broth if you’re feeling adventurous. This will contribute a deeper, more complex flavor profile to your rustic bread.
Salt
- Fine Sea Salt: Salt isn’t just for seasoning; it’s vital for controlling yeast activity and strengthening the gluten structure, which contributes to the bread’s texture.
- Substitution Tip: Kosher salt or even regular table salt will work perfectly fine. If using table salt, you might want to slightly reduce the amount as it’s typically finer and denser.
Olive Oil
- Extra Virgin Olive Oil: I use a generous amount of good quality olive oil for both richness in the dough and for oiling the skillet, which helps create that beautiful, crispy crust. It also adds to the characteristic Mediterranean flavor profile.
- Substitution Tip: Unsalted butter, melted, can be used instead of olive oil for a different kind of richness, giving the bread a slightly more tender, less chewy crumb. Vegetable oil or avocado oil are also neutral alternatives if you’re out of olive oil, but you’ll miss out on the distinct flavor.
Garlic
- Fresh Garlic: This is where the “garlic” in Rustic Garlic Rosemary Skillet Bread truly shines! Freshly minced garlic provides an incomparable pungent and aromatic flavor that infuses every bite.
- Substitution Tip: Garlic powder can be used in a pinch, but it won’t give you the same vibrant, fresh flavor. If you must use it, start with about 1 teaspoon of garlic powder for every 3 cloves of fresh garlic, and adjust to your taste.
Rosemary
- Fresh Rosemary: The aromatic, piney notes of fresh rosemary are simply essential for this recipe. Finely chopped, it distributes beautifully throughout the dough.
- Substitution Tip: If fresh rosemary isn’t available, you can use about 1 teaspoon of dried rosemary for every tablespoon of fresh. Other fresh herbs like thyme or oregano can also be used for a different, but equally delicious, rustic herb bread.
Sugar
- Granulated Sugar: A small amount of sugar acts as food for the yeast, helping to kickstart its activity and give the dough a little boost.
- Substitution Tip: Honey or maple syrup can also be used, about 1 teaspoon, for a slightly different subtle sweetness and flavor.
Step-by-Step Instructions
Alright, let’s get baking! Follow these steps, and you’ll be pulling a warm, fragrant loaf of Rustic Garlic Rosemary Skillet Bread from your oven in no time. I promise it’s incredibly satisfying!
- Activate the Yeast: In a large mixing bowl, combine the warm water, granulated sugar, and active dry yeast. Give it a gentle stir. Let this mixture sit for 5-10 minutes, or until it becomes frothy and bubbly. This tells us the yeast is active and ready to work its magic!
- Combine Dry Ingredients: In a separate, larger bowl, whisk together the all-purpose flour and fine sea salt. I always find a good whisk through the flour helps to aerate it and distribute the salt evenly.
- Mix the Dough: Once your yeast mixture is bubbly, pour it into the bowl with the dry ingredients. Add 2 tablespoons of the extra virgin olive oil. Using a sturdy spoon or a dough whisk, mix everything together until a shaggy dough forms and most of the flour is incorporated.
- Knead the Dough: Turn the dough out onto a lightly floured surface. Knead the dough for about 8-10 minutes. If using a stand mixer with a dough hook, knead for 6-8 minutes on medium-low speed. You’re looking for a smooth, elastic, and slightly tacky dough. This kneading develops the gluten, which gives your bread its structure.
- First Rise (Bulk Fermentation): Lightly grease a clean bowl with about 1 tablespoon of olive oil. Place the kneaded dough in the bowl, turning it once to coat with oil. Cover the bowl tightly with plastic wrap or a clean kitchen towel. Let the dough rise in a warm, draft-free place for 1 to 1.5 hours, or until it has doubled in size. I often place mine in a slightly warmed oven (turned off!) or on top of the fridge.
- Prepare Flavorings & Skillet: While the dough is rising, finely mince your fresh garlic and finely chop your fresh rosemary. Drizzle 1-2 tablespoons of olive oil into a 10-inch cast iron skillet or other oven-safe skillet, ensuring the bottom and sides are well coated.
- Shape and Flavor the Dough: Once the dough has doubled, gently punch it down to release the air. Turn the dough out onto a lightly floured surface. Gently flatten it into a rough rectangle. Sprinkle the minced garlic and chopped rosemary evenly over the surface of the dough. Fold the dough over a few times and gently knead it for about 1 minute to evenly distribute the herbs and garlic. You can shape it into a single rustic round to fit the skillet, or divide it into smaller, irregular pieces to create a pull-apart bread effect.
- Second Rise (Proofing): Place the shaped dough into the prepared cast iron skillet. You can dimple the top with your fingers for a more rustic look. Cover the skillet loosely with plastic wrap or a kitchen towel and let it rise again in a warm place for another 30-45 minutes, or until noticeably puffy.
- Preheat Oven & Bake: About 15-20 minutes before the second rise is complete, preheat your oven to 400°F (200°C). Once preheated, uncover the skillet and place it in the hot oven. Bake for 25-35 minutes, or until the bread is golden brown on top and sounds hollow when tapped on the bottom. If the top is browning too quickly, you can loosely tent it with aluminum foil.
- Finish and Serve: Once baked, carefully remove the skillet from the oven. For an extra touch of flavor and shine, you can immediately brush the top with a little more olive oil or even a garlic-infused olive oil. Let the bread cool in the skillet for 5-10 minutes before carefully transferring it to a wire rack to cool slightly more before slicing or pulling apart. Enjoy warm!
Tips & Suggestions
Making bread is a rewarding experience, and this Rustic Garlic Rosemary Skillet Bread is truly a joy to bake. Here are some of my favorite tips and suggestions to help you achieve the best results and make it your own:
- The Magic of Cast Iron: Using a cast iron skillet isn’t just for the aesthetic; it conducts heat incredibly well and evenly, which is crucial for achieving that wonderfully crisp, golden-brown crust on the bottom and sides of your skillet bread. If you don’t have one, a heavy-bottomed oven-safe pan will work, but cast iron truly elevates this recipe.
- Don’t Rush the Rise: Patience is key in bread making! Allowing the dough to fully rise during both the first and second fermentations (proofs) ensures a light, airy crumb. If your kitchen is cool, place the bowl in a slightly warmed (but turned off!) oven or even in the microwave with a cup of hot water.
- Achieving Rustic Dimples: Before the final rise in the skillet, I love to gently press my fingertips into the top of the dough. This creates beautiful dimples that catch olive oil and garlic, adding to that rustic look and texture.
- Boost the Garlic Flavor: For an even deeper garlic flavor, you can lightly roast the minced garlic in a tablespoon of olive oil over low heat for a few minutes before adding it to the dough. This mellows the raw garlic intensity and brings out its sweet notes. Alternatively, use garlic-infused olive oil for brushing the top after baking.
- Serving Suggestions: This skillet bread is incredibly versatile. I love serving it warm, torn into pieces for dipping into a good quality extra virgin olive oil, especially one with a balsamic swirl. It’s also perfect alongside hearty soups and stews, as a companion to a cheese board, or even as a flavorful side for roasted beef or chicken.
- Experiment with Add-ins: While garlic and rosemary are a classic pairing, feel free to get creative! I’ve had great success adding a handful of grated Parmesan cheese, sun-dried tomatoes (finely chopped), or even a sprinkle of red pepper flakes for a little kick. Just be mindful not to overload the dough, which can inhibit its rise.
- Know Your Dough: The texture of the dough is important. After kneading, it should be smooth, elastic, and slightly tacky, but not sticky. If it’s too sticky, add a little more flour, one tablespoon at a time. If it’s too stiff, add a tiny bit more warm water. Humidity and flour types can vary, so trust your instincts.
Storage
You’ve just baked a masterpiece, and while it’s tempting to eat it all in one sitting (I know the feeling!), here’s how I recommend storing your Rustic Garlic Rosemary Skillet Bread to keep it fresh for as long as possible.
- Cool Completely First: This is a crucial first step! Always let your bread cool down completely on a wire rack before storing it. Storing warm bread will trap moisture, making the crust soggy and encouraging mold growth. It usually takes at least an hour, sometimes two, depending on your environment.
- Room Temperature (Short Term): For enjoying within 2-3 days, your Rustic Garlic Rosemary Skillet Bread is best stored at room temperature. I typically wrap it tightly in aluminum foil, then place it in a large, airtight plastic bag or a bread box. This helps to keep the crust from becoming too hard and the interior from drying out. Avoid putting it in the fridge, as refrigeration tends to dry out bread much faster, making it stale.
-
Freezing (Long Term): If you won’t be finishing the bread within a few days, freezing is an excellent option!
- Whole Loaf: Once completely cooled, wrap the entire loaf tightly in plastic wrap, then an additional layer of aluminum foil. This double layer protects against freezer burn. It can be frozen for up to 1-2 months.
- Sliced: For easier portioning, you can slice the bread before freezing. Place parchment paper between slices to prevent them from sticking together. Then, stack the slices and wrap them tightly in plastic wrap and foil. You can grab just a few slices as needed.
-
Reheating Frozen Bread:
- From Whole Loaf: Remove the foil and plastic wrap, then place the frozen loaf directly into a preheated oven at 350°F (175°C) for about 20-30 minutes, or until warmed through and the crust is crisp again.
- From Slices: You can toast individual slices in a toaster, toaster oven, or bake them in a regular oven for about 5-10 minutes until heated through and crisp.
Reheating in the oven is my preferred method as it helps to revive that lovely crust. Microwaving will soften the bread quickly but can make it a bit chewy and doesn’t restore the crispness of the crust.
Final Thoughts
I truly hope you embark on the delightful journey of making this Rustic Garlic Rosemary Skillet Bread Recipe! There’s an unparalleled joy in pulling a warm, fragrant loaf directly from your skillet, knowing you’ve created something so wholesome and delicious with your own hands. The incredible aroma of fresh rosemary and pungent garlic filling your kitchen is just the beginning of its charm. This isn’t merely bread; it’s a testament to simple ingredients transforming into a comforting masterpiece that begs to be torn, shared, and savored.
Whether you’re pairing it with a rich, hearty beef stew, serving it alongside a vibrant salad, or simply enjoying a slice slathered with butter, I promise you that this Rustic Garlic Rosemary Skillet Bread Recipe is an absolute must-try. Its rustic appeal, incredible flavor, and satisfying texture make it a standout dish that will undoubtedly become a beloved staple in your home. Go on, give it a bake, and let the warmth and wonderful taste of this skillet bread captivate you!
Rustic Garlic Rosemary Skillet Bread: Quick & Delicious
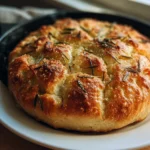
This Rustic Garlic Rosemary Skillet Bread is a game-changer, offering a warm hug and a flavor explosion in every bite. With its golden crust and aromatic garlic and rosemary, it’s the perfect addition to any meal.
- Prep Time: 15 mins
- Cook Time: 30 mins
- Total Time: 45 minutes
- Yield: 8 servings 1x
- Category: Bread
- Method: Baking
- Cuisine: Mediterranean
Ingredients
- 3 cups All-Purpose Flour
- 1 cup Warm Water (around 105-115°F or 40-46°C)
- 2 teaspoons Active Dry Yeast
- 1 tablespoon Granulated Sugar
- 1 teaspoon Fine Sea Salt
- 2 tablespoons Extra Virgin Olive Oil
- 3 cloves Fresh Garlic, minced
- 2 tablespoons Fresh Rosemary, finely chopped
Instructions
- In a large mixing bowl, combine the warm water, granulated sugar, and active dry yeast. Give it a gentle stir. Let this mixture sit for 5-10 minutes, or until it becomes frothy and bubbly.
- In a separate, larger bowl, whisk together the all-purpose flour and fine sea salt.
- Once your yeast mixture is bubbly, pour it into the bowl with the dry ingredients. Add 2 tablespoons of the extra virgin olive oil. Using a sturdy spoon or a dough whisk, mix everything together until a shaggy dough forms.
- Turn the dough out onto a lightly floured surface. Knead the dough for about 8-10 minutes until smooth and elastic.
- Lightly grease a clean bowl with about 1 tablespoon of olive oil. Place the kneaded dough in the bowl, turning it once to coat with oil. Cover the bowl tightly and let the dough rise in a warm place for 1 to 1.5 hours, or until it has doubled in size.
- While the dough is rising, finely mince your fresh garlic and finely chop your fresh rosemary. Drizzle 1-2 tablespoons of olive oil into a 10-inch cast iron skillet.
- Once the dough has doubled, gently punch it down. Turn the dough out onto a lightly floured surface. Flatten it into a rough rectangle. Sprinkle the minced garlic and chopped rosemary evenly over the surface of the dough. Fold the dough over a few times and gently knead it for about 1 minute.
- Place the shaped dough into the prepared cast iron skillet. Cover the skillet loosely and let it rise again for another 30-45 minutes.
- About 15-20 minutes before the second rise is complete, preheat your oven to 400°F (200°C). Once preheated, uncover the skillet and place it in the oven. Bake for 25-35 minutes, or until the bread is golden brown and sounds hollow when tapped.
- Once baked, carefully remove the skillet from the oven. Brush the top with a little more olive oil. Let the bread cool in the skillet for 5-10 minutes before transferring it to a wire rack.
Nutrition
- Serving Size: 1 slice
- Calories: 150
- Sugar: 1 g
- Sodium: 200 mg
- Fat: 5 g
- Saturated Fat: 1 g
- Unsaturated Fat: 4 g
- Trans Fat: 0 g
- Carbohydrates: 24 g
- Fiber: 1 g
- Protein: 4 g
- Cholesterol: 0 mg
Keywords: For a chewier texture, you can substitute up to 1 cup of all-purpose flour with whole wheat flour. If fresh rosemary isn't available, use about 1 teaspoon of dried rosemary for every tablespoon of fresh.


Leave a Comment