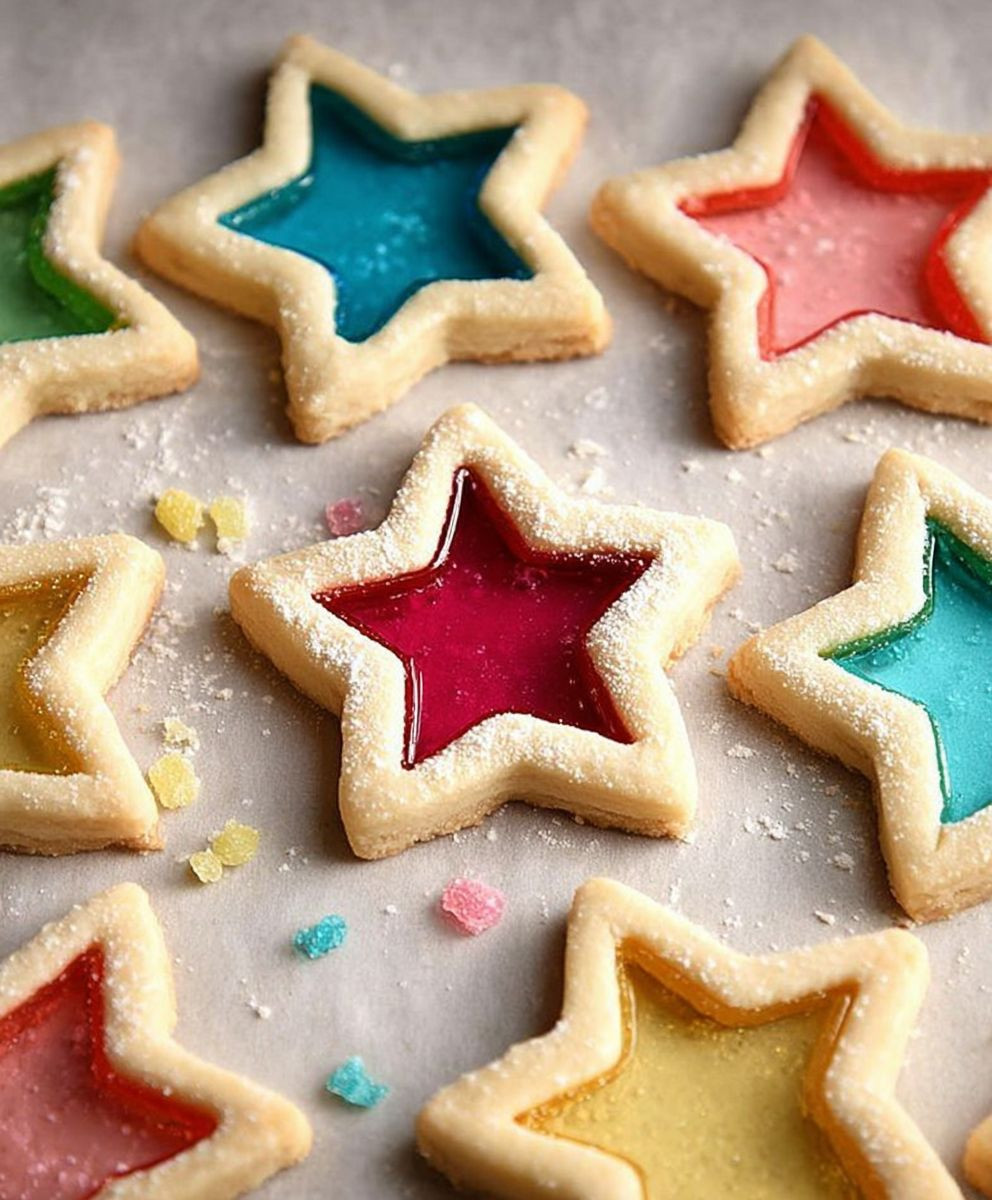
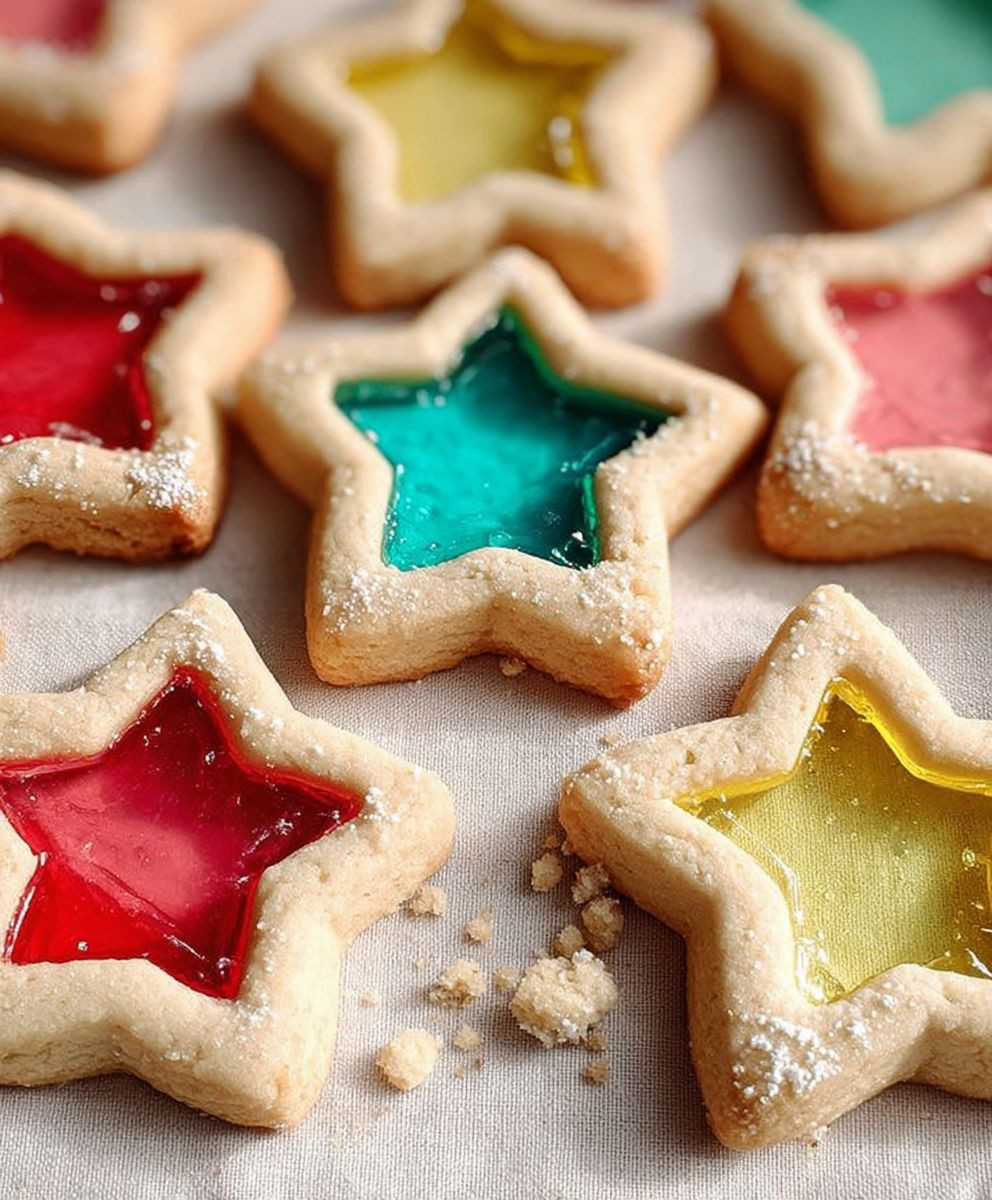
Stained glass cookies aren’t just a treat; they’re edible art! Imagine holding a shimmering, translucent cookie up to the light, the vibrant colors dancing like a miniature stained glass window. These delightful cookies are guaranteed to bring a touch of magic to any occasion, especially during the holidays. But where did this dazzling dessert originate?
While the exact origins are a bit hazy, the concept of using hard candy to create a “glass-like” effect in baking has been around for centuries. Some believe the inspiration came from the intricate stained glass windows found in European cathedrals, inspiring bakers to recreate that beauty in a delicious form. Regardless of their precise history, stained glass cookies have become a beloved tradition in many families, passed down through generations.
What makes these cookies so irresistible? It’s a combination of factors! The satisfying crunch of the cookie, the sweet burst of flavor from the melted hard candies, and the sheer visual appeal all contribute to their popularity. Plus, they’re surprisingly fun to make, offering a creative outlet for both adults and children. Whether you’re looking for a show-stopping dessert for a holiday gathering or a fun baking project to do with your family, these cookies are sure to impress. Get ready to create some edible masterpieces!
Ingredients:
- 1 cup (2 sticks) unsalted butter, softened
- 1 cup granulated sugar
- 2 large eggs
- 1 teaspoon vanilla extract
- 3 cups all-purpose flour, plus more for dusting
- 1/2 teaspoon baking powder
- 1/4 teaspoon salt
- Assorted hard candies (Jolly Ranchers, Life Savers, etc.), different colors
Preparing the Dough:
- Cream the butter and sugar: In a large bowl, or the bowl of a stand mixer fitted with the paddle attachment, cream together the softened butter and granulated sugar until light and fluffy. This usually takes about 3-5 minutes on medium speed. Make sure to scrape down the sides of the bowl occasionally to ensure everything is evenly mixed. You want the mixture to be pale and airy, not just combined.
- Add the eggs and vanilla: Beat in the eggs one at a time, mixing well after each addition. Then, stir in the vanilla extract. The mixture might look slightly curdled at this point, but don’t worry, it will come together when you add the dry ingredients.
- Combine the dry ingredients: In a separate medium bowl, whisk together the flour, baking powder, and salt. Whisking ensures that the baking powder and salt are evenly distributed throughout the flour, which is important for the texture of the cookies.
- Gradually add the dry ingredients to the wet ingredients: Gradually add the dry ingredients to the wet ingredients, mixing on low speed until just combined. Be careful not to overmix the dough, as this can result in tough cookies. Mix until the flour is just incorporated, and then stop. A few streaks of flour are okay at this point.
- Form the dough into discs and chill: Divide the dough in half and flatten each half into a disc. Wrap each disc tightly in plastic wrap and refrigerate for at least 2 hours, or preferably overnight. This chilling time is crucial because it allows the gluten in the flour to relax, which will prevent the cookies from shrinking and becoming misshapen during baking. It also makes the dough easier to roll out.
Preparing the Candies:
- Sort the candies by color: Separate the hard candies by color into different resealable plastic bags. This will make it easier to create colorful stained glass effects in your cookies.
- Crush the candies: Using a food processor or a heavy-duty zip-top bag and a rolling pin, crush each color of candy into small pieces. You want the pieces to be relatively uniform in size so that they melt evenly in the oven. If using a food processor, pulse the candies until they are crushed, being careful not to over-process them into a powder. If using a zip-top bag and rolling pin, place the candies in the bag, seal it tightly, and then use the rolling pin to crush the candies into small pieces.
Cutting and Baking the Cookies:
- Preheat the oven and prepare baking sheets: Preheat your oven to 350°F (175°C). Line baking sheets with parchment paper or silicone baking mats. This will prevent the cookies from sticking to the baking sheets and make cleanup easier.
- Roll out the dough: On a lightly floured surface, roll out one disc of dough to about 1/8-inch thickness. Keep the other disc of dough refrigerated while you work with the first one.
- Cut out the cookies: Use cookie cutters to cut out desired shapes from the dough. For stained glass cookies, you’ll need to cut out two shapes for each cookie: an outer shape and a smaller inner shape. For example, you could use a large star cookie cutter for the outer shape and a smaller star cookie cutter for the inner shape. You can also use a knife to cut out more intricate shapes if you’re feeling creative.
- Place cookies on baking sheets: Carefully transfer the cut-out cookies to the prepared baking sheets, leaving about 1 inch of space between each cookie.
- Fill the centers with crushed candies: Fill the inner cut-out shapes with the crushed hard candies, using different colors for a stained glass effect. Make sure the candies are evenly distributed and fill the entire space.
- Bake the cookies: Bake for 8-10 minutes, or until the edges of the cookies are lightly golden brown and the candies are melted and smooth. Keep a close eye on the cookies while they are baking, as the candies can burn easily.
- Cool the cookies completely: Remove the baking sheets from the oven and let the cookies cool completely on the baking sheets before transferring them to a wire rack. The candies will be very hot when they come out of the oven, so it’s important to let them cool completely before handling the cookies.
- Repeat with remaining dough: Repeat the rolling, cutting, and baking process with the remaining dough and crushed candies.
Tips for Success:
- Don’t overbake: Overbaked cookies will be dry and brittle. Bake just until the edges are lightly golden brown.
- Use a variety of candy colors: The more colors you use, the more vibrant your stained glass effect will be.
- Crush the candies finely: Finely crushed candies will melt more evenly and create a smoother stained glass effect.
- Let the cookies cool completely: The candies need to cool completely before you handle the cookies, or they will be sticky and messy.
- Store the cookies properly: Store the cooled cookies in an airtight container at room temperature. They will keep for several days.
- Experiment with different shapes and sizes: Get creative with your cookie cutters and create a variety of stained glass cookie designs.
- Add edible glitter: For an extra touch of sparkle, sprinkle edible glitter over the melted candies while they are still warm.
- Use different extracts: Experiment with different extracts, such as almond extract or lemon extract, to add different flavors to your cookies.
- Make them festive: Use holiday-themed cookie cutters and candy colors to make stained glass cookies for Christmas, Easter, or other holidays.
Troubleshooting:
- Cookies spreading too much: If your cookies are spreading too much in the oven, the dough may be too warm. Try chilling the dough for a longer period of time before rolling it out. You can also add a tablespoon or two of flour to the dough to help it hold its shape.
- Candies not melting evenly: If the candies are not melting evenly, make sure they are crushed into small, uniform pieces. You can also try baking the cookies at a slightly lower temperature for a longer period of time.
- Candies burning: If the candies are burning, reduce the oven temperature and bake the cookies for a shorter period of time. You can also try placing a piece of aluminum foil over the cookies during the last few minutes of baking to prevent the candies from burning.
- Cookies sticking to the baking sheet: To prevent the cookies from sticking to the baking sheet, line the baking sheet with parchment paper or a silicone baking mat.
Variations:
- Citrus Zest: Add the zest of one lemon, orange, or lime to the dough for a bright, citrusy flavor.
- Spices: Add a teaspoon of ground cinnamon, nutmeg, or ginger to the dough for a warm, spiced flavor.
- Chocolate Chips: Add 1/2 cup of mini chocolate chips to the dough for a chocolatey twist.
- Nuts: Add 1/2 cup of chopped nuts, such as pecans, walnuts, or almonds, to the dough for added texture and flavor.
- Royal Icing: After the cookies have cooled completely, decorate them with royal icing for an extra touch of elegance.
Enjoy your beautiful and delicious stained glass cookies! They’re perfect for holidays, parties, or just a fun baking project.

Conclusion:
So, there you have it! These stained glass cookies are more than just a treat; they’re an edible art project that’s surprisingly simple to pull off. I know, I know, sometimes recipes look intimidating, but trust me on this one. The “wow” factor far outweighs the effort involved. From the satisfying crunch of the cookie to the dazzling, jewel-toned candy center, these cookies are guaranteed to be a hit with everyone, young and old alike.
Why are these a must-try? Well, first and foremost, they’re absolutely stunning. Imagine presenting a platter of these beauties at your next holiday gathering or bake sale. They’re guaranteed to be the star of the show! But beyond their visual appeal, they’re also incredibly delicious. The buttery, slightly sweet cookie perfectly complements the sugary burst of the melted hard candies. It’s a delightful combination of textures and flavors that will leave you wanting more.
And the best part? They’re incredibly versatile! Feel free to experiment with different cookie dough recipes. A gingerbread dough would add a warm, spicy note, while a chocolate dough would create a richer, more decadent treat. You can also play around with the colors and shapes of the candy. Use different colored candies to create intricate patterns or even spell out names or messages. Get creative and let your imagination run wild!
Serving Suggestions and Variations:
These stained glass cookies are perfect on their own, but here are a few ideas to take them to the next level:
- Dust them with powdered sugar: A light dusting of powdered sugar adds a touch of elegance and enhances the contrast between the cookie and the candy.
- Drizzle them with melted chocolate: For an extra indulgent treat, drizzle the cookies with melted white or dark chocolate.
- Serve them with a scoop of ice cream: A warm stained glass cookie paired with a scoop of vanilla ice cream is the perfect dessert on a cold winter night.
- Use them as edible ornaments: Carefully poke a hole in the top of the cookie before baking and thread a ribbon through it to create a beautiful and delicious ornament for your Christmas tree.
- Make them gluten-free: Simply substitute the all-purpose flour with a gluten-free flour blend.
I’m so excited for you to try this recipe! I truly believe that anyone can make these cookies, regardless of their baking experience. The key is to have fun and don’t be afraid to experiment. Remember to keep a close eye on the cookies while they’re baking to prevent the candy from burning.
Once you’ve made your own batch of these dazzling stained glass cookies, I’d love to hear about your experience! Share your photos and tips on social media using [Your Hashtag Here] and tag me [Your Social Media Handle Here]. I can’t wait to see your creations and hear what variations you came up with. Happy baking!
I hope you enjoy making and eating these as much as I do. They are truly a special treat that brings joy to everyone who sees and tastes them. So, gather your ingredients, preheat your oven, and get ready to create some edible masterpieces!
Stained Glass Cookies: A Festive Recipe & Decorating Guide
Buttery sugar cookies with colorful, melted hard candy centers create a stunning stained glass effect. Perfect for holidays or special occasions.
Ingredients
- 1 cup (2 sticks) unsalted butter, softened
- 1 cup granulated sugar
- 2 large eggs
- 1 teaspoon vanilla extract
- 3 cups all-purpose flour, plus more for dusting
- 1/2 teaspoon baking powder
- 1/4 teaspoon salt
- Assorted hard candies (Jolly Ranchers, Life Savers, etc.), different colors
Instructions
- Cream the butter and sugar: In a large bowl, or the bowl of a stand mixer fitted with the paddle attachment, cream together the softened butter and granulated sugar until light and fluffy (3-5 minutes on medium speed). Scrape down the sides of the bowl occasionally.
- Add the eggs and vanilla: Beat in the eggs one at a time, mixing well after each addition. Then, stir in the vanilla extract.
- Combine the dry ingredients: In a separate medium bowl, whisk together the flour, baking powder, and salt.
- Gradually add the dry ingredients to the wet ingredients: Gradually add the dry ingredients to the wet ingredients, mixing on low speed until just combined. Be careful not to overmix the dough.
- Form the dough into discs and chill: Divide the dough in half and flatten each half into a disc. Wrap each disc tightly in plastic wrap and refrigerate for at least 2 hours, or preferably overnight.
- Sort the candies by color: Separate the hard candies by color into different resealable plastic bags.
- Crush the candies: Using a food processor or a heavy-duty zip-top bag and a rolling pin, crush each color of candy into small pieces.
- Preheat the oven and prepare baking sheets: Preheat your oven to 350°F (175°C). Line baking sheets with parchment paper or silicone baking mats.
- Roll out the dough: On a lightly floured surface, roll out one disc of dough to about 1/8-inch thickness. Keep the other disc of dough refrigerated.
- Cut out the cookies: Use cookie cutters to cut out desired shapes from the dough. For stained glass cookies, you’ll need to cut out two shapes for each cookie: an outer shape and a smaller inner shape.
- Place cookies on baking sheets: Carefully transfer the cut-out cookies to the prepared baking sheets, leaving about 1 inch of space between each cookie.
- Fill the centers with crushed candies: Fill the inner cut-out shapes with the crushed hard candies, using different colors for a stained glass effect.
- Bake the cookies: Bake for 8-10 minutes, or until the edges of the cookies are lightly golden brown and the candies are melted and smooth.
- Cool the cookies completely: Remove the baking sheets from the oven and let the cookies cool completely on the baking sheets before transferring them to a wire rack.
- Repeat with remaining dough: Repeat the rolling, cutting, and baking process with the remaining dough and crushed candies.
Notes
- Chilling the dough: Chilling the dough is crucial to prevent spreading and misshapen cookies.
- Candy size: Crush the candies into small, uniform pieces for even melting.
- Don’t overbake: Overbaked cookies will be dry. Bake until edges are lightly golden.
- Cooling: Let the cookies cool completely before handling, as the candies will be very hot.
- Storage: Store cooled cookies in an airtight container at room temperature.
- Variations: Add citrus zest, spices, chocolate chips, or nuts to the dough. Decorate with royal icing after cooling.


Leave a Comment